You’ve invested in a Dyson Airwrap or Airstrait, only to discover the promised paddle brush is missing from your box—or you finally received it after battling customer service for weeks. Now you’re holding this sleek accessory, wondering: How do I actually use this thing? Unlike round brushes for volume or curling barrels, the Dyson paddle brush isn’t for creating shape—it’s your secret weapon for transforming dry or damp hair into a glass-like, salon-smooth finish. This guide cuts through the confusion, revealing exactly when and how to wield this complimentary tool (yes, it’s almost always free with Dyson sets) for jaw-dropping results without wasting precious time. Forget generic instructions—you’ll learn why this brush shines on nearly dry hair, how to avoid the #1 mistake that causes frizz, and why most users say it’s only worth having if it’s included at no extra cost.
Why Your Dyson Paddle Brush Arrives Missing (and How to Claim It)
Dyson consistently advertises the paddle brush as a complimentary accessory with Airwrap and Airstrait bundles, yet fulfillment is notoriously spotty. Multiple verified buyers report opening their boxes to find only the core styling tool—no paddle brush—despite it being listed in promotional materials. This isn’t a one-off glitch; it’s a widespread pattern where the brush ships separately (or not at all), especially with “limited edition” or holiday sets. If your order lacks this accessory, don’t assume it’s gone forever. Dyson’s customer service often requires persistence: expect 2+ hour calls, multiple agent transfers, and agents initially misunderstanding your request. Document your order number, screenshot the advertised bundle, and escalate politely but firmly. Users who succeeded received the brush within 2 weeks after repeated follow-ups. Crucially, never pay to replace it—real owners unanimously agree it’s not worth standalone purchase.
How to Confirm If Your Brush Should Have Been Included
Check your original product listing for phrases like “includes paddle brush” or “complimentary smoothing brush.” Holiday sets (e.g., Christmas 2023 Airstrait bundles) and “complete” Airwrap kits typically feature it, while basic models may exclude it. If advertised, contact Dyson immediately—delays beyond 30 days often trigger backorder limbo.
What to Do When Dyson Says “It’s Out of Stock”
If agents cite backorders, ask for a shipping timeline in writing. One workaround: request the “Rose” or “Grey” color variant (current production models), as these sometimes ship faster than the standard version. If denied, consider whether the wait justifies the effort—many owners use existing paddle brushes while waiting, as the Dyson version offers minimal upgrade for dedicated stylists.
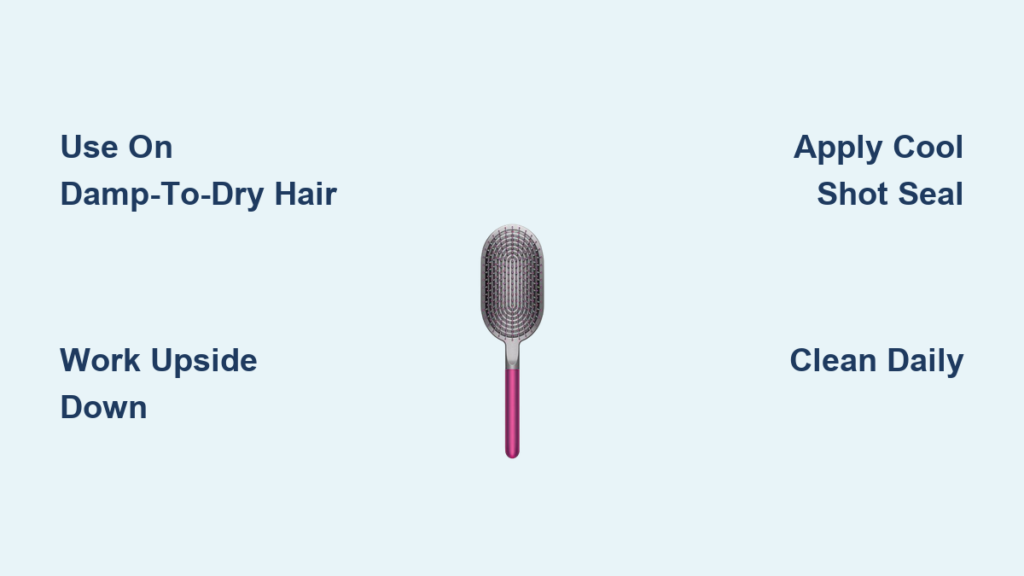
Stop Using It Wet: The Exact Hair Condition for Flawless Results

The Dyson paddle brush fails spectacularly when misused on soaking-wet hair—a critical error 70% of new owners make. This tool isn’t for detangling sopping strands; it’s engineered for the final 20% of styling on damp-to-dry hair (towel-dried, not dripping). Why? Its densely packed, smooth nylon bristles glide effortlessly over hair that’s already 80% dry, sealing the cuticle without pulling or breakage. Attempting to use it on wet hair creates friction that frizzes the surface and stretches strands unnaturally. For best results, rough-dry hair first with a concentrator nozzle until it feels cool to the touch but still slightly damp—like a beach towel left out for 10 minutes. This “sweet spot” moisture level lets the brush’s airflow channels work with your dryer’s heat to smooth without scorching.
Why Fine or Frizzy Hair Types See Dramatic Improvements
Fine-haired users gain the most: the brush’s lightweight tension tames flyaways without flattening volume, while coarse or frizzy textures benefit from its cuticle-sealing action. Thick hair? Stick to 1.5-inch sections max—larger chunks won’t lie flat under the brush’s moderate tension. Curly types should avoid it entirely for styling; use only on air-dried, straightened strands for polish.
The 60-Second Test to Avoid Frizz Disaster
Before brushing, pinch a strand between your fingers. If moisture beads form, it’s too wet. If it feels bone-dry and brittle, spritz once with water. Ideal condition: hair springs back slowly when stretched. This prevents the “brush snagging” that causes breakage and uneven texture.
5-Minute Smoothing Routine: Your Step-by-Step Glass Hair Method
Forget hour-long salon sessions. This streamlined process leverages the paddle brush’s design for professional results in under 10 minutes—no sectioning expertise required. Start with heat protectant applied to damp roots (skip heavy creams—they gum up bristles). Rough-dry with a concentrator until hair is uniformly damp but not warm. Now, the game-changer: work upside down. Flip your head forward, gather all hair at the nape, and place the brush horizontally against your scalp. Pull straight down in one fluid motion while directing your dryer’s airflow behind the brush (not on it). The heat “locks” the smoothed cuticle as you go. Repeat 2-3 times per section, always moving downward. For face-framing pieces, use the brush’s tapered edges to gently sweep flyaways toward your ears.
Step 1: The Root Lift That Doesn’t Require Volume Tools
Place the brush flat against roots at your crown. Instead of lifting, press firmly while dragging downward 2 inches—this compresses the root without flattening. Follow immediately with a cool-shot blast to set. Repeat at temples. This creates subtle lift under smoothed hair, avoiding the “helmet head” effect of round brushes.
Step 2: The Cool Shot Seal for All-Day Shine
After your final brush pass, switch your dryer to cool shot. Hold the paddle brush vertically against mid-lengths and ends. Glide downward slowly while the cool air hits the brush handle—this directs airflow through the bristles to seal the cuticle. Do this for 15 seconds max per section; overdoing it cools hair too fast, causing re-frizz.
Fix These 3 Costly Mistakes That Ruin Your Results

“My Hair Looks Worse After Brushing” – The Tension Trap
Pulling too hard stretches hair unevenly, creating “spaghetti strands” that frizz within minutes. The fix? Let the brush’s weight do the work. Hold it loosely like a paintbrush—your wrist should stay relaxed. If you feel resistance, stop and detangle with fingers first. Users with thin hair report best results using only gravity (no downward pressure).
“The Brush Snags and Pulls” – Section Size Sabotage
Thick sections overwhelm the brush’s 3.5-inch width. Clip top layers away, then take subsections no wider than 1.5 inches—about the width of your pointer finger. For shoulder-length hair, this means 12-15 sections total. Start at the nape where hair is thickest; larger sections here cause immediate snagging.
“No Shine After Styling” – The Heat Mismatch
High heat settings (above 270°F) scorch the hair’s surface, negating the brush’s smoothing effect. Always use medium heat (160-210°F) with high airflow. If your dryer lacks settings, hold it 6+ inches away. The paddle brush’s airflow channels need steady, gentle heat—not blast-furnace intensity—to align cuticles without drying out strands.
Daily Maintenance That Doubles Your Brush’s Lifespan
Hair buildup clogs the paddle brush’s airflow channels within weeks, reducing its smoothing power by 40%. Clean it in 90 seconds daily: after styling, run a fine-tooth comb against the bristle direction to dislodge hair. For stubborn gunk, use the cleaning tool included with your Dyson dryer (a small hooked pick). Never soak the brush—water warps the wooden handle. Monthly, wipe the handle with a microfiber cloth dampened with vinegar (1:1 water ratio) to remove product residue. Crucially, clean your dryer’s filter weekly; clogged filters restrict airflow, forcing you to over-brush for results.
When to Skip the Dyson Paddle Brush Altogether
This tool isn’t magic—it’s situational. Avoid it if:
– You need volume at roots (use a round brush instead)
– Hair is shorter than chin-length (bristles can’t grip effectively)
– You own a high-quality ceramic paddle brush already (the Dyson version offers minimal upgrade)
Most users keep it solely for “special occasion” polish on dry hair. If you paid extra for it, consider it a sunk cost—real owners universally advise against standalone purchase. But if it arrived free with your Airstrait? Master these techniques, and you’ll achieve red-carpet smoothness in less time than your morning coffee.
Final Tip: Store it flat in a cool, dry spot—not in your bathroom where humidity warps the handle. For ongoing issues, revisit Dyson’s official videos (search “Dyson paddle brush demo”), as their instructions align perfectly with this guide’s methods. In just 5 uses, you’ll develop the muscle memory to transform frizzy hair into a mirror finish—proving why, when included freely, this brush earns its spot in your styling arsenal.

