
If you’ve ever struggled with your Dyson Airwrap—wondering why your hair won’t wrap around the barrel or why your curls fall flat within hours—you’re not alone. The Dyson Airwrap is a revolutionary hair tool that uses the Coandă effect to style hair with air instead of extreme heat, but unlocking its full potential requires specific techniques. Unlike traditional styling tools that rely on high temperatures (often exceeding 230°C), the Airwrap operates at a gentler 150°C, minimizing damage while creating beautiful styles. This complete guide will transform you from Airwrap novice to pro, showing exactly how to use dyson airwrap to achieve salon-quality results at home. Let’s dive into the precise techniques that make this tool work its magic.
Perfect Hair Prep: Getting Your Hair Ready for Dyson Airwrap Styling
The 85% Dry Rule: Why Moisture Level Matters Most
Your Dyson Airwrap will only deliver professional results when your hair is at the perfect moisture level—80-85% dry. This isn’t just a recommendation; it’s the science behind the Coandă effect that powers your Airwrap. Hair that’s too wet won’t properly adhere to the barrel, while bone-dry hair lacks the necessary moisture to create lasting styles. The ideal starting point is freshly washed hair that’s been towel-dried until it’s damp but not dripping. Fine hair typically dries faster than thick hair, so adjust your prep time accordingly—thick or coarse hair may need less time under the towel.
Critical Warning: Never attempt to style soaking wet hair with your Airwrap. This is the #1 reason for styling failures and can actually damage both your hair and the tool over time.
Choosing the Right Products for Your Hair Type
The products you apply before styling make or break your Airwrap results. For fine, limp hair, start with a root-lifting spray followed by a lightweight volumizing mousse applied at the roots. Thick, coarse hair needs a different approach—apply a smoothing cream to damp hair to tame frizz while still allowing the Coandă effect to work. Color-treated hair requires extra protection; use a heat protectant spray with UV filters. Apply your heat protectant 6-8 inches from your head, focusing on mid-lengths and ends where damage occurs most frequently.
Product Application Checklist:
– Heat protectant (non-negotiable for all hair types)
– Volumizing mousse (for fine hair) or smoothing serum (for thick hair)
– Light-hold hairspray (for setting curls)
– Finishing oil (applied only to ends after styling)
Professional Sectioning: How to Divide Hair for Airwrap Success
Creating the “Sectioning Box” for Even Styling
Proper sectioning isn’t just helpful—it’s essential for consistent results with your how to use dyson airwrap routine. Start by detangling with a wide-tooth comb, then create a “sectioning box”: part your hair from ear to ear and from crown to nape, dividing it into four quadrants. Clip the top sections out of the way using alligator clips (never elastic bands which leave dents). Always work from the bottom up, starting with the lowest layers at the nape of your neck. This bottom-up approach ensures each layer has proper support and volume.
The Bottom-Up Approach for Lasting Results
When styling with your Dyson Airwrap, never start at the crown. Begin with the bottom section at the nape of your neck, working upward toward the crown. Keep sections small—about 1 inch wide—for maximum control and precision. Large sections are the most common mistake Airwrap users make, resulting in uneven heat distribution and poor curl formation. As you complete each section, clip it up and out of the way to prevent accidental restyling. This systematic approach takes just 2-3 minutes but makes the difference between amateur and professional results.
Master Every Airwrap Attachment: Step-by-Step Guide for Perfect Results
Coanda Smoothing Dryer: Your Secret Weapon for Shine
The Coanda Smoothing Dryer isn’t just for pre-styling—it’s your finishing tool for flawless results. Use it first on damp hair to reach that critical 85% dryness level, directing the airflow down the hair shaft to smooth the cuticle. After completing your main styling, switch back to this attachment on cool shot to smooth flyaways and set your style. Hold it 6 inches from your head and move slowly downward, allowing the airflow to naturally smooth your hair without flattening volume. For stubborn flyaways around your hairline, hold the dryer close and use short bursts of cool air.
Volumizing Round Brush: Creating Lift at the Roots
For maximum volume, the Volumizing Round Brush is unmatched. Section a 1-inch strand near your roots, place the brush close to the scalp, and rotate it away from your face as you dry. The key is maintaining tension while directing the airflow down the hair shaft. Hold for 5 seconds at the roots before moving toward the ends. For fine hair, use the lowest heat setting (100°C); normal hair uses medium heat (150°C); thick or coarse hair can handle the highest setting (185°C). Always finish with a 5-second cool shot to lock in your volume before gently releasing the brush.
1.2-inch vs. 1.6-inch Barrels: Which to Use When
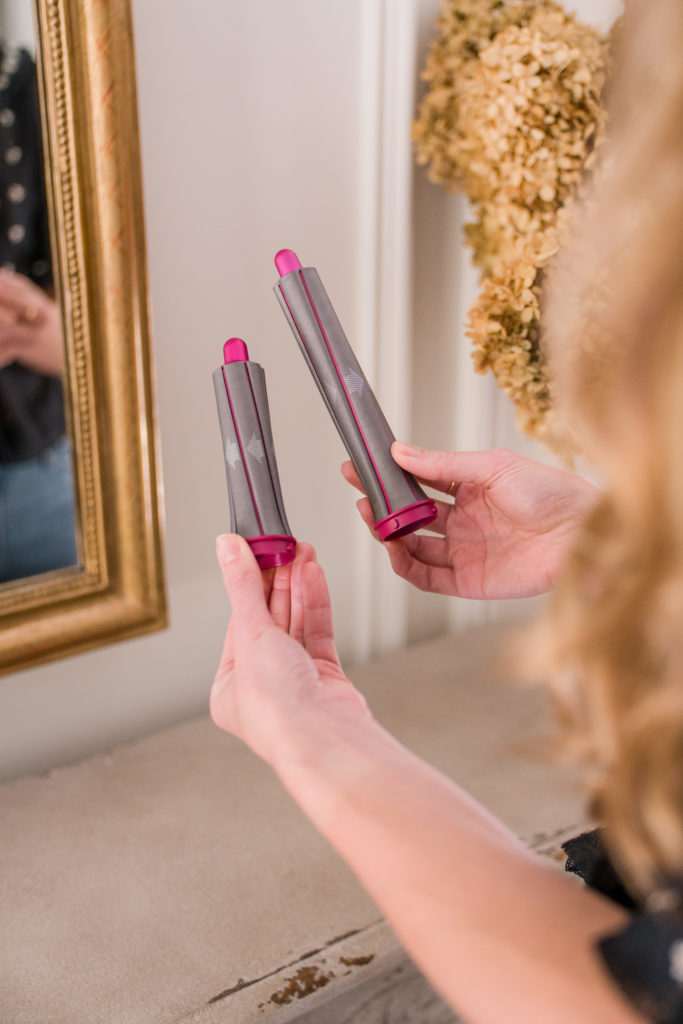
The 1.2-inch (30mm) barrel creates bouncy, defined curls perfect for shoulder-length hair, while the 1.6-inch (40mm) barrel gives soft, loose waves ideal for longer lengths. To use either barrel correctly: select a 1-inch section, hold the Airwrap 2 inches from the ends, and press the cool shot button to engage the hair. The airflow will automatically wrap your hair around the barrel—don’t force it. Hold for 10-15 seconds (longer for coarse hair), then blast with cool air for 5 seconds before gently releasing. For natural-looking results, alternate curl directions on back sections while keeping face-framing pieces consistent.
Fix These 5 Common Dyson Airwrap Problems in Minutes
Why Your Hair Won’t Wrap Around the Barrel (and How to Fix It)
This frustrating issue almost always comes down to moisture level. If your hair isn’t wrapping, it’s either too dry or too wet—not at that crucial 85% dry sweet spot. For fine hair that won’t grip, add texture with a light spritz of texturizing spray. Thick or coarse hair may need a bit more moisture; mist lightly with water before styling. Another common culprit is section size—use 1-inch sections maximum, not the larger chunks many beginners try. Finally, ensure you’re pressing the cool shot button to activate the airflow before bringing the barrel near your hair.
When Curls Won’t Hold: The Cool Shot Solution
If your curls fall flat within minutes, you’re likely skipping the critical cool shot step. After holding the barrel for 10-15 seconds, always blast your curl with cool air for 5 full seconds to set the style before releasing. For extra hold, apply a light-hold mousse to damp hair before styling—never heavy products that weigh hair down. Fine hair benefits from a root-lifting spray at the crown, while thick hair may need a light-hold hairspray misted onto hands and smoothed over the finished style. Remember: the Airwrap creates the shape, but proper setting techniques make it last.
Essential Products That Make Your Dyson Airwrap Work Better

The Non-Negotiable: Heat Protectant Application Technique
Heat protectant isn’t optional—it’s mandatory for protecting your hair from even the Airwrap’s gentler temperatures. Apply 6-8 sprays for medium-length hair, holding the bottle 6-8 inches from your head. Focus on mid-lengths and ends where damage occurs most, but avoid saturating roots which can flatten volume. For best results, apply to damp hair before any other products. Skip this step, and you risk cumulative heat damage that leads to dryness, breakage, and split ends over time—defeating the Airwrap’s primary benefit of gentler styling.
Product Layering for Maximum Results
The order you apply products dramatically affects your Airwrap results. Start with heat protectant on damp hair, followed by your styling product (mousse for volume or serum for smoothing), then finish with a light-hold hairspray before curling if you need extra hold. Never apply oils or heavy creams before styling—they create a barrier that prevents the Coandă effect from working properly. For second-day styles, refresh with dry shampoo at the roots and a light mist of water on ends before restyling problem areas.
Keep Your Airwrap Working Like New: Simple Maintenance Routine
Regular maintenance ensures your Dyson Airwrap delivers professional results for years. After each use, allow attachments to cool completely before storing. Wipe barrels and the main unit with a soft, dry cloth—never submerge any part in water. Check the filter monthly; a clogged filter reduces airflow and affects performance. Clean it by removing according to manufacturer instructions and rinsing under lukewarm water. Store your Airwrap and all attachments in the provided case in a dry, temperature-stable area—never in a bathroom where humidity can damage the electronics.
Mastering how to use dyson airwrap takes practice, but these precise techniques will transform your styling routine. Remember the golden rules: start with 85% dry hair, use small sections, always apply heat protectant, and never skip the cool shot. With consistent practice using these methods, you’ll achieve salon-quality blowouts, bouncy curls, and smooth styles with less heat damage than traditional tools. The Airwrap’s genius lies in its airflow technology—respect the science behind it, and you’ll unlock results you never thought possible at home.

