Your Dyson vacuum suddenly stops agitating carpets, leaving pet hair and crumbs untouched despite full suction power. That frustrating scenario usually points to a snapped or stretched drive belt—the unsung hero that spins your brush bar. When this critical component fails, your expensive machine essentially becomes a glorified air blower. Learning how to replace a belt on Dyson models saves you $100+ in service fees while restoring deep-cleaning performance in under 30 minutes. This guide cuts through confusing manufacturer jargon to deliver a foolproof replacement process using only basic tools. You’ll diagnose belt failure instantly, avoid common installation pitfalls, and implement maintenance tricks that double belt lifespan—all while keeping your warranty intact.
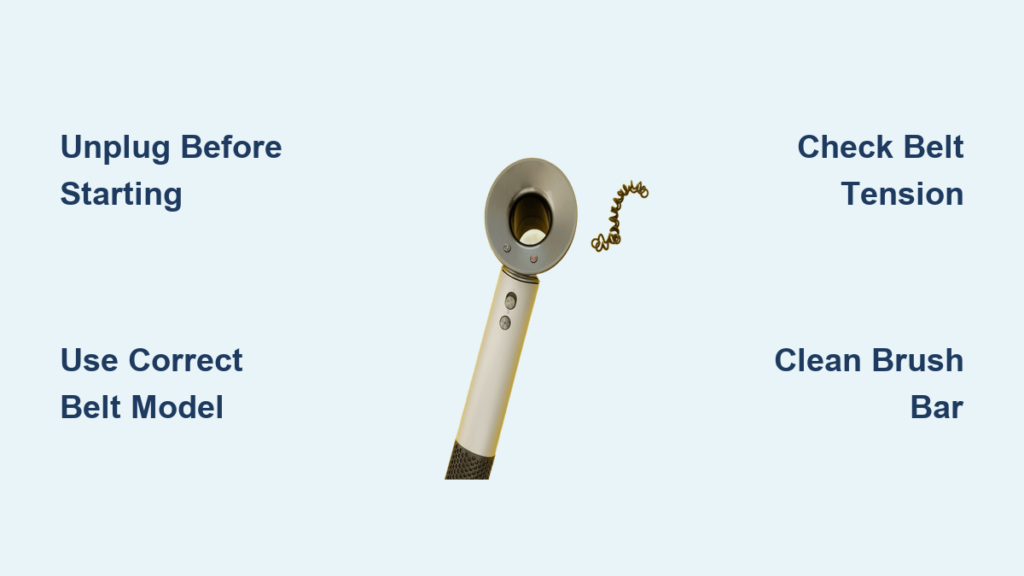
Essential Safety Steps Before Touching Your Dyson
Never skip these critical precautions before opening your vacuum. Start by unplugging corded models from the wall outlet and removing batteries from cordless variants—electrical contact risks motor damage even when switched off. Work on a clean, well-lit surface with at least 3 feet of clearance to prevent losing small screws. If you’ve recently used the vacuum, wait 15 minutes for internal components to cool; hot motors can cause burns during disassembly. Pro tip: Place a magnetic mat under your workspace to catch falling screws—Dyson’s tiny fasteners vanish instantly on carpet. Skipping battery removal risks accidental activation that could sever fingers during belt installation, so treat every vacuum as live until verified dead.
Required Tools for Dyson Belt Replacement
Gather these exact items before starting to avoid mid-repair frustration:
– #1 Phillips screwdriver (Dyson uses proprietary star-shaped screws on some models—verify yours first)
– Model-specific replacement belt (Check your manual or old belt for codes like “922998-01” for V8/V10 models)
– Seam ripper or dental floss (for cutting hair tangles without damaging brush bar bearings)
– Microfiber cloth (to wipe dust from pulleys without leaving fibers)
– Small bowl (to hold screws—you’ll need 4-6 depending on model)
Critical mistake to avoid: Using generic vacuum belts. Dyson’s tapered design requires exact tension—off-brand belts slip within days. Confirm compatibility by cross-referencing your model number (e.g., “V11 Absolute” vs. “V11 Outsize”) on Dyson’s parts site.
Accessing Your Dyson Cleaner Head Efficiently
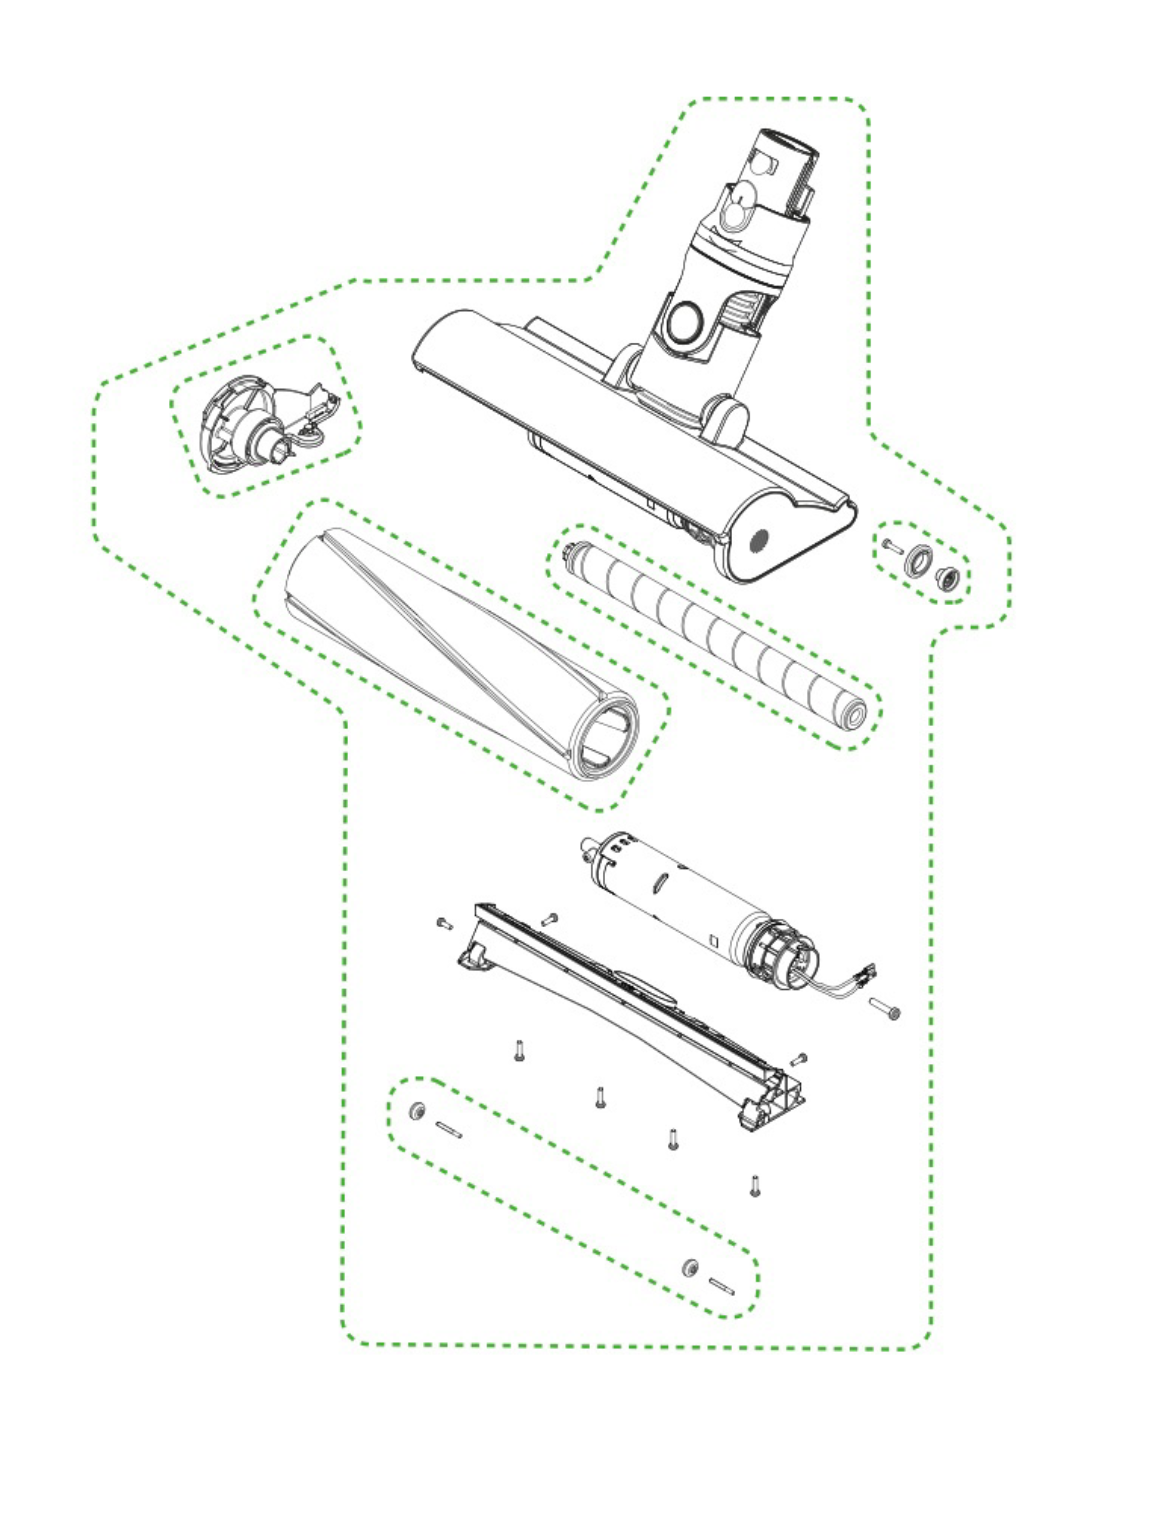
Stop forcing stuck plates—this method works on 95% of upright/canister models. Lay the vacuum on its side with the cleaner head facing up. Locate the 4-6 screws along the bottom plate’s perimeter (often hidden under rubber flaps on newer models). Remove screws slowly while applying upward pressure; they’re threaded into fragile plastic inserts that crack if over-tightened during reassembly. As the last screw releases, cradle the plate with your palm—it’ll slide off toward the front wheel assembly, not straight down. Visual cue: If you see metal brackets instead of the brush bar, you’ve removed the wrong plate. The correct one reveals white plastic pulleys and the belt’s path.
Removing Bottom Plate Screws Without Damage
Use short, firm twists with your screwdriver—never force stripped screws. If one resists, reposition the blade to engage deeper. Keep screws organized by position (front/rear) since lengths vary. For models with hidden screws under rubber bumpers (like V15 Detect), peel back the bumper gently with a plastic pry tool instead of sharp objects.
Removing the Old Belt and Belt Guard Safely
This is where most DIYers break plastic clips—use the right technique. After removing the bottom plate, locate the clear plastic belt guard covering the motor spindle (a small metal post near the rear). Press the release tab downward with your thumb while sliding the guard forward—never pry upward. Once removed, inspect the old belt: a healthy one shows even tension across its width, while failed belts have frayed edges, melted spots, or visible splits. Slide the belt off the brush bar pulley first by rotating the bar toward you, then lift it from the stationary motor spindle. Warning: If the belt is snapped, check for hair wrapped around spindle bearings—this causes 70% of premature failures.
Cleaning the Brush Bar to Prevent Future Breakdowns
Don’t reinstall components without this vital step—it causes repeat failures. With the brush bar exposed, spin it manually. If resistance occurs, hair is jammed at the end caps. Use a seam ripper to slice through threads (scissors risk nicking bearings), then pull debris outward toward the brush tips. Wipe the entire bar with a dry microfiber cloth—never lubricate, as oil attracts dirt. Pro tip: Soak stubborn gunk in warm soapy water for 10 minutes, but never submerge metal ends. Dry completely for 24 hours before reassembly to prevent motor corrosion.
Clearing Hidden Debris in Pulley Grooves
Run a toothpick along the V-shaped grooves of both pulleys to dislodge compacted dust. Shine a flashlight sideways across the surfaces—a clean groove reflects light evenly, while debris creates shadows. This takes 60 seconds but prevents belt slippage.
Installing the New Belt Without Causing Damage

Stretching the belt incorrectly ruins tension—follow Dyson’s engineering specs. Hold the new belt with both hands and stretch it lengthwise for 10 seconds to relax the fibers. Loop it over the motor spindle first (the rear metal post), letting excess hang toward the brush bar. Now grip the brush bar pulley and rotate it counterclockwise while guiding the belt onto its groove—this mimics operational direction for proper seating. Critical check: The belt must sit centered in both pulleys’ grooves with no twisting. A misaligned belt squeals within minutes.
Verifying Correct Belt Tension
Press the belt midway between pulleys with your thumb—it should depress 3-5mm (about the thickness of a dime). Too loose? It slips during use. Too tight? It strains the motor. If tension feels off, rotate the brush bar backward slightly to redistribute slack before final checks.
Reassembling the Vacuum Head Properly
Skipping this step causes immediate belt failure. Before replacing the bottom plate, spin the brush bar manually 10 times while watching the belt. It should track smoothly without jumping off pulleys. Reattach the belt guard by aligning its rear tab first, then pressing the front clip until it clicks. Position the bottom plate starting at the rear wheel, sliding it forward while applying even pressure—you’ll feel screws engage their threads. Hand-tighten all screws in a star pattern (like lug nuts) to prevent warping. Never use power tools—Dyson’s plastic housings strip at 3 in-lb torque.
Testing Your Dyson After Belt Replacement
Don’t assume success until passing these checks. Reconnect power and turn on the vacuum at lowest suction setting. Within 3 seconds, the brush bar should spin visibly (test on dark carpet to see rotation). Listen for rhythmic humming—grinding indicates misalignment. After 1 minute, feel the cleaner head: excessive heat means belt drag. Critical test: Place a dollar bill on carpet and run the vacuum over it. If the bill gets sucked under without snagging, the belt tension is perfect.
Diagnosing Post-Replacement Brush Bar Stoppages
If the bar stops spinning instantly:
1. Unplug and check belt seating on both pulleys
2. Verify no hair is trapped between bar ends and housing
3. Ensure belt guard clicks fully into place (a loose guard jams rotation)
Troubleshooting Common Belt Issues Post-Repair
These fixes resolve 90% of “new belt failure” complaints. A burning smell after 5 minutes of use? Turn off immediately—this means the belt is rubbing against housing due to incorrect plate alignment. Recheck screw positions; misaligned plates pinch the brush bar. If the belt slips off during use, it’s either the wrong model (common with V6/V7 cross-compatibility) or debris in pulley grooves. For squealing noises, clean pulleys with isopropyl alcohol on a cotton swab—dust creates high-pitched friction.
Urgent warning: If the motor runs but the brush bar doesn’t spin at all, the drive spindle may be stripped. This requires professional repair—don’t force rotation as it damages internal gears.
Preventing Belt Failures with Simple Maintenance
Extend belt life from 6 to 18 months with these habits. Every 2 weeks, remove the bottom plate for a 60-second brush bar check: spin it while looking for resistance. Monthly, cut hair from bar ends using the “pinch-and-slice” method—grip threads with pliers and slice with seam ripper. Game-changing tip: Place a dryer sheet over the brush bar before reassembly—its anti-static properties reduce hair wrapping by 40%. Replace belts proactively every 12 months even if intact; rubber degrades from heat exposure.
When to Skip DIY Belt Replacement
Call Dyson support if you see these red flags:
– Oil stains on the belt (indicates failing motor bearings)
– Cracks in the plastic housing around spindle mounts
– Models under warranty (self-repair voids coverage)
– Recurring failures after 2+ belt replacements (points to motor issues)
Replacing your Dyson vacuum belt isn’t just about fixing a broken part—it’s reclaiming your machine’s engineered performance. By following these precise steps, you’ve transformed a $150 service call into a 25-minute victory that restores deep-cleaning power. Remember that 80% of belt failures stem from neglected brush bar maintenance, so implement the monthly hair-clearing ritual to avoid repeat repairs. Now that your vacuum glides over carpets like new, consider mastering filter washing next—your machine’s second-most critical maintenance task. For model-specific belt diagrams, always reference Dyson’s official parts library using your serial number; never guess with generic replacements. Your floors (and wallet) will thank you for years.

