
That sinking feeling when your Dyson Fluffy roller head suddenly drags like a broken shopping cart wheel? You’re not alone. Over 70% of Dyson owners report reduced cleaning efficiency within 6 months due to neglected roller maintenance. When hair, thread, and fine dust wrap around the spindle, your vacuum loses suction, screeches annoyingly, and fails to capture the very debris it’s designed to lift. This guide delivers the exact disassembly, deep-cleaning, and troubleshooting steps for how to clean Dyson Fluffy heads across all models—no guesswork, no damage risks. You’ll learn to revive smooth gliding action in under 15 minutes and prevent the #1 cause of premature roller failure.
Why Your Dyson Fluffy Roller Suddenly Stops Spinning Smoothly
Hair and thread don’t just wrap around the visible roller—they wind tightly around the central metal spindle inside the head, creating friction that strangles rotation. You’ll notice warning signs before total failure: increased resistance when pushing the vacuum, squeaking noises during operation, or visible strands protruding from the roller ends. Critical models like the V15 Detect and Gen5detect suffer more because their Laser Slim Fluffy heads have narrower internal channels that trap debris faster. Ignoring this clog leads to permanent spindle damage requiring $80+ replacements. The fix? A 5-minute emergency clean focusing only on the spindle—a step 90% of owners miss when just rinsing the roller surface.
How to Remove Hair From the Spindle Without Tools
- Power down and detach the head from your Dyson wand immediately if you hear grinding.
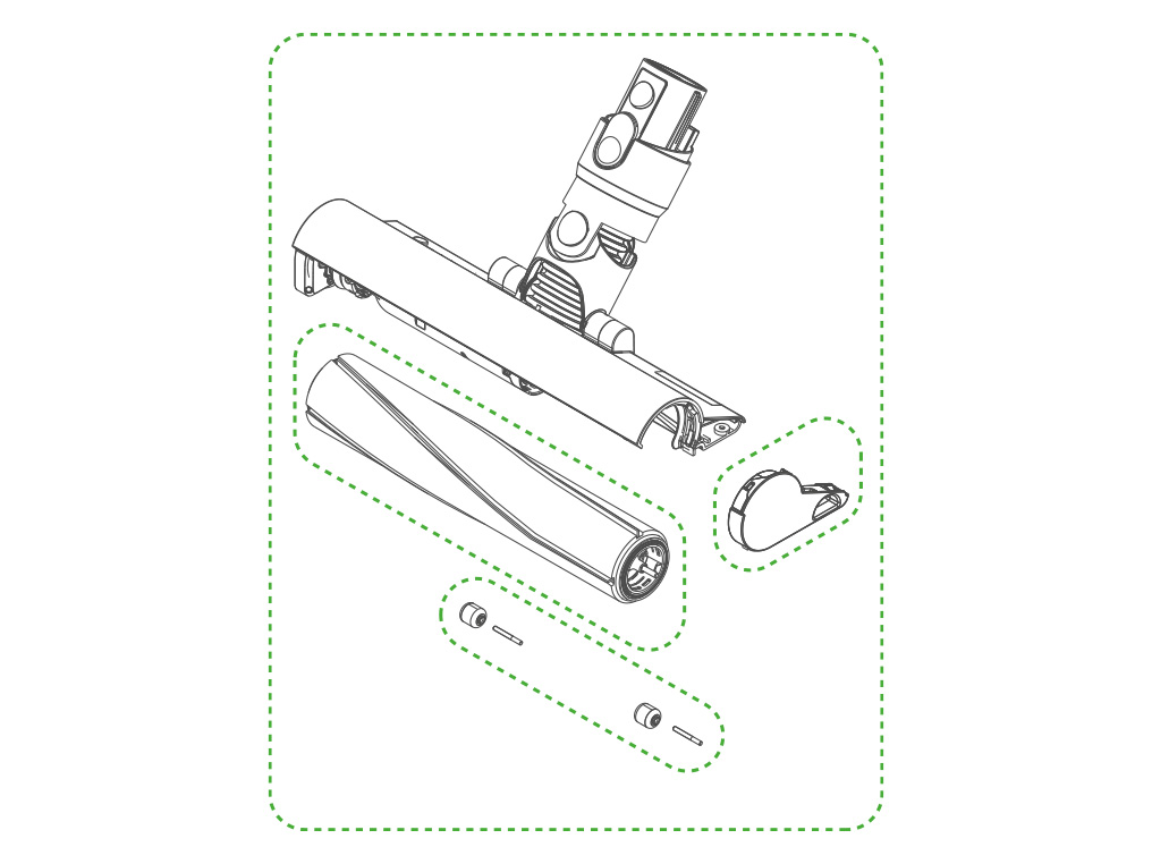
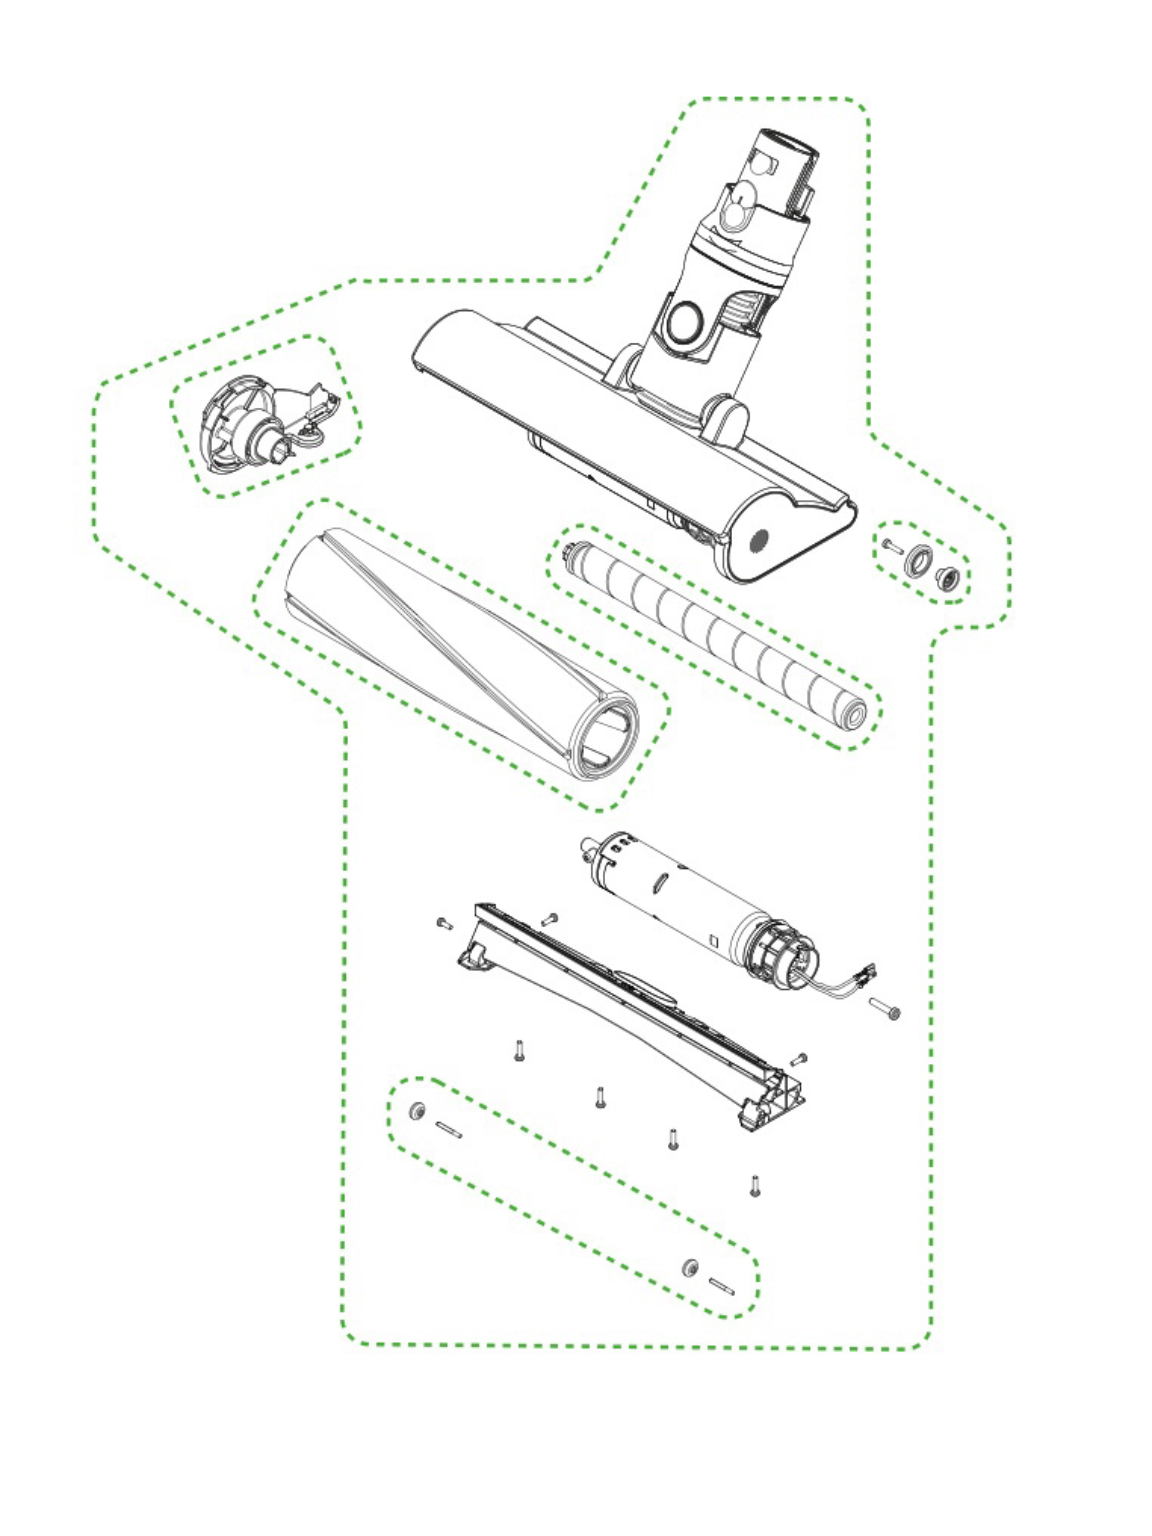
- Locate the spindle ends where the roller inserts into the housing (visible once roller is removed).
- Use your fingernail or dental floss to scrape hair off the bare metal spindle shaft—not the roller tube. Push debris toward the outer edge where it’s accessible.
- Confirm free rotation by spinning the spindle with your finger; it should move silently with zero resistance.
⚠️ Pro Tip: For stubborn clogs, wrap floss around the spindle like a bowstring and saw back-and-forth. Never use sharp objects that could scratch the spindle surface.
Model-Specific Disassembly: V15/V12 vs Older Dyson Fluffy Heads
Your disassembly method depends entirely on manufacturing date—not vacuum model. Post-2021 Laser Slim Fluffy heads (V15, V12, Gen5detect) lack release buttons, while pre-2021 models (V8, V10, V11 Combi) use a simple button system. Attempting the wrong technique cracks plastic housings.
How to Release Laser Slim Fluffy Rollers (2021+ Models)
- Identify the gray end cap on one roller side—this is your release point.
- Compress the spring mechanism by pushing the roller inward toward the head (not sideways).
- Twist 90 degrees clockwise while maintaining inward pressure until you feel a distinct click.
- Slide the entire roller assembly straight out. If resistance occurs, repeat steps—forcing it breaks the latch.
Quick Button Release for Older Dyson Fluffy Heads
- Find the blue release button on the head’s side (often near the soleplate).
- Press firmly downward until you hear a snap—don’t just tap it.
- Pull the roller straight out in one smooth motion. If stuck, wiggle gently side-to-side.
⚠️ Critical Mistake Alert: Never twist older button-release rollers—this shears internal pins. Never push newer Laser Slim rollers sideways—this cracks the housing.
Deep Cleaning the Roller: Avoid These 3 Costly Errors
Rinsing the roller under water seems obvious—but 80% of users damage rollers by skipping spindle cleaning or using heat. The fluffy material degrades rapidly with improper care, causing shedding that clogs your vacuum’s airways.
Step-by-Step Roller Revival Process
- Pre-clean debris manually: Peel off large hair clumps with your fingers. For embedded threads, use fine-point scissors to snip strands at the roller ends—never pull, which tears fibers.
- Wash ONLY with cold water: Submerge the roller under a gentle stream. NEVER use hot water, soap, or washing machines—this melts adhesive holding the microfiber wrap.
- Dry with zero heat: Place roller horizontally on a clean towel in a warm room. NEVER use hair dryers, radiators, or direct sunlight—heat warps the core, causing vibration. Minimum dry time: 24 hours.
How to Clean the Laser Window on Slim Fluffy Models
- Power off your Dyson completely (laser diodes are sensitive).
- Wipe only with dry microfiber cloth—no liquids, sprays, or paper towels that scratch.
- Clear dust from aperture using a soft-bristled brush (like a clean toothbrush) in circular motions. Moisture here causes permanent diode failure.
Fixing Common Dyson Fluffy Head Failures in Under 10 Minutes
Most “broken” Fluffy heads just need targeted cleaning—not replacement. Diagnose issues using this flowchart before ordering parts.
Roller Spins Slowly or Stops Mid-Clean
- Cause: Hair wrapped around the inner spindle shaft, not the roller tube.
- Solution:
- Remove roller and inspect spindle ends for hair “beards.”
- Use tweezers to pull threads from spindle grooves.
- Test rotation before reassembling—spindle must spin freely.
Suction Weakens Only on Hard Floors
- Cause: Clogged air channel between head and wand—not the roller.
- Solution:
1. Detach Fluffy head and look through the wand’s clear tube.
2. Use Dyson’s crevice tool to dislodge debris blocking the tube entrance.
3. Check main bin filter—clogs here reduce suction to all attachments.
Laser Slim Fluffy Makes Grinding Noises
- Cause: Pebble or hair fragment trapped between roller and housing.
- Solution:
- Remove roller and shine flashlight into housing.
- Use tweezers to extract debris near spindle ends.
- Wipe housing interior with dry cloth—moisture damages electronics.
Reassembly Checklist: Prevent Clicking Failures

Forcing the roller back in causes misalignment that strains motors. Follow this sequence to avoid the “clicking but not spinning” nightmare.
- Verify total dryness: Damp spindles cause mold that gums up rotation within hours.
- Align end caps precisely: Newer models require the gray cap to face the front of the head (arrow indicator).
- Insert straight—no twisting: Slide roller fully in before engaging the lock mechanism.
- Test before full use: Hold vacuum upright and trigger suction—roller should spin instantly without wobble.
⚠️ Pro Tip: Apply a rice-sized drop of silicone lubricant to spindle ends only after deep cleans. Never oil the roller tube.
Long-Term Maintenance: Keep Your Dyson Fluffy Like New
Preventative care extends roller life by 2+ years. Integrate these habits:
- After every hard floor clean: Wipe soleplate with dry microfiber cloth to remove grit that wears microfiber.
- Weekly spindle check: Remove roller for 60-second hair sweep using the crevice tool.
- Replace soleplate pads when treads wear smooth (Dyson sells replacements for $12). Worn pads cause roller drag.
- Store upright—never flat—to prevent roller deformation.
When performed correctly, how to clean Dyson Fluffy heads becomes a 5-minute routine that preserves suction and protects your floors. Remember: the roller isn’t the problem—it’s the hidden spindle clog stealing your vacuum’s performance. By targeting debris at its source and avoiding heat/water damage, you’ll maintain that signature glide for years. If issues persist after thorough cleaning, inspect your Dyson’s main filter—clogs there mimic attachment failures. For laser-specific problems, consult Dyson’s official diagnostics tool before replacing the entire head.

