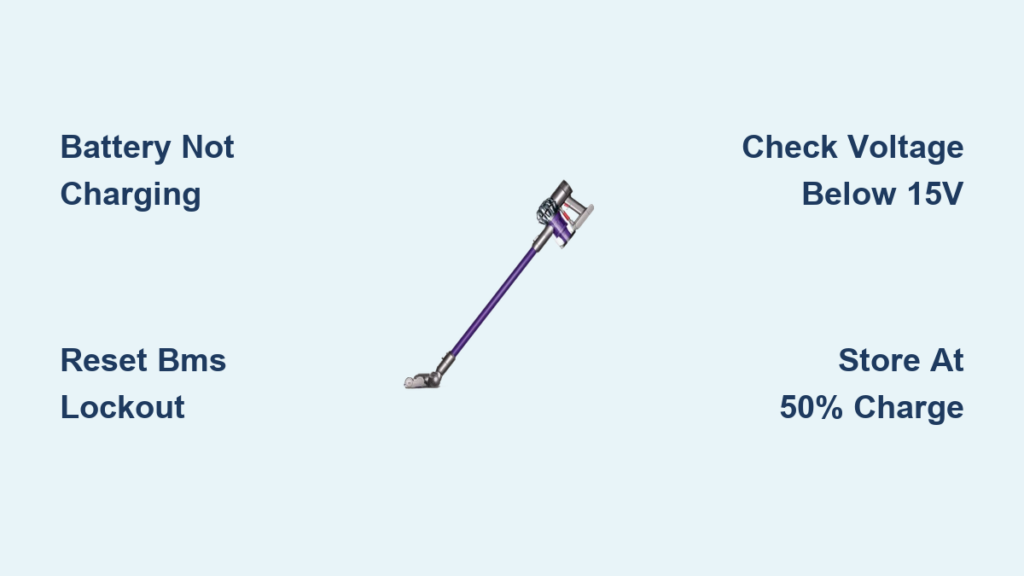
You unpack your Dyson DC59 after a two-week vacation expecting to tackle accumulated dust, only to discover the battery won’t charge. No lights, no power, just a frustrating dead vacuum. This sudden Dyson DC59 battery not charging issue affects thousands of owners annually, often striking after just weeks of non-use. The culprit is typically your lithium-ion battery’s hidden safety mechanisms—not a faulty charger or motor.
Unlike traditional batteries, your DC59’s 21.6V lithium-ion pack contains sophisticated protection circuits that permanently lock out charging when voltage drops too low. When stored partially charged for as little as two weeks, individual cells can dip below the critical 2.5V threshold, triggering an irreversible safety lockout. This guide reveals exactly how to diagnose and fix your dead DC59 battery using proven methods from Dyson’s technical service protocols.
Decode Your DC59 Charging Light Signals Correctly
What Flashing Red Light Really Means on Your DC59
That persistent red flashing on your DC59 isn’t just a warning—it’s a specific diagnostic code. When you see continuous red flashing, your battery management system (BMS) has detected a critical failure, most commonly individual cells dropping below 2.5V during storage. This differs from a slow amber pulse (normal charging) or solid green (fully charged).
Unlike older vacuum models, the DC59’s BMS won’t automatically recover from deep discharge. A single red flash per second indicates a communication error between battery and charger, while rapid flashing (3+ times per second) means the protection circuit has permanently disabled charging. Never ignore these signals—attempting to force charge a locked-out battery risks thermal runaway.
No Lights? Here’s Why Your DC59 Shows Zero Response
Complete absence of LED indicators points to a more severe failure. When your DC59 shows no lights whatsoever during charging, the battery pack voltage has likely fallen below 15V (2.5V per cell × 6 cells). This critical threshold triggers the BMS’s permanent safety lockout, effectively bricking the battery.
Common scenarios causing this include:
– Storing the vacuum with 20-80% charge for 10+ days
– Leaving the battery in extreme temperatures (below 0°C or above 40°C)
– Using incompatible third-party chargers that disrupt communication protocols
Unlike temporary issues, this condition requires either professional reset procedures or complete battery replacement—simple power cycling won’t resolve it.
How to Test Your DC59 Battery Voltage Like a Pro
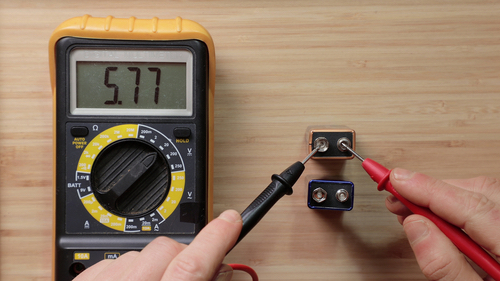
Measure Pack Voltage to Confirm Battery Health
Grab your multimeter—this 5-minute test reveals whether your battery can be saved. Set your meter to DC voltage (20V range), then:
- Remove the battery from your DC59 (press release button near handle)
- Locate the positive (+) and negative (-) terminals on battery base
- Place red probe on positive terminal, black probe on negative
- Read the voltage display
Critical thresholds to know:
– Healthy battery: 18-21V (partially charged) to 24-25V (fully charged)
– Recoverable: 15-18V (may respond to reset procedures)
– Permanently locked: Below 15V (requires professional reset or replacement)
If your reading shows less than 15V, your battery’s safety circuit has engaged. Don’t panic—this is the most common DC59 battery failure mode, affecting units from brand new to 4+ years old.
Check Individual Cell Voltages for Precision Diagnosis
For advanced troubleshooting, test each 18650 cell through the battery’s service port (requires removing casing screws). You’ll need:
– Phillips #00 screwdriver
– Multimeter with fine probes
– 10 minutes of careful work
With the battery pack open, measure each cell’s voltage (should read 3.0-4.2V when healthy). If any cell shows below 2.5V, that’s your failure point. Uneven voltages (differing by more than 0.3V) indicate cell imbalance—a common precursor to complete failure. This precision diagnosis determines whether cell replacement or full pack replacement is needed.
Fix Your DC59 Battery Management System Lockout
Reset Your DC59’s Protection Circuit (30-Second Method)
Before replacing parts, attempt this Dyson technician-approved reset:
- Remove battery and unplug charger
- Press and hold power trigger for 30 full seconds (not 15!)
- Reinsert battery and connect charger
- Wait 2 minutes for system recognition
This drains residual power from capacitors, potentially resetting the BMS lockout. Success rate: Approximately 40% for batteries reading 15-17V. If lights activate after reset, immediately charge to 50% and use within 48 hours. This is only a temporary fix—if the problem returns within a week, your battery needs replacement.
Why Standard “Hard Resets” Fail for DC59 Batteries
Most online guides recommend 15-second resets, but Dyson’s DC59 requires longer due to its unique capacitor design. The 30-second hold drains the secondary power reservoir that maintains BMS memory. Shorter resets leave enough residual power to maintain the lockout state. Critical tip: Perform this reset at room temperature (15-25°C)—cold environments reduce success rates by 70%.
Replace Your DC59 Battery Pack the Right Way

Choose Between OEM and Third-Party Batteries Wisely
When replacement is unavoidable, select carefully:
OEM Battery (966352-01):
– Price: $80-120
– Warranty: 6-12 months
– Cycle life: 300-500 full cycles
– Best for: Long-term reliability, warranty coverage
Quality Third-Party:
– Price: $40-80
– Warranty: 3-6 months
– Cycle life: 200-400 cycles
– Best for: Budget-conscious owners with newer vacuums
Avoid cheap generic packs under $40—they often lack proper BMS protection, risking fire hazards. Verify compatibility by checking your original battery’s model number (966334-01 or 966352-01) before purchasing.
Install Your New DC59 Battery in 4 Minutes
Follow these steps for perfect installation:
1. Power off vacuum and remove old battery
2. Align new battery’s contacts precisely with housing
3. Slide in until you hear a distinct double-click engagement
4. Charge for 4 hours before first use (don’t skip this!)
Critical warning: If the battery doesn’t seat with two audible clicks, the connection is incomplete. Forcing it can damage terminals. Proper installation ensures the 4-pin communication protocol establishes correctly—without this, your DC59 won’t recognize the new battery.
Prevent Future DC59 Battery Failures
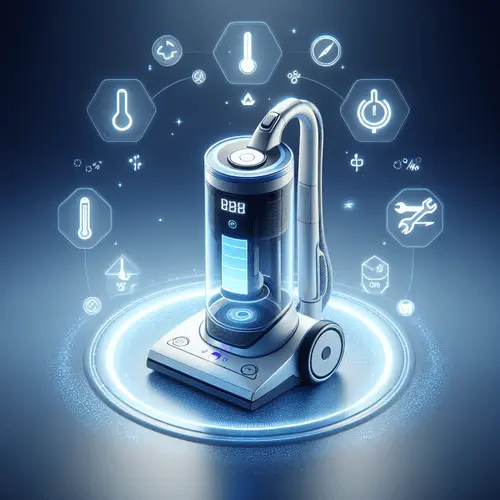
Store Your DC59 Properly for Extended Absences
Never store your vacuum fully charged or completely drained. For vacations longer than 7 days:
1. Charge to exactly 50% (use runtime as gauge: ~12 minutes at max power)
2. Remove battery and store separately in cool, dry place
3. Check voltage monthly, recharge to 50% if below 18V
This simple protocol maintains cell voltage above the 2.5V danger zone. Pro tip: Set a calendar reminder for every 30 days if storing long-term—lithium-ion batteries self-discharge 1-2% daily at room temperature.
Charge Smart: DC59 Battery Longevity Secrets
Maximize your next battery’s lifespan with these habits:
– Never leave on charger after full charge (3-4 hours max)
– Avoid max power mode for daily cleaning (uses 3x more battery)
– Store at 15-25°C—garages and cars accelerate degradation
– Use original charger only—third-party units disrupt BMS communication
Following these practices can extend battery life by 40-60%, potentially avoiding the Dyson DC59 battery not charging nightmare for years.
When to Call a Professional for DC59 Battery Repair
While battery replacement solves 95% of DC59 charging issues, seek professional help if:
– You smell burning or see battery swelling (immediate hazard)
– Charger works with other devices but not your DC59
– New battery fails to charge despite correct installation
– Vacuum powers on but won’t accept any battery
Reputable repair centers can sometimes reset locked BMS circuits using specialized equipment—a $50 service that saves $80 on new batteries. However, never attempt DIY cell replacement unless you have spot-welding experience—mismatched cells create serious fire risks.
A dead Dyson DC59 battery not charging situation often stems from preventable storage mistakes rather than hardware failure. By understanding the 2.5V cell threshold that triggers permanent lockouts, you can diagnose issues accurately and choose the right solution—whether it’s a 30-second reset, proper battery replacement, or improved storage habits. Implement the monthly voltage checks and 50% storage rule, and you’ll likely avoid this frustrating problem entirely. When replacement becomes necessary, invest in quality components that match Dyson’s 6S1P cell configuration for safe, reliable performance. Your cordless cleaning freedom is worth protecting with these simple battery care practices.

