
You’re about to tackle a quick clean-up, but your Dyson cordless vacuum won’t power on. The culprit? An incomplete charge you didn’t realize wasn’t finished. Knowing exactly how to know Dyson is charged separates frustration from seamless cleaning sessions. That steady blue glow on your V15 isn’t just pretty lighting—it’s your battery’s “all systems go” signal. For Dyson owners, misreading these indicators wastes precious time and strains lithium-ion batteries. This guide cuts through the confusion with model-specific light patterns so you’ll never wonder whether your machine is truly ready. You’ll discover why a pulsing light means “charging in progress” while a solid beam confirms full readiness—and how to troubleshoot when the signals go wrong.
Most users assume all Dyson models behave identically during charging, but subtle differences between your V8 and V15 Detect can cause costly mistakes. A flashing red light on your Purifier Cool isn’t just “charging”—it’s a critical error demanding immediate action. By the end of this guide, you’ll confidently interpret every blink, pulse, and color shift across 12+ Dyson models. We’ll cover vacuum-specific signals, air treatment device indicators, and emergency protocols for faulty batteries. No more guessing games before your weekend deep clean.
Why Your Dyson’s Charging Light Behavior Matters More Than You Think
Dyson’s charging indicators aren’t arbitrary—they’re engineered communication tools reflecting your battery’s health. Ignoring these signals accelerates degradation in your $400+ investment. Lithium-ion batteries hate being left plugged in after hitting 100%, yet many users do this daily because they misread the “full charge” signal. The difference between a healthy battery lasting 4 years versus 2 comes down to correctly identifying that critical transition from charging to full readiness.
Spotting the Full Charge Signal by Model
Your Dyson’s light pattern shifts dramatically when charging completes. For cordless vacuums:
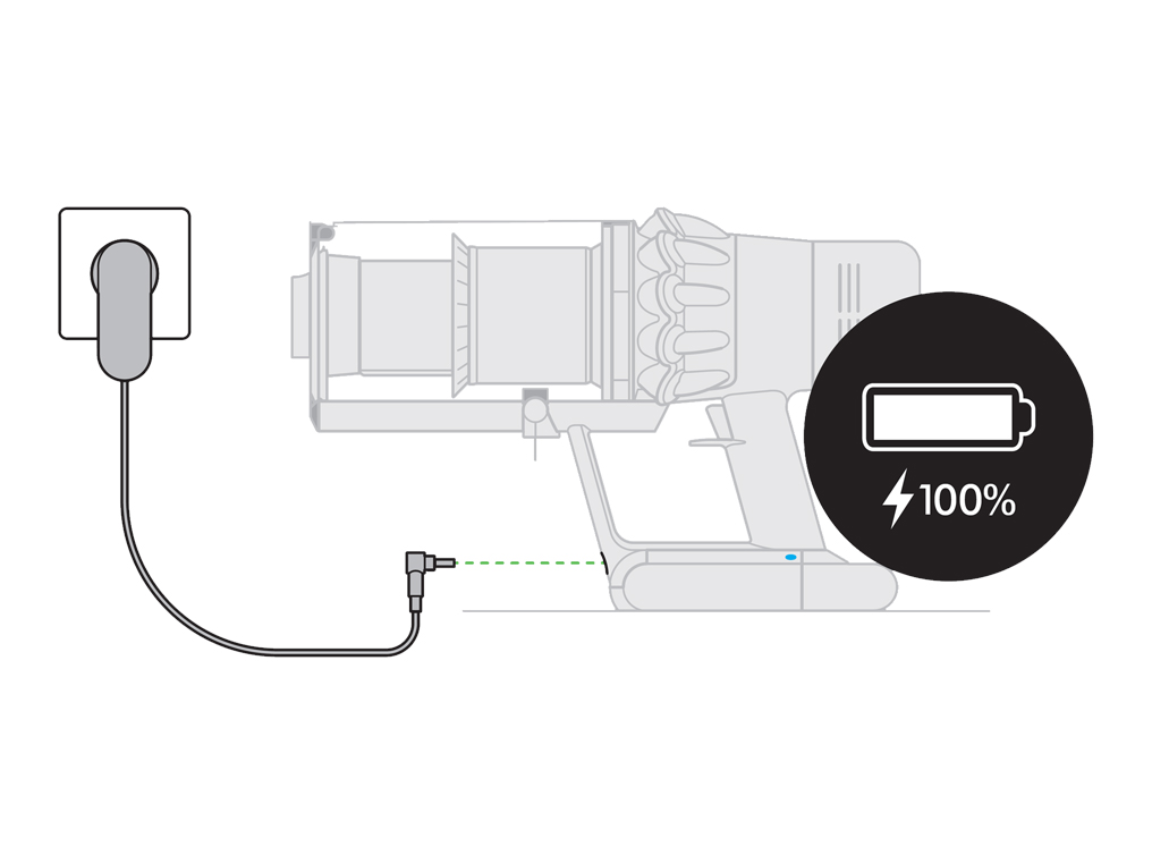
– V7/V8/V10 models: A steady, non-blinking blue light on the charger base confirms full charge (not the pulsing blue during charging)
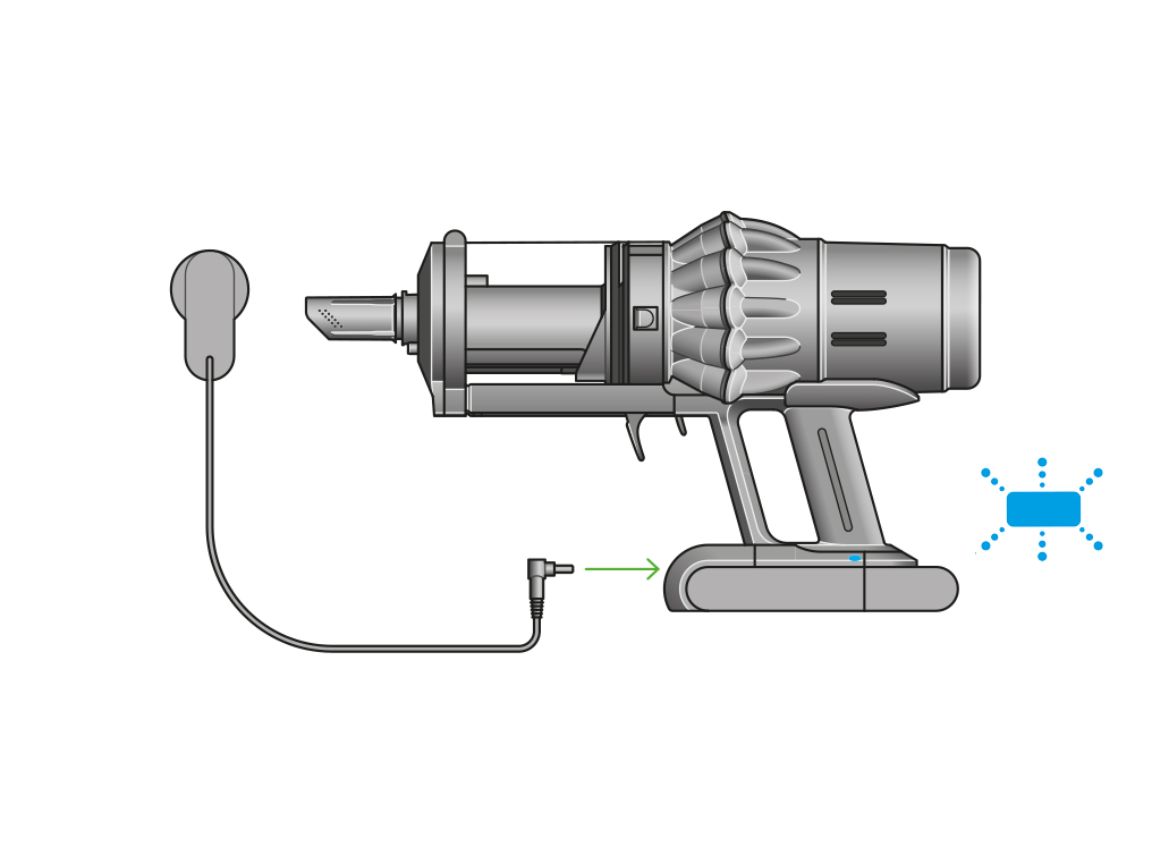
– V12/V15 Detect: Solid blue light on the main unit’s battery indicator—no flashing whatsoever
– Dyson Purifiers: Unblinking green light on the power button or remote control
The universal rule? Any movement in the light means charging continues. If you see rhythmic pulsing, slow blinking, or color transitions (like blue fading to green), your device needs more time. Only when the light becomes completely static—like a frozen traffic signal—can you trust it’s fully charged. Check your model’s quick-start guide if uncertain, but never assume “less flashing” equals “almost done.” Many users unplug their V11 when the light slows to 1 pulse per second, not realizing it needs 3 more hours to reach true 100%.
The Hidden Charging Stages Your Dyson Never Tells You About
Dyson devices use multi-phase charging that explains confusing light behaviors. During the initial fast-charge phase (first 60-80% capacity), lights pulse rapidly—sometimes 2-3 times per second. As capacity nears 90%, it shifts to trickle charging with slower pulses (1 pulse every 5-10 seconds). The final top-off phase (last 5-10%) often shows no visible change for hours while the battery management system carefully balances cells. This is why your V15 might appear “stuck” at 95% for 2 hours with a slow-pulsing light. Only when all cells hit exact voltage targets does the light snap to solid mode. Rushing this process by unplugging early causes “phantom full” syndrome—where your vacuum dies at 70% runtime.
Decoding Every Dyson Light Pattern: Blue, Green, Red & Flashing
Your charger’s light tells a precise story if you know the language. Misinterpreting red flashes as “normal charging” could mean using a faulty battery. These color codes apply to 95% of Dyson models manufactured since 2016.
What Each Light Color Means for Vacuums vs. Air Purifiers
| Light Behavior | Cordless Vacuums (V7-V15) | Air Treatment Devices (Purifier Cool) |
|---|---|---|
| Solid Blue | Fully charged & ready | Charging in progress (on battery models) |
| Solid Green | N/A | Fully charged & ready to use |
| Pulsing Blue | Charging (0-95%) | N/A |
| Pulsing Green | N/A | Charging (0-95%) |
| Flashing Red | Critical error | Battery fault or overheating |
| No Light | Poor connection or dead outlet | Standby mode (plug in required) |
Critical note: Purifier models reverse the green/blue meaning versus vacuums. Your Dyson Purifier Cool shows solid green when fully charged—not blue. Always verify your device type before troubleshooting. A V10 owner seeing solid green on their purifier might incorrectly assume a problem when it’s actually ready.
When Steady Lights Lie: The 2% Exception Cases
Rarely, a solid light appears prematurely due to:
– Cold battery syndrome: After winter storage, lights may falsely indicate “full” until the battery warms during first use
– Firmware glitches: V15 models occasionally show solid blue at 98% capacity (requires full discharge/recharge cycle)
– Damaged contacts: Corrosion on charging pins can trick the system into “thinking” it’s full
If your vacuum dies within 2 minutes despite a solid light, perform this test: Unplug for 5 minutes, then recheck the light. A genuine full charge shows immediate solid light upon reconnection. False readings will revert to pulsing.
Why Your Dyson Light Won’t Stop Flashing (And How to Fix It)
That endlessly blinking light isn’t just annoying—it’s a battery emergency. Lithium-ion cells degrade 20% faster when stuck in partial charge cycles. If your Dyson’s light pulses longer than these thresholds, intervene immediately:
- Vacuums: >4 hours for V7/V8, >5 hours for V10/V11
- Purifiers: >6 hours on battery models
- Zone headphones: >3 hours on charging case
Step-by-Step Flashing Light Rescue Protocol
-
Power-cycle the system (takes 30 seconds):
Unplug charger → Remove battery (if possible) → Hold power button 20 sec → Reconnect everything
Why it works: Resets the battery management system’s error memory -
Inspect contact points (critical for V12/V15):
Shine flashlight on metal pins of vacuum and dock—look for green corrosion or dust buildup. Clean with dry microfiber cloth folded into a triangle point.
Pro tip: Rub contacts with pencil eraser to remove oxidation without scratching -
Test with alternative power sources:
Plug charger directly into wall outlet (not power strip) → Try different outlet in another room → Verify outlet works with phone charger
Warning: If light behaves normally in outlet B but not A, outlet A has voltage fluctuations damaging your battery
If flashing persists after these steps, your battery is likely failing. Most Dyson models show consistent flashing for 2+ weeks before complete failure—replace within 30 days to avoid sudden death.
Prevent Permanent Damage: The Charging Mistakes 90% of Owners Make
Leaving your Dyson plugged in overnight after full charge seems harmless but shaves years off battery life. Lithium-ion cells suffer “voltage stress” when held at 100% for extended periods. Dyson’s built-in safeguards minimize this, but they can’t eliminate degradation from habitual overcharging. Here’s how to charge like a pro:
The 20-80% Sweet Spot for Daily Use
- Ideal daily range: Top up from 30% to 70% instead of 0% to 100%
- Full charge only when needed: Reserve 100% charges for deep cleans >30 minutes
- Storage protocol: For >30 days unused, store at 40-60% charge in cool, dry place
Real-world impact: Users following this method report 50% longer battery life (3+ years vs. 2 years). Your V10 will maintain 85% capacity at year 3 versus 60% for “full cycle” chargers.
Temperature Danger Zones That Break Batteries
- Charging禁区: Below 40°F (4°C) or above 95°F (35°C)
- Critical symptom: Light turns solid too fast in cold environments (false full charge)
- Emergency fix: If charging in cold space, wrap device in towel for 15 minutes before plugging in
Never charge immediately after vacuuming carpet—heat buildup from motors combined with charging heat causes irreversible damage. Let your Dyson cool to room temperature (usually 30-60 minutes) first.
When to Call Dyson Support Before It’s Too Late
Some charging errors require professional help. If you see these signs, stop charging immediately:
– Solid red light (not flashing) on any model
– Alternating red/blue pulses more than 5 times
– Burning smell or visible swelling near battery
Warranty alert: Attempting DIY repairs on charging circuits voids coverage. Contact Dyson within 48 hours of error lights appearing—they often push firmware updates that resolve “faulty battery” errors remotely. For out-of-warranty units, genuine Dyson batteries cost 30-50% less than third-party replacements and include 2-year coverage.
Final Note: You’ll know how to know Dyson is charged by watching for that critical transition from movement to stillness in the indicator light. Solid blue for vacuums, solid green for purifiers—never flashing, never pulsing. Implement the 20-80% charging habit and temperature precautions to double your battery’s lifespan. If lights behave erratically beyond basic troubleshooting, contact Dyson Support before permanent damage occurs. Keep this guide bookmarked for your next charging session—you’ll never second-guess your Dyson’s readiness again. For model-specific light pattern charts, download Dyson’s official Charging Guide from their support portal (search “Dyson charging indicators” in your region).

