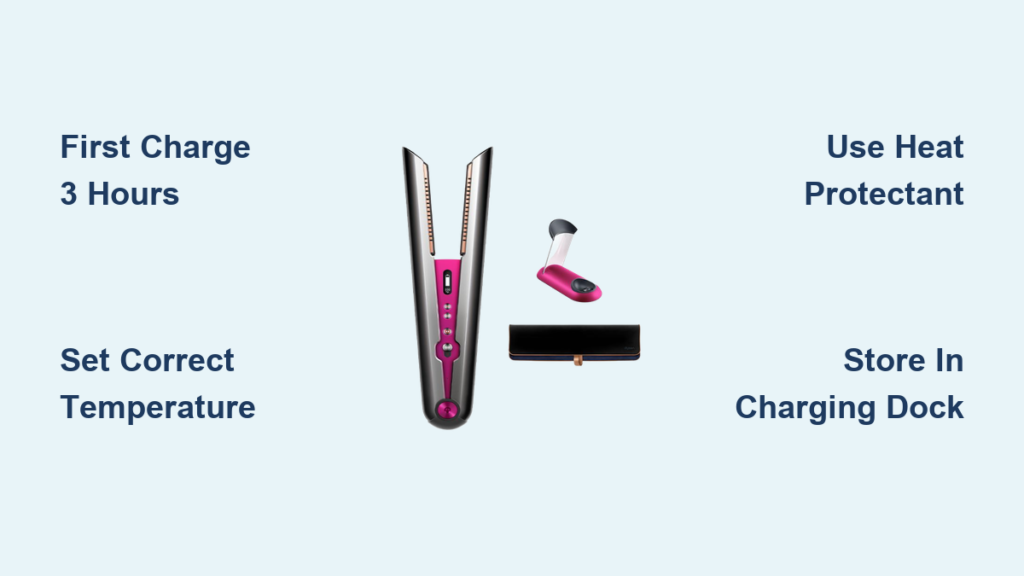
That sleek, futuristic box just arrived at your door—your new Dyson Corrale hair straightener is finally here! But before you can create those perfect waves or achieve pin-straight locks, you need to properly set up your investment. Knowing how to set up Dyson Corrale correctly isn’t just about getting started; it’s about ensuring maximum performance, safety, and longevity for your premium styling tool. Many users skip crucial setup steps, only to face frustrating issues later that could have been prevented with proper initial configuration.
A proper Dyson Corrale setup takes less than 30 minutes but impacts every styling session you’ll have for years to come. Whether you’re upgrading from a traditional straightener or replacing an older Corrale model, following these precise setup procedures guarantees you’ll experience the salon-quality results Dyson promises. This guide delivers exactly what you need to know—no fluff, no guesswork—just actionable steps to get your Corrale ready for its first flawless styling session.
What’s Inside Your Dyson Corrale Box: Verify Before Setup
Your Dyson Corrale packaging contains everything needed for professional styling right out of the box. Before plugging anything in, carefully unpack all components on a clean, flat, heat-resistant surface. You should find:
- The Corrale straightener with flexing copper plates
- Magnetic charging dock with power cord
- Protective heat-resistant storage mat
- Quick Start Guide with safety information
Verify all items are present before proceeding—missing components could compromise your setup process. The charging dock requires special attention as it serves multiple critical functions: powering your device, cooling it after use, and providing safe storage. Position the dock on a stable surface away from edges where it won’t be accidentally knocked over. Keep children and pets away from your setup area, as the charging components contain strong magnets that could be hazardous if mishandled.
First-Time Charging: Avoid Common Power Mistakes
Proper initial charging establishes your Corrale’s battery performance for its entire lifespan. Many users rush this step, leading to reduced battery life and inconsistent heating during styling sessions.
Complete First Charge Procedure:
1. Plug the charging dock’s power cord into a wall outlet that’s easily accessible but away from water sources
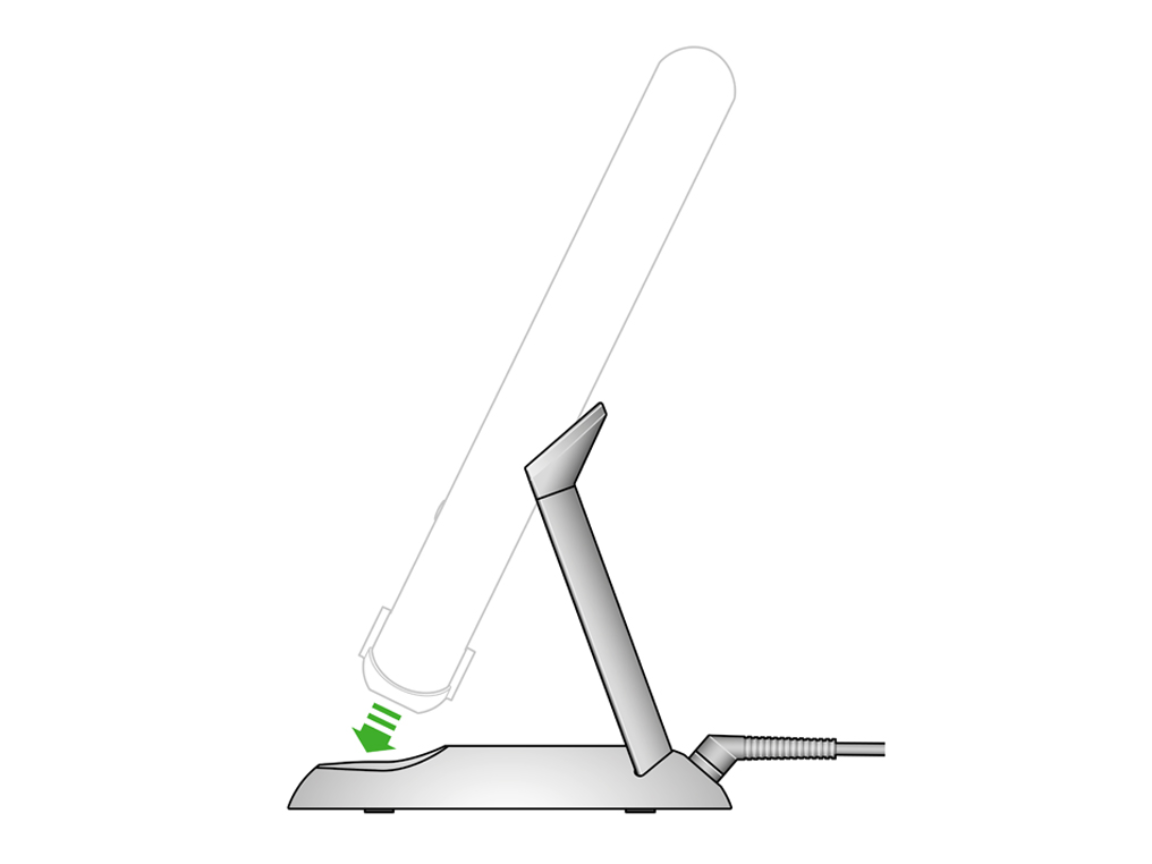
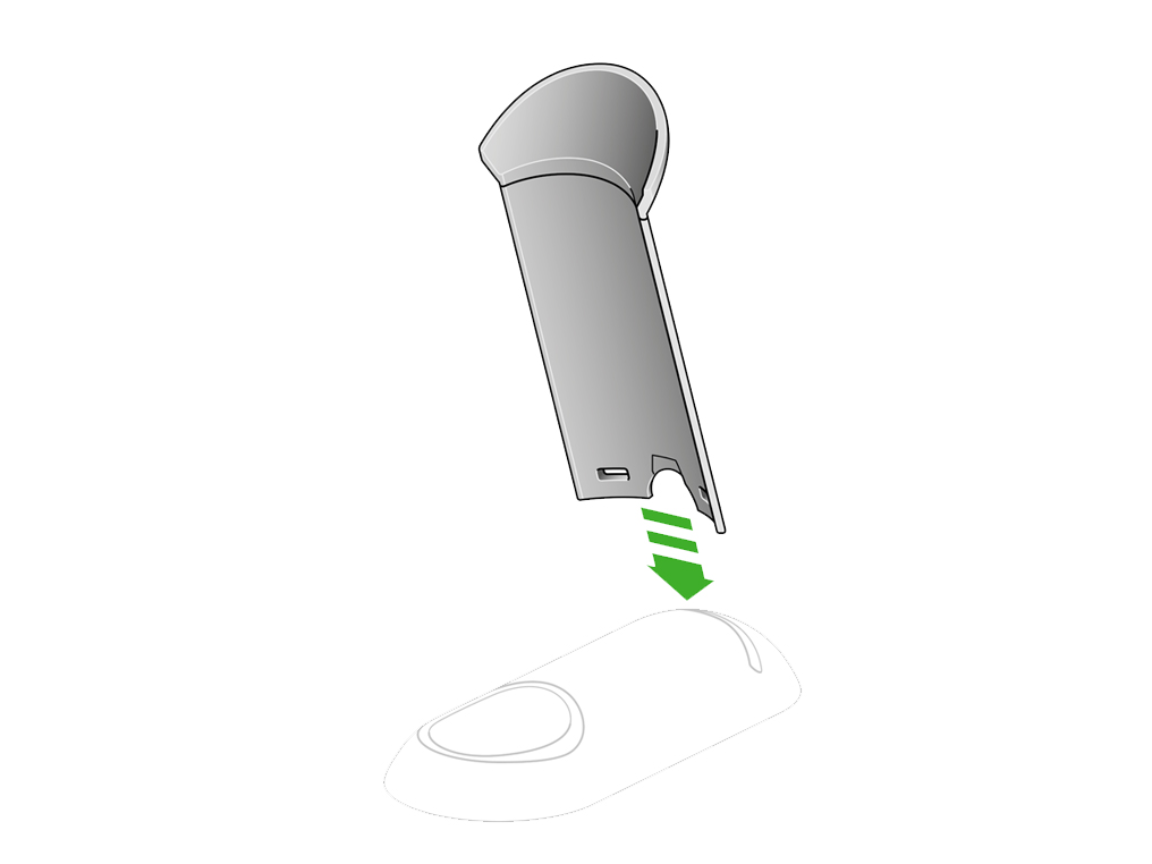
2. Place the Corrale handle into the magnetic cradle—you’ll hear a distinct click confirming proper connection
3. Observe the LED indicator: a pulsing amber light means charging has begun
4. Allow the full 3-hour charge cycle to complete without interruption (this initial charge is longer than subsequent top-ups)
5. A solid white LED indicates 100% charge and readiness for first use
Don’t skip the full initial charge—even if you’re tempted to try your new straightener immediately. Partial charging during this critical first cycle can permanently reduce your battery’s maximum capacity. While waiting, review the temperature settings to determine what works best for your hair type. Remember that the Corrale provides up to 30 minutes of cord-free styling on a full charge, making those initial 3 hours a worthwhile investment in future styling convenience.
Mastering Controls: Set Your Perfect Temperature in Seconds
Understanding your Corrale’s intuitive controls prevents accidental damage to your hair and ensures optimal styling results from day one. The temperature display and adjustment system represents a significant upgrade from traditional straighteners, but only if you know how to use it properly.
Essential Control Functions Explained:
* Power Activation: Press and hold the power button for exactly 3 seconds—less time won’t activate the device, while holding longer serves no purpose
* Temperature Adjustment: Each press of + or - changes the setting by 10°F (5°C) across the 165°F-410°F (70°C-210°C) range
* Battery Check: A quick press shows current charge level through color-coded LEDs (green=sufficient, amber=needs charging, red=critical)
Recommended Temperature Settings by Hair Type:
– Fine or damaged hair: 165°F-265°F (70°C-130°C)
– Medium or color-treated hair: 265°F-300°F (130°C-150°C) – the default daily styling setting
– Thick, coarse, or curly hair: 300°F-410°F (150°C-210°C)
For your first use, perform a “burn-in” cycle by heating to maximum temperature, then allowing complete cooldown. This process stabilizes the heating elements and ensures consistent performance during regular styling. Always wait for the solid green LED indicator before styling—this confirms the plates have reached and stabilized at your selected temperature.
First Styling Session: Achieve Perfect Results Immediately
Your initial styling experience sets expectations for what the Corrale can deliver. Follow these precise techniques to maximize results while protecting your hair.
Professional First-Use Technique:
1. Start with completely dry, clean hair—never style damp hair with the Corrale
2. Section hair into 2-inch wide subsections using clips
3. Position the Corrale close to roots (but not touching scalp) and gently clamp
4. Move slowly down the hair shaft at a steady pace of 1 inch per second
5. For curls or waves, rotate the Corrale as you glide downward
Critical First-Use Mistakes to Avoid:
– Skipping heat protectant – Always apply a thermal protectant spray before first use
– Using excessive tension – Let the Corrale’s flexing plates do the work without pulling
– Repeating passes – One smooth pass per section is sufficient for most hair types
– Ignoring cooldown – Allow the iron to cool completely before storage
The Corrale’s unique flexing copper plates require a different technique than traditional straighteners. Instead of forcing hair between rigid plates, let the copper elements gently conform to your hair’s shape. This reduces breakage while creating more natural-looking results. Take your time with this first session—you’re not just styling hair, you’re learning how your Corrale responds to your specific hair texture.
Proper Storage and Maintenance: Extend Your Corrale’s Lifespan
How you store and clean your Corrale after each use directly impacts its performance longevity. Many users unknowingly damage their expensive tool through improper post-use care.
Daily Post-Styling Routine:
1. Immediately after your last pass, switch off the Corrale with a 3-second power button press
2. Place it upright in the cooling dock—never lay it flat on any surface
3. Allow complete cooling (approximately 30 minutes) before cleaning
4. Once cool, wipe plates with a soft, dry microfiber cloth in downward motions
5. Store in the charging dock with the power cord neatly wrapped
Cleaning Don’ts That Cause Permanent Damage:
– Never use liquids or cleaning solutions on the plates
– Avoid abrasive cloths that scratch the copper surface
– Don’t immerse any part of the Corrale in water
– Never store while still warm—this damages internal components
The charging dock serves triple duty as your Corrale’s power source, cooling station, and storage solution. Keeping your straightener docked when not in use maintains optimal battery health and prevents accidental damage. Unlike traditional straighteners that can be tossed in a drawer, the Corrale requires this specific storage method to preserve its sophisticated internal technology.
Troubleshooting Common Setup Issues Before They Become Problems
Even with perfect setup, you might encounter minor issues. Address these immediately to prevent frustration during future styling sessions.
Why Your Corrale Won’t Power On After Setup:
– Check battery level first – Perform a battery check by pressing the indicator button
– Verify full charge – The initial 3-hour charge is mandatory before first use
– Reset the device – Hold power button for 10 seconds to restart internal systems
– Test different outlets – Some voltage-sensitive outlets may not provide sufficient power
Temperature Control Problems Solved:
– Inconsistent heating – Complete the recommended burn-in cycle before regular use
– Temperature won’t change – Ensure you’re pressing buttons firmly but briefly
– Display not lighting – Clean around buttons with dry cloth to remove residue
If issues persist after these troubleshooting steps, consult Dyson’s official support resources. Never attempt to disassemble your Corrale—this voids the warranty and creates serious safety hazards. Most “defective” units reported by users are actually experiencing simple setup oversights that proper configuration would resolve.
Critical Safety Measures No One Tells You About
Your Corrale contains powerful heating elements and advanced battery technology that require specific safety protocols beyond what’s obvious.
Non-Negotiable Safety Practices:
– Never leave unattended while powered on – The Corrale reaches 410°F in seconds
– Keep at least 3 feet from water sources – Steam can cause electrical hazards
– Use only the official charging dock – Third-party chargers risk battery damage
– Store upright in dock away from flammable materials – Even when cool
The Corrale’s cord-free design creates unique safety considerations. Always place the charging dock on a non-flammable surface like tile or stone—never on wood or fabric that could smolder if accidentally contacted by hot components. Keep the straightener away from children and pets even when stored, as the smooth surfaces and magnetic components present choking hazards.
Mastering how to set up Dyson Corrale properly transforms your styling experience from frustrating to flawless. By following these precise setup procedures, you’ve positioned yourself to enjoy years of salon-quality results with minimal maintenance. Remember that the initial time invested in proper configuration pays dividends through consistent performance, extended tool lifespan, and healthier-looking hair.
Your Corrale’s performance depends on maintaining these setup fundamentals through every use. Regularly revisit these setup guidelines as you become more familiar with your device—many advanced users discover they’ve developed bad habits that compromise results. For the most current information, always refer to your Dyson Corrale’s printed Quick Start Guide and the official Dyson website’s support section. Now that your setup is complete, you’re ready to experience why the Corrale represents the future of hair styling technology.

