Your Dyson V7 suddenly dies mid-clean, refusing to hold a charge even after overnight charging. You’ve tried resetting the vacuum, testing different outlets, and confirming the charger works—but that blinking red light won’t go away. If you’re searching for how to open a Dyson battery pack to diagnose this frustrating failure, you’re not alone. Thousands of V6 and V7 owners face identical issues when their battery packs “brick” unexpectedly. This guide reveals the precise steps to safely open these specific models based on community reverse-engineering, but with critical warnings: Lithium-ion packs can ignite or explode if mishandled. You’ll learn why the BMS (Battery Management System) often fails before the cells die, when replacement beats repair, and exactly how to avoid catastrophic mistakes.
Before touching any tools, understand this isn’t a simple fix. Opening a Dyson battery requires surgical precision—those sealed casings hide volatile 18650 cells that demand respect. This guide covers only V6 and V7 models (newer Dysons use handshake protocols making DIY repair impossible). If your pack is swollen, punctured, or fully charged, stop now and buy a replacement. For others with basic electronics skills, we’ll walk through the teardown process while emphasizing non-negotiable safety rules. You’ll discover why most “dead” batteries actually have healthy cells trapped by a failed BMS—and how to potentially revive them without replacing a single component.
Required Safety Gear and Workspace Setup for Dyson V6/V7 Battery Opening

Skipping proper safety prep turns this repair into Russian roulette. Lithium-ion fires burn at 1,500°F and can’t be extinguished with water. Your workspace must eliminate every ignition risk before you touch the battery.
Must-Have Tools: Torx Screwdrivers and Non-Flammable Surfaces
Gather these before starting:
– Safety glasses and insulated gloves (1000V rating minimum)
– T6 or T8 Torx security screwdriver (Dyson hides screws under labels)
– Plastic spudger (metal tools risk short-circuiting terminals)
– Class D fire extinguisher or bucket of dry sand (water accelerates lithium fires)
– Non-conductive work surface (ceramic tile or concrete—not wood or plastic)
Never use pliers, knives, or metal screwdrivers near exposed terminals. One slip against both poles creates a dead short, instantly vaporizing metal and triggering thermal runaway. Place the battery on ceramic tile over sand in case of ignition. Keep pets and people 10+ feet away—lithium fires release toxic fumes.
Why a 50% Discharged Battery Is Your Only Safe Starting Point
Never open a fully charged or swollen pack. A charged Dyson V7 pack stores 22 watt-hours of energy—equivalent to igniting a small firework inside your home. Fully discharge it first by running your vacuum until it shuts down, then wait 24 hours. Test with a multimeter: If cells read above 3.8V each, discharge further. Below 2.5V? Discard immediately—these are unstable and could ignite during disassembly. If the casing bulges like a puffed chip bag, skip opening entirely and take it to an e-waste facility.
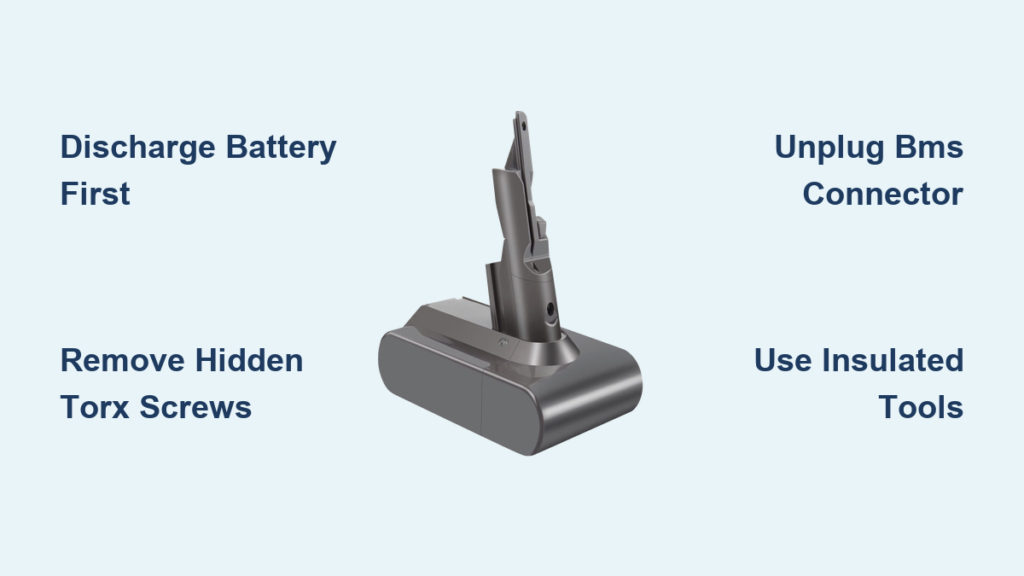
Step 1: Locating Hidden Screws on Dyson V6/V7 Battery Casings
Dyson intentionally conceals entry points to deter tampering. The V6/V7 packs use a deceptive two-part design with screws disguised under branding labels—a trap for inexperienced tinkerers.
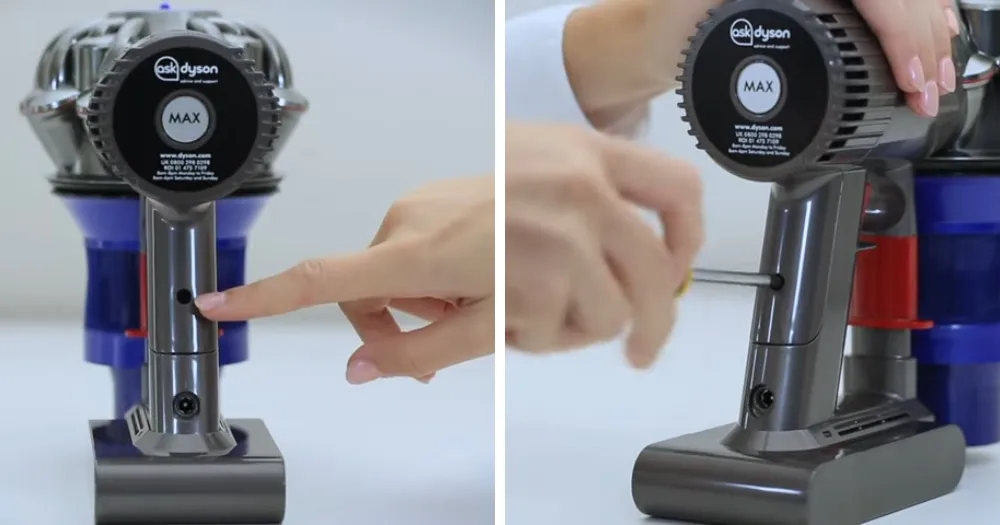
How to Find Torx Screws Under Dyson’s Stickers Without Damage
Peel back the rubber end cap to expose the seam. Most users miss the critical detail: Three Torx screws hide beneath the main label, not visible until you gently lift the adhesive sticker near the charging port. Use your plastic spudger to lift one corner of the label—don’t tear it. You’ll find T8 screws at 12, 3, and 6 o’clock positions. Remove these first; attempting to pry the casing without unscrewing causes internal damage. If screws are stripped (common in older packs), apply firm downward pressure while turning slowly—never force them.
Critical Warning: Avoid Prying Near the BMS Connector
The seam looks uniform, but prying near the top (where the BMS connects) cracks solder joints. Start prying at the bottom center using the spudger, working slowly toward the sides. Apply even pressure—no twisting. If the casing resists, you’ve missed a screw. Forcing it breaks the plastic clips, making reassembly impossible.
Step 2: Safely Disconnecting the BMS to Prevent Instant Short Circuits
This single step causes 90% of DIY lithium-ion disasters. The BMS connector sits millimeters from live terminals—if your spudger slips during disconnection, you’ll trigger a fireball.
Why Unplugging the BMS Connector Is Your Most Critical Move
Inside the pack, three components demand attention:
1. Battery terminals (thick red/black wires)
2. BMS board (small green circuit board)
3. Cell cluster (arranged in 3S2P configuration)
Immediately unplug the main connector from the BMS board using your spudger. Do not touch metal parts. Once disconnected, cover both battery terminals with electrical tape—this isolates the cells from accidental contact. Never assume the vacuum being “off” makes it safe; residual current remains. If you smell ozone or see smoke during disconnection, drop everything and retreat to a safe distance.
Step 3: Diagnosing Why Your Dyson V6/V7 Battery “Bricked”
Most users assume dead cells killed their battery, but community testing proves otherwise. The real culprit? Dyson’s flawed BMS design that permanently locks when cells drift out of balance.
The 300mV Imbalance Threshold That Kills Your Battery
Dyson V6/V7 BMS boards lack cell-balancing circuits despite using ICs that support them. This means:
– Cells naturally degrade at different rates during charging cycles
– Once any cell hits 300mV higher or lower than others, the BMS “bricks”
– The vacuum shows 32 red flashes or won’t power on—even with healthy cells
Test each 18650 cell with a multimeter. Healthy Sanyo NCR-18650B cells read 3.6-3.8V when discharged. If all measure within 0.1V of each other but the pack fails, the BMS is faulty—not the cells. Replacing cells won’t fix this; you’d need to reflash the BMS firmware, which requires soldering skills and specialized tools.
Why V6/V7 Packs Don’t Need Handshakes (Unlike Newer Models)
Crucially, V6/V7 vacuums don’t authenticate batteries digitally. As reverse-engineering confirms, “pulling the trigger literally just actuates a switch on the battery.” If your reassembled pack powers on but dies quickly, cells are imbalanced—not incompatible. Newer Dysons (V8+) use encrypted handshakes, making DIY repairs futile. Stick to V6/V7 for this process.
Step 4: Reassembling Your Dyson Battery Without Creating Fire Risks
Reassembly is where most DIYers cause future hazards through rushed connections. One misplaced wire turns your repaired pack into a time bomb.
When to Use Electrical Tape vs. Spot Welding for Cell Replacement
If replacing cells:
– Never solder directly to 18650s—heat damages internal layers causing fires
– Must use nickel strips and spot welder (cheap Chinese welders often underpower)
– Insulate every terminal with Kapton tape before clustering cells
For BMS reconnection: Align the connector perfectly before pressing down. A misaligned plug creates arcing that melts plastic. After reassembly, perform a “smoke test”: Power on the vacuum in a sand-filled container for 10 minutes. If you smell burning plastic or see smoke, disconnect immediately—it’s unsafe.
Critical Fire Hazards: What Happens When You Short a Lithium-Ion Pack
Understand the consequences before proceeding. A short circuit between terminals:
– Generates temperatures exceeding 1,100°F in 0.5 seconds
– Causes electrolyte vaporization, rupturing the cell casing
– Releases flammable gases that ignite on contact with air
Never place metal tools near terminals. One technician reported a screwdriver shorting his V7 pack: “The tool melted through the workbench, setting the concrete on fire. Sand smothered it, but the room filled with hydrofluoric acid fumes.” Keep sand within arm’s reach at all times.
When Replacement Beats DIY: Finding Genuine Dyson Batteries
For 80% of users, buying a replacement is smarter than opening the pack. iFixit and authorized recyclers sell tested V6/V7 packs for $40-$60—far safer than risking a house fire.
Why Third-Party Packs Beat DIY for Most Homeowners
Consider these realities:
– BMS reflashing requires EEVBlog-level expertise (clearing EEPROM bits isn’t beginner-friendly)
– Even with healthy cells, imbalances recur without balancing circuits
– A single punctured cell during disassembly voids all safety
If your vacuum is out of warranty, a $50 third-party battery from iFixit avoids all risks. OEM packs are scarce for discontinued models, but reputable sellers test cells and BMS functionality.
Final Safety Check: Testing Your Repaired Dyson Battery Before Use
Never install a freshly reassembled pack without validation. Charge it on a non-flammable surface while monitoring with an infrared thermometer. If any spot exceeds 120°F during the first charge cycle, disconnect immediately—that’s pre-failure heat.
If your vacuum powers on but cuts out quickly, cells are imbalanced. Manually rebalance them using a Nitecore D4 charger before resealing the pack. But if you’re unsure at any stage, stop. Your Dyson isn’t worth burns or property damage. As one EEVBlog member warns: “I got lucky with my phase-1 error, but lithium-ion gives no second chances.” When in doubt, buy a certified replacement—your safety is non-negotiable.
Final Note: This guide strictly covers V6/V7 models for educational purposes. Lithium-ion repair carries inherent risks of fire, explosion, and toxic exposure. All procedures assume full responsibility rests with the user. Dyson’s newer models cannot be repaired using these methods due to encrypted battery handshakes. For non-technical users, professional replacement remains the only safe solution.

