Your Dyson vacuum cleaner’s charger suddenly failing can bring your entire cleaning routine to a screeching halt. When your cordless vacuum won’t charge, you’re left staring at blinking lights or complete darkness instead of the reassuring green indicator. This comprehensive guide gives you the exact steps to diagnose and fix your “dyson vacuum cleaner charger not working” problem, whether you own a V7, V8, or V10 model. By the time you finish reading, you’ll know precisely how to identify the culprit and get your vacuum back in action—without unnecessary trips to customer service or costly replacements.
Identify Your Specific Dyson Charging Failure Pattern
Before diving into repairs, you need to pinpoint exactly what’s wrong with your Dyson’s charging system. Different light patterns and behaviors indicate specific problems, and misdiagnosing can waste your time on unnecessary fixes. Your Dyson’s charging system involves multiple components that must work together: the wall outlet, power adapter, charging cable, charging dock (if applicable), charging port on the vacuum, battery, and internal circuitry.
Decode Your Dyson’s Charging Indicator Light Patterns
Your Dyson communicates its charging status through specific light sequences—learning to read these is your first diagnostic tool:
- Solid blue or amber light: Normal charging in progress (varies by model)
- Solid green or blue light: Fully charged (model-dependent)
- Flashing red light: Critical charging fault requiring immediate attention
- Red and blue alternating flash: Battery or charging circuit communication failure (common on V8 models)
- No lights at all: Complete power failure in the charging chain
Pro tip: Note exactly how many times the light flashes before pausing. Some Dyson models use specific flash patterns to indicate particular faults. A red light flashing 3 times then pausing often indicates a battery issue, while 5 flashes might point to a charger problem.
Confirm Whether It’s the Charger or Vacuum at Fault
The most common mistake people make is assuming the entire vacuum is broken when the problem might be as simple as a faulty wall outlet. Before you panic:
- Test your wall outlet with another device like a phone charger or lamp
- Check for tripped GFCI outlets in nearby bathrooms or kitchens
- Try a different power cord if your Dyson uses a detachable power cable
- Bypass the charging dock by connecting the charger directly to your vacuum’s port
If your vacuum powers on when you hold the trigger while the charger is connected (but won’t hold a charge), the battery is likely the culprit rather than the charger itself.
Immediate Fixes for Dyson Charger Connection Problems
Many “dyson vacuum cleaner charger not working” issues stem from simple connection problems that take minutes to resolve. These are the most common fixes that solve charging problems for 70% of users before they need to consider more complex solutions.
Clean Your Charging Contacts with Isopropyl Alcohol
Dust, hair, and oxidation buildup on charging contacts is the #1 preventable cause of charging failures. Over time, this grime creates an insulating layer that blocks electrical flow.
-
What to do: Unplug everything first. Dip a cotton swab in 91% isopropyl alcohol (not rubbing alcohol, which contains oils) and gently clean the small gold contacts on both your vacuum and charging dock. For the vacuum’s port, use compressed air first to blow out debris, then wipe with alcohol. Let everything dry completely for 10 minutes before attempting to charge again.
-
Warning: Never use water, household cleaners, or metal objects to clean contacts—this can cause corrosion or short circuits.
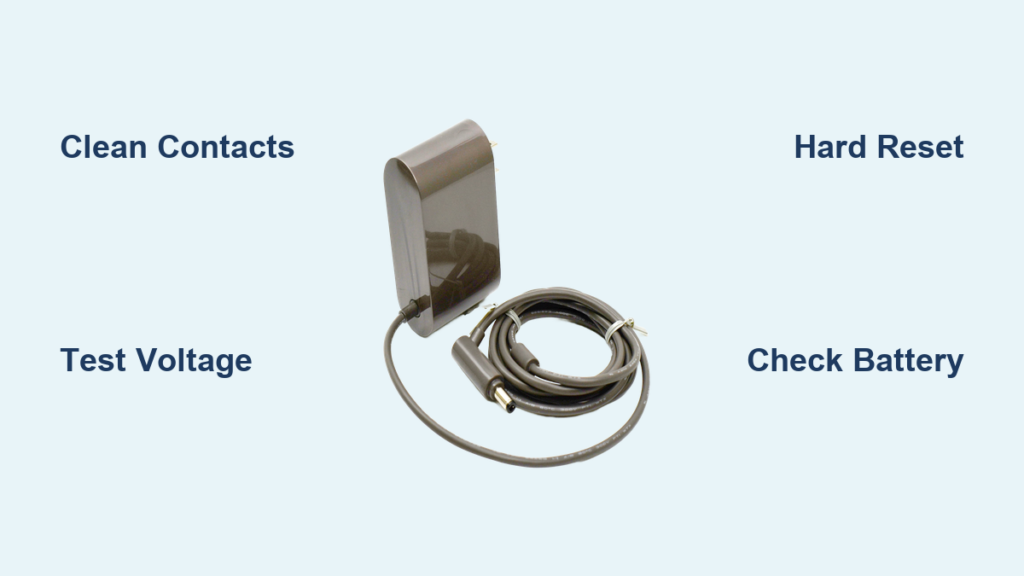
Verify Your Charger’s Output Voltage with a Multimeter

A faulty charger is the second most common issue. Many users waste money replacing batteries when the real problem is a dead charger.
-
Test procedure: Set a multimeter to DC volts (200V range). Unplug the charger’s low-voltage end. Touch probes to the inner pin and outer ring of the DC connector. A working V8/V10 charger should read approximately 31.4V DC. Significantly lower voltage (below 28V) or zero indicates a bad charger.
-
Model-specific specs: V7/V8 models need 21.6V/32.4W chargers while V10/V11 require 32.4V/70W units. Using the wrong charger causes slow or failed charging.
Battery-Specific Troubleshooting for Non-Charging Dysons
When your Dyson vacuum cleaner charger not working issue persists after checking connections, the battery is likely failing. Lithium-ion batteries degrade over time, and Dyson’s high-power demands accelerate this process.
Test Your Dyson Battery Voltage

A deeply discharged or dead battery won’t accept a charge, making it appear that your charger has failed.
-
How to test: Remove the battery (if possible on your model). Set your multimeter to DC volts. Touch probes to the battery terminals. A healthy V8 battery should read 20-30V. Below 16V often indicates a battery that’s too discharged for the charger’s safety circuit to engage.
-
Critical warning: If your battery is swollen, hot, or leaking, stop all charging attempts immediately. These are serious safety hazards requiring battery replacement.
Perform a Hard Reset on Your Dyson Vacuum
Electronic glitches can trick your vacuum into thinking there’s a charging problem when everything is physically fine.
- Unplug the charger from the wall
- Press and hold the power trigger for 20-30 seconds
- While continuing to hold the trigger, plug in the charger
- Hold for another 10 seconds, then release
This process resets the vacuum’s power management system, often clearing false error codes that prevent charging.
When to Replace Components vs. Your Entire Vacuum

Not every charging problem requires a new vacuum. Knowing when to replace specific parts saves you hundreds of dollars compared to buying a replacement unit.
Battery Replacement Guidelines
Replace your Dyson battery if:
* It’s more than 2-3 years old (typical lifespan with daily use)
* Runtime has dropped below 15 minutes on max power
* Voltage tests below 16V and won’t recharge
* You see physical swelling or damage
Cost comparison: Genuine Dyson batteries cost $70-100 while quality third-party options run $40-80. Compare this to a new vacuum costing $300-800—battery replacement is almost always the economical choice.
Charger and Dock Replacement Strategy
Your charger is the most affordable component to replace:
* Genuine Dyson charger: $50-80
* Compatible third-party charger: $20-40
* Charging dock replacement: $15-50
Critical compatibility note: Always verify voltage and polarity match your model. A V8 requires 31.4V 0.3A—using a higher voltage charger risks permanent damage.
Prevent Future “Dyson Vacuum Charger Not Working” Problems
The best fix is preventing the problem altogether. Implement these maintenance practices to extend your Dyson’s charging system lifespan.
Monthly Charging System Maintenance Routine
- Clean contacts with isopropyl alcohol every 30 days
- Store at 40-60% charge if not using for extended periods
- Avoid complete discharges—recharge when battery drops to 20%
- Keep in cool, dry place away from direct sunlight or heat sources
Pro tip: Never leave your Dyson charging unattended overnight. Lithium-ion batteries perform best with partial, frequent charges rather than full discharge/recharge cycles.
When to Seek Professional Help
Contact Dyson support or a certified repair center if:
* You’ve tested and replaced both charger and battery with no success
* You detect burning smells or excessive heat during charging
* Your vacuum shows physical damage to the charging port
* The unit is still under warranty (typically 2 years)
Important: Attempting internal repairs on modern Dyson models often voids any remaining warranty and risks electrical damage. Unless you’re experienced with electronics repair, leave internal component replacement to professionals.
Final Verification Steps Before Replacement
Before deciding your Dyson is beyond repair, complete this verification checklist:
- Tested outlet with another device ✅
- Cleaned all charging contacts with 91% isopropyl alcohol ✅
- Verified charger output with multimeter (31.4V for V8) ✅
- Tested battery voltage (20-30V when functional) ✅
- Performed hard reset procedure ✅
- Tried different power sources and cables ✅
If all these checks confirm your charger, battery, and connections are functional yet your “dyson vacuum cleaner charger not working” problem persists, the issue likely involves internal circuitry requiring professional service. However, in 9 out of 10 cases, one of the simple fixes in this guide resolves the charging problem without costly replacements.
By following this systematic approach, you’ve transformed from frustrated user to informed troubleshooter—saving time, money, and the headache of unnecessary vacuum replacement. Regular maintenance prevents most charging issues, so make contact cleaning part of your monthly household routine to keep your Dyson running reliably for years to come.

