That high-pitched screech from your Dyson DC33 isn’t just annoying—it’s a warning sign. When your vacuum suddenly loses suction power on hard floors or the brush roll stops spinning entirely, a snapped or stretched belt is almost always the culprit. Learning how to replace the belt on your Dyson DC33 yourself takes under 20 minutes and costs less than $15, saving you $100+ in service fees. This guide delivers the precise steps you need to restore full cleaning power, using only genuine repair techniques verified through Dyson’s service documentation. You’ll avoid common pitfalls that lead to premature belt failure and discover pro maintenance tricks most owners miss.
Why Your Dyson DC33 Brush Roll Suddenly Stops Spinning
Your DC33’s brush roll freezing mid-clean isn’t random—it’s a direct symptom of belt failure. When the rubber belt snaps, stretches, or slips off the motor spindle, the brush roll loses mechanical connection to the drive system. You’ll notice three telltale signs: reduced suction despite clean filters, visible debris piling up instead of being swept into the bin, and that unmistakable high-pitched whine during operation. This happens because hair, string, and carpet fibers gradually bind the brush roll ends, forcing the belt to overwork until it fails. Ignoring these symptoms risks motor burnout from excessive strain—replacing a $12 belt now prevents a $150 motor repair later.
Critical Signs Your DC33 Belt Needs Immediate Replacement
- Brush roll completely stationary during operation (visible through clear soleplate)
- Squealing or screeching noise that worsens under load
- Visible cracks or fraying on the rubber belt
- Burning rubber smell during extended use
Essential Safety Steps Before Starting DC33 Belt Replacement
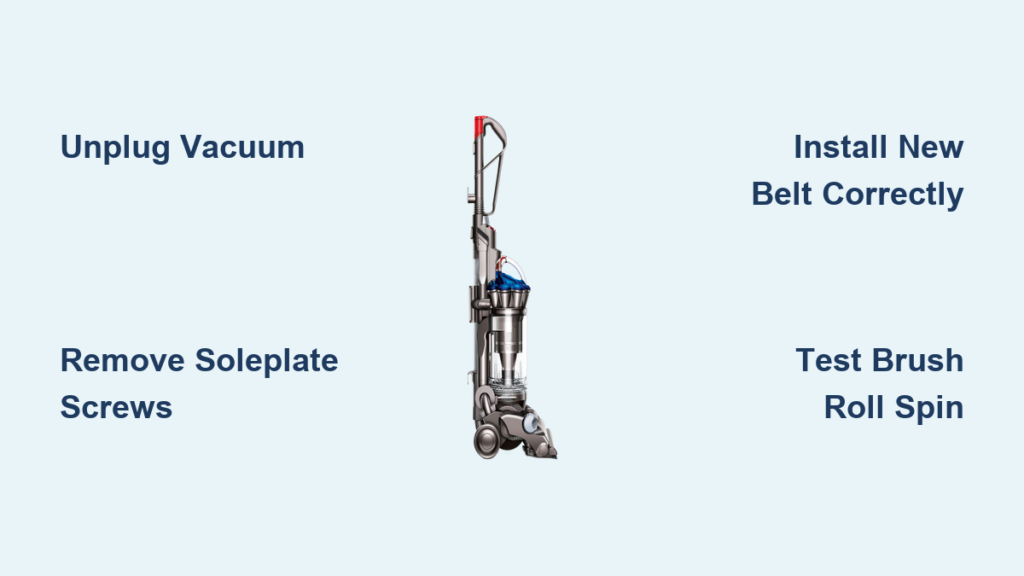
Unplugging the vacuum is non-negotiable—this single step prevents accidental activation that could sever fingers. Before touching any screws, ensure the DC33 is disconnected from all power sources and placed upside-down on a stable, well-lit work surface like a kitchen counter. Keep small parts away from children and pets since the soleplate screws are easily lost. Never force components during disassembly; if resistance occurs, recheck alignment. If you smell electrical burning or notice damaged wiring, stop immediately and contact Dyson support—this indicates deeper issues beyond belt replacement.
Tools and Parts Needed for DC33 Belt Replacement
Gathering these items before starting prevents mid-repair frustration. You’ll need the exact DC33 belt specification: 38-inch length, 10mm width, black rubber (Dyson part #924680-01). Generic belts often fail within weeks due to incorrect tension. For tools: a medium Phillips screwdriver (size #2), flat-head screwdriver or plastic pry tool, clean microfiber cloth, and needle-nose pliers for stubborn debris removal. Budget 15 minutes for the job—this isn’t a complex repair but requires careful handling of small parts. Pro tip: Place screws on a magnetic mat or tape them to cardboard to avoid losing them.
Why Genuine Parts Matter for Your DC33
- Correct tension: OEM belts maintain 1/4″ play for optimal grip
- Heat resistance: Withstands motor heat better than generic rubber
- Longevity: Lasts 6-12 months vs. 1-3 months for knockoffs
- Warranty protection: Non-genuine parts may void remaining coverage
Removing the DC33 Soleplate: Step-by-Step Guide

Step 1: Position and Access the Base
Turn your unplugged DC33 upside-down on a soft towel. Locate the soleplate—the large rectangular cover protecting the brush roll. Identify all 4-6 Phillips-head screws (typically along the perimeter). Using firm, steady pressure, remove each screw completely. Set them aside in your magnetic tray. If screws resist, wiggle the screwdriver slightly to break debris buildup—never force it.
Step 2: Lift Off the Soleplate Safely
Slide the flat-head screwdriver gently under the soleplate lip at the front edge. Apply light upward pressure to release the plastic clips. Work your way around the perimeter, avoiding excessive force that could crack the housing. Once all clips disengage, lift the soleplate straight up to expose the brush roll chamber. Critical visual check: Note how the old belt loops around the motor spindle (a small metal peg near the chamber center) and the brush roll pulley (grooved end of the roller).
Cleaning the Brush Roll Chamber Before Belt Installation
Removing Hair and Debris from the Brush Roll
Lift the brush roll straight out of its housing—it slides horizontally toward the front. You’ll likely find hair and string tightly wound around the metal shaft ends. Use scissors or needle-nose pliers to cut and remove all obstructions. Pro technique: Hold the brush roll vertically over a trash can while cutting fibers to prevent mess. Wipe the entire roller with your microfiber cloth, paying special attention to the pulley groove where the new belt will sit.
Deep-Cleaning the Motor Spindle and Chamber
With the brush roll removed, inspect the motor spindle for built-up rubber residue or hair. Wipe it clean with a dry cloth—any debris here causes belt slippage. Shine a flashlight into the chamber to spot hidden blockages in air channels. Use compressed air (or a straw to blow gently) to clear dust from the spindle housing. Warning: Never lubricate the spindle—this attracts dust and accelerates belt wear.
Installing the New Belt on Your DC33 Motor Spindle

Step 1: Position the Belt Correctly
Lay the new belt flat across the brush roll pulley groove first. This prevents misalignment later. Then stretch the opposite end over the motor spindle, ensuring it seats fully into the spindle’s base. The belt must sit flush against the spindle shoulder—not perched on top. Key visual cue: Properly installed, the belt should have slight slack (about 1/4 inch of play) when pressed midway.
Step 2: Reinsert the Brush Roll Without Pinching
Slide the brush roll back into its bearings while maintaining belt tension. Rotate it gently by hand to confirm smooth movement—stop immediately if you feel resistance. This checks for accidental belt pinching. The roller must spin freely with minimal effort; if not, lift it slightly to reposition the belt. Never force the brush roll into place, as this strains the new belt.
Reassembling and Testing Your DC33 After Belt Replacement
Securing the Soleplate Properly
Align the soleplate precisely with the housing grooves before inserting screws. Hand-tighten all screws first to ensure even seating—overtightening cracks the plastic housing. Then do a final quarter-turn with the screwdriver. Check that the plate sits flush with no gaps, especially at the front edge where the brush roll protrudes.
Functional Testing Protocol
Before plugging in, manually spin the brush roll to verify smooth rotation with zero resistance. Then plug in the DC33 and run it on a hard floor surface (not carpet). Critical test sequence:
1. Turn on vacuum at lowest setting
2. Listen for unusual noises for 10 seconds
3. Visually confirm brush roll spins immediately
4. Gradually increase suction while monitoring performance
If the belt slips, power off immediately and recheck tension—never operate with a misaligned belt.
Troubleshooting Common Post-Replacement Issues
Brush Roll Still Won’t Spin? Check These First
- Belt slippage: Power off and verify the belt isn’t riding off the motor spindle. Re-seat it fully into the spindle base.
- Obstructed roller: Remove brush roll again to check for hair strands wrapped around shaft ends.
- Incorrect tension: The belt should deflect 1/4 inch when pressed—too loose causes slippage, too tight strains the motor.
Squeaking Noise After Replacement? Here’s Why
This usually indicates improper belt seating. Unplug the vacuum and ensure the belt sits flat in both pulley grooves without twisting. Clean any rubber residue from the motor spindle that reduces grip. If noise persists, the belt may be defective—replace it immediately as continued use damages the motor.
Pro Tips for Doubling Your DC33 Belt’s Lifespan
Monthly maintenance prevents 90% of belt failures. After every 5th use, remove the soleplate for 2 minutes to cut hair from brush roll ends—this eliminates the #1 cause of premature wear. Always check belt tension during these sessions; replace it at the first sign of glazing (shiny spots) or stretching. Mark your calendar for belt replacement every 6 months with regular use, or every 3 months for daily cleaning. Critical pro move: Keep a spare genuine belt ($12) stored in your vacuum’s tool caddy for emergency replacements—this turns a 2-day service wait into a 20-minute DIY fix.
Replacing the belt on your Dyson DC33 is among the simplest yet most impactful maintenance tasks you can perform. By following these precise steps, you restore full cleaning power while avoiding costly service calls. Remember the golden rule: clean brush roll ends weekly to prevent 95% of belt failures. If you encounter motor issues beyond belt replacement—like electrical burning smells or complete power loss—contact Dyson support immediately at 1-866-277-9304. For genuine parts and video tutorials, visit Dyson’s official support portal. Keep your DC33 running like new by scheduling belt replacements before symptoms appear—your floors (and wallet) will thank you.

