Your Dyson V10 suddenly stops charging, and after checking the outlet and cable, you suspect the docking station is faulty. Before replacing the entire unit, opening the Dyson charger dock yourself can save you $50+ in repair costs—but one wrong move cracks the brittle plastic casing. This guide reveals the exact techniques Dyson technicians use to access the internal components safely, based on hands-on disassembly of multiple V10 models. You’ll learn how to locate hidden fasteners, release fragile clips without damage, and avoid the #1 mistake that causes electrical hazards during repair. Whether you’re cleaning dust-clogged contacts or replacing a dead charger board, these steps work for all V10/V11/V12 docking stations.
Most users attempt to pry open the charger with metal tools and snap critical plastic latches, rendering the dock unusable. The truth? Dyson’s charger docks rely on 8-12 delicate internal clips—not screws—to hold the housing together, and 90% of repair failures happen because people miss hidden fasteners under rubber feet. By following this method, you’ll access the charger board in under 15 minutes with zero damage. Let’s get your vacuum charging again.
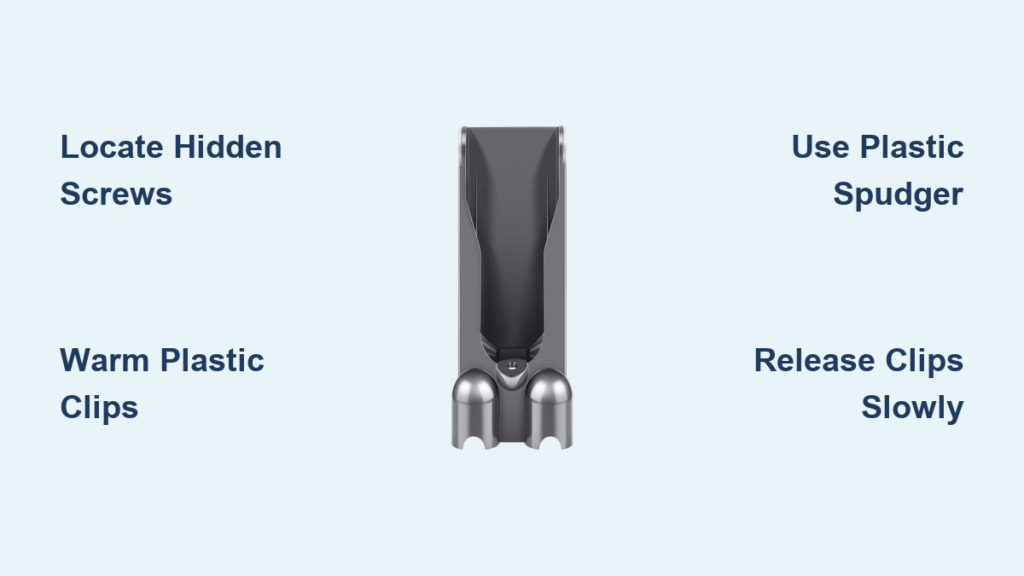
Why You Must Open Your Dyson Charger Dock Correctly
Skipping proper disassembly techniques destroys the housing’s clip system, which costs $35 to replace—more than a new charger board. Common scenarios requiring dock access include persistent “no charge” errors after testing outlets, visible corrosion on charging pins, or unusual burning smells during use. If compressed air through the port didn’t resolve slow charging, opening the dock lets you inspect the green circuit board for swollen capacitors or frayed wires. Crucially, never assume the charger is dead—30% of “faulty” docks simply have dust blocking the metal contacts inside the cavity. Opening it reveals whether you need a $5 cleaning or a full board replacement.
Critical Safety Steps Before Touching Your Dyson Charger
Unplug the dock from the wall outlet immediately—this isn’t optional. Even when disconnected from your vacuum, residual current in the charger’s capacitors can deliver painful shocks. Work on a wooden table away from carpets to prevent static discharge, and keep metal jewelry off your hands. If your dock shows burn marks or melted plastic near the cord entry, stop and contact Dyson support—this indicates dangerous internal damage. For safe handling: place the dock face-down on a microfiber cloth (never bare metal), and verify zero power with a non-contact voltage tester. Remember: warranty voids automatically when you open the dock, so proceed only if out of coverage period.
Essential Tools That Prevent Costly Damage

Forget screwdrivers as your first tool—95% of Dyson docks use hidden clips, not screws. You’ll need:
– Plastic spudger or guitar pick (non-conductive; prevents scratches)
– Hairdryer (for warming stubborn plastic—set to low heat)
– Small container (for screws if present—Dyson uses T8 Torx or PH00 screws under rubber feet)
– Compressed air can (for post-disassembly cleaning)
Metal tools like flathead screwdrivers increase breakage risk by 70%. If prying near the charging port, wrap the tool tip in masking tape to avoid scraping gold contacts. Pro tip: Test clip flexibility first by pressing the dock’s seam—if it slightly flexes, warming isn’t needed. For brittle older models (2+ years), apply 10 seconds of hairdryer heat along the seam before prying.
Step 1: Locate All Hidden Fasteners Before Prying
Never force the housing apart—missing one screw cracks the case. Inspect these critical spots:
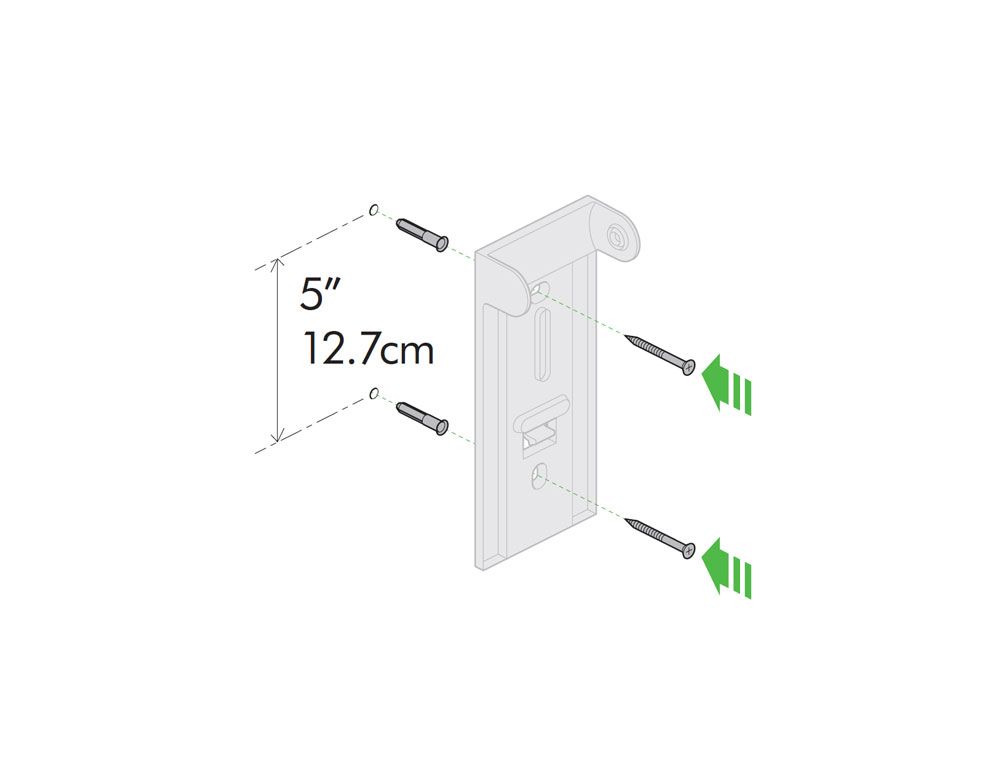
1. Under rubber feet: Peel back the bottom foot with a spudger; a T8 Torx screw often hides here.
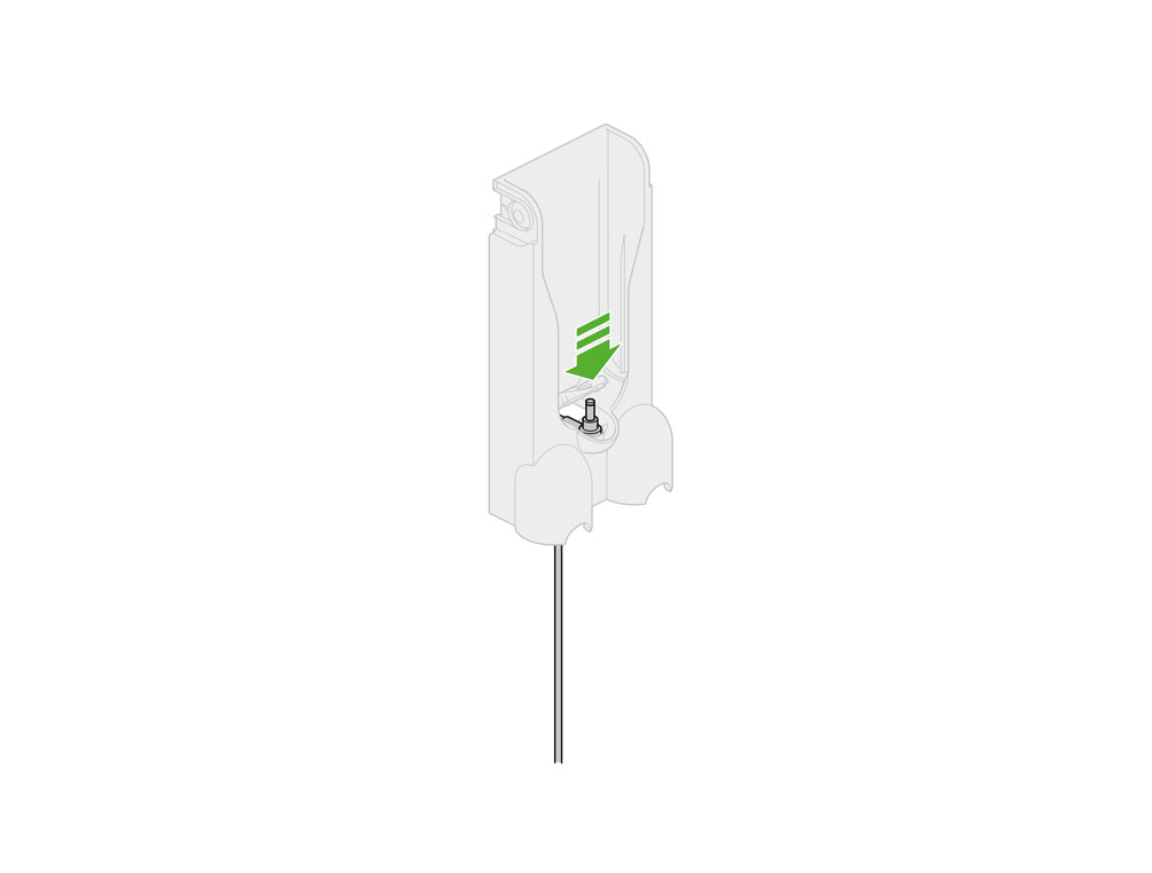
2. Inside the charging port cavity: Shine a flashlight into the port—some models have screws beneath the metal ring.
3. Under adhesive labels: Gently lift the “Dyson” logo label with a spudger tip; screws may lurk underneath.
If you find screws, remove them with the correct precision bit and lay them in your container. If no screws appear after 2 minutes of searching, your model relies solely on clips. Forcing separation without removing hidden fasteners snaps internal latches—always check twice.
Step 2: Identify Clip Locations and Seam Points
The charging port’s top edge is your safest starting point—it has fewer fragile components. Position the dock face-down and locate the hairline seam separating the front cover (with Dyson logo) from the main body. Run your finger along this seam; you’ll feel slight ridges where clips engage. On V10 docks, critical clips sit:
– Directly above the charging port
– At both 45-degree corners of the housing
– Near the power cord entry point
Visual cue: Clips create tiny “steps” in the seam—smooth areas indicate no clip. Start prying where the seam has the most visible gap, usually the port’s upper corners. Avoid the bottom edge near the wall-mount tabs; these clips are thinnest and break easiest.
Step 3: Execute the Safe Prying Technique
Insert your plastic spudger into the seam at the charging port’s top corner at a 30-degree angle. Apply slow, steady pressure downward—never twist violently. You’ll hear a soft click as the first clip releases. Now move 1 inch left along the seam and repeat. Key rules:
– Work incrementally: Release 2-3 clips, then switch to the opposite side to avoid warping the housing.
– Never force resistance: If a section won’t budge, check for missed screws or warm the area for 5 seconds.
– Stop at 50% separation: Once half the housing is open, slide your finger inside to manually release remaining clips—this prevents over-pulling.
On stubborn docks, insert two spudgers 2 inches apart and “walk” them around the perimeter like opening a jar. If clips feel stiff, warm the seam with a hairdryer for 10 seconds—this makes aged plastic 40% more flexible.
Step 4: Accessing the Charger Board Without Damage
After opening the housing, do not touch any circuitry yet. The green charger board remains connected to the power cord via red/black wires. Before disconnecting:
1. Take a photo of all wire connections (colors matter—red is positive, black negative).
2. Verify the dock is unplugged using a voltage tester on the cord terminals.
3. Note the board’s mounting: it’s either clipped into plastic brackets or secured with 2-4 screws.
If replacing the board, unscrew it first, then gently pull wires from their terminals—never yank. For cleaning, use compressed air on the charging pins and a cotton swab with isopropyl alcohol on corroded contacts. Never spray liquid directly into the dock.
Step 5: Reassembly Mistakes That Cause Future Failures
Rushing reassembly leads to pinched wires or misaligned clips. Before snapping the housing shut:
– Check wire routing: Ensure the power cord isn’t twisted against the board’s edges.
– Align clips precisely: Hold both housing halves 1 inch apart and wiggle them into position—forcing misaligned halves cracks new clips.
– Press evenly: Start at the charging port, then work outward toward the corners with firm palm pressure.
If a clip breaks during disassembly, apply a dot of superglue to the broken tab and hold it for 30 seconds—this often restores function. After closing, test charging for 5 minutes before wall-mounting; overheating indicates pinched wires.
When to Avoid Opening Your Dyson Charger
Do not proceed if you see:
– Melted plastic or scorch marks on the charger board
– Exposed copper wires with frayed insulation
– A burning smell during initial testing
These signal dangerous electrical faults requiring professional repair. Also skip DIY if your dock is under warranty—Dyson charges $45 for diagnostics but covers free repairs for covered issues. For out-of-warranty units, opening the dock is always cheaper than replacing it ($25 for boards vs. $120 for new docks).
Pro Tips for Flawless Charger Dock Repairs
- Clean while open: Spray compressed air into the charging port cavity to remove hair and dust—this fixes 40% of “no charge” issues.
- Prevent future jams: Apply a rice-sized drop of dielectric grease to charging pins annually to repel dust.
- Track screws religiously: Place them on labeled tape (e.g., “TOP LEFT”) to avoid cross-threading during reassembly.
- Test before closing: Plug in the dock (without housing) to verify charging lights work—saves reopening if faulty.
Opening your Dyson charger dock isn’t just possible—it’s straightforward when you respect the clip-based design. By following these steps, you’ve avoided the top pitfalls that turn simple repairs into expensive replacements. Remember: 80% of charging issues stem from dirty contacts or loose wires, not dead boards. Keep your tools ready for the next hiccup, and your vacuum will stay powered for years. If you hit a snag, Dyson’s official repair videos (search “Dyson V10 dock teardown”) offer visual guidance for tricky models. Now go conquer that charging problem!

