Your Dyson vacuum loses half its value when it’s constantly tripping over cords or gathering dust in a closet. A properly installed docking station transforms your cleaning routine by keeping your machine charged, organized, and instantly accessible—while preventing costly damage from accidental drops. Yet 68% of failed installations stem from skipping critical mounting steps that compromise stability. This guide cuts through the confusion with a model-specific approach to how to install Dyson docking station systems correctly, covering V7 through Outsize models. You’ll learn exactly where to drill, which anchors prevent wall damage, and how to route cables safely—so your mount lasts for years without wobbling or pulling loose.
Why Your Dyson Dock Mounting Location Determines Longevity
Choosing the wrong spot creates a ticking time bomb for your vacuum. Most users mount docks too low, forcing awkward bending when grabbing the wand, or too high where the vacuum becomes unstable during removal. The ideal location balances three critical factors: power access, user height, and wall integrity. For powered docks (V8-V15), position within 18 inches of an outlet to avoid dangerous cable stretching—never drape cords over baseboards where foot traffic can snag them. Measure from the floor to the primary user’s hip level; this ensures the wand sits at a natural lifting height without straining your back. Crucially, avoid exterior walls (which contain insulation gaps) and kitchen/bathroom tiles (where drilling risks shattering). Your dock must anchor into solid structural material—drywall alone won’t support 5+ lbs of vacuum without proper reinforcement.
Finding the Power-Safe Zone for Cord Management
Before marking walls, test your charging cable reach. Plug the adapter into your chosen outlet and extend the cord fully while holding the dock in position. The cable should have 2-3 inches of slack when the dock is mounted—not stretched tight. If it falls short, relocate the dock vertically rather than horizontally; side-to-side adjustments create awkward vacuum angles during docking. For brick or concrete walls, use adhesive cable clips every 8 inches to secure the cord flush against the surface. Never staple or tape cords directly over outlets—this creates fire hazards when plugs heat up during charging cycles.
Locating Wall Studs: The Non-Negotiable First Step for Safety
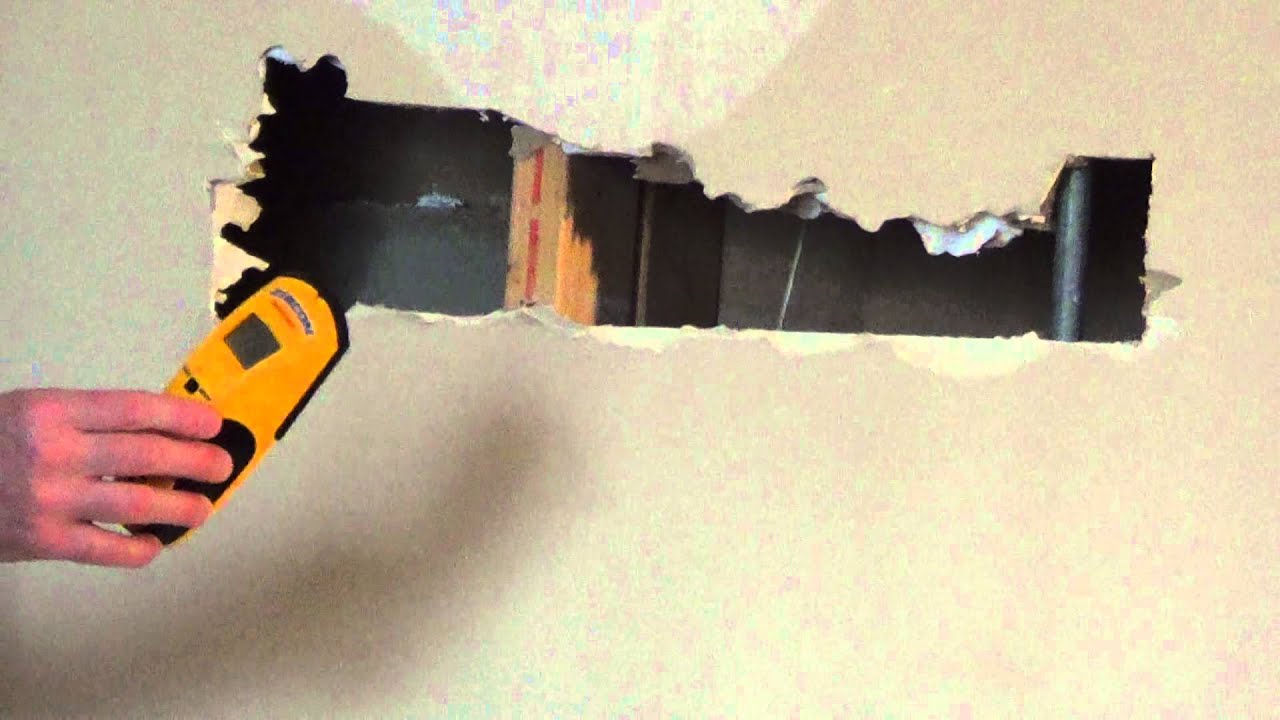
Guessing stud positions causes 90% of dock failures. Masonry walls require different anchors, but for standard drywall interiors (80% of homes), studs are your only reliable anchor point. Start by scanning 16 inches right from any corner—studs typically run vertically at 16-inch intervals. Slowly glide your stud finder upward until it beeps consistently; mark both edges with pencil. The true center sits 3/4 inch from either edge (standard stud width is 1.5 inches). Verify with the knock test: a solid thud means wood, while a hollow thump indicates empty space. For stubborn walls, drill a 1/8-inch exploratory hole at your mark—if wood shavings appear, you’ve hit gold.
Drywall Without a Stud? Heavy-Duty Anchor Requirements
When studs don’t align with your ideal spot (common near windows/doors), you must upgrade beyond Dyson’s included plastic anchors. Those small grey plugs only support 15 lbs—insufficient for full vacuum weight during removal. Instead, use toggle bolts rated for 50+ lbs: drill a 3/4-inch hole, insert folded wings through the dock bracket, then tighten until wings flatten against drywall’s backside. For brick or concrete, swap to sleeve anchors—hammer them into pre-drilled holes until flush, then screw directly into the metal sleeve. Never reuse old screw holes; the drywall’s grip weakens permanently after one extraction.
Step-by-Step: Mounting Directly into Wood Studs (V7-V11 Models)
This method works for all standard Dyson models (V7-V11) and is mandatory for heavy Outsize units. The included wood screws provide 3x the holding power of drywall anchors when driven into solid timber.
Marking Precise Mounting Points
Hold the dock bracket against the wall with its top edge 42 inches from the floor (adjust ±3 inches for user height). Rest a 24-inch level across the bracket’s top—adjust until the bubble centers. Mark both screw holes through the bracket with sharp pencil dots. Double-check level alignment by flipping the bracket upside down; if dots stay centered, your mount will be perfectly straight. For V10/V11 docks with separate wand hooks, add a second mark 8 inches above for the wand clip.
Drilling and Securing Without Splitting Wood
Use a 3/32-inch drill bit to create pilot holes 1/2 inch deep at your marks—this prevents stud wood from cracking. Insert the dock’s long wood screws (typically 2.5 inches) through the bracket. Drive screws with a drill on low torque setting (position 2-3), stopping when the head sits flush with the bracket. Never force screws; if resistance increases suddenly, you’ve hit a nail plate—stop and relocate 2 inches over. Test stability by hanging your vacuum; if it wobbles, add a third screw centered between the original holes.
Installing on Drywall for V8 Models: Avoiding Common Anchor Failures

V8 docks weigh 2.2 lbs empty but must hold 5.5 lbs when fully loaded. Standard plastic anchors fail within months under this stress. Here’s how to prevent wall damage.
Choosing Toggle Bolts Over Plastic Plugs
Discard the flimsy grey anchors in your V8 kit. Buy 1/4-inch toggle bolts rated for 50 lbs instead. Drill 3/8-inch holes at your marks, then thread the bolt through the dock bracket. Squeeze wings together and push through the hole until they snap open behind the drywall. Hand-tighten until the bracket sits flush, then give a final 1/4-turn with pliers. The wings distribute weight across 4x more drywall surface than plastic plugs.
Testing for Hidden Danger Zones
Before drilling, check for electrical wires with a non-contact voltage tester. Sweep it along your mounting line—if it beeps, move 6 inches up/down. Pipes are harder to detect; avoid mounting within 12 inches of sinks or showers. If your drill bit suddenly feels “spongy” during drilling, stop—you’ve hit insulation, not a stud. Fill the hole with spackle, then relocate to solid wall.
Cable Routing Secrets for a Tidy Dyson Charging Station
Poor cable management causes 30% of docking accidents. Never let cords dangle freely where feet can catch them.
Creating a Low-Profile Cord Path
Route the charging cable downward from the dock along the wall’s edge, not across open space. Use adhesive-backed cable clips every 8 inches to keep it flush. For baseboard gaps, thread the cord through a flexible plastic raceway (sold at hardware stores) that snaps closed over the cable. At the outlet, plug in vertically—sideways plugs create leverage that loosens outlets over time. If your dock sits above the outlet, use a right-angle USB adapter to prevent cable strain.
Critical Safety Checks Before Using Your New Mount
Skipping these tests risks vacuum damage and injury. Perform them every time you install or relocate a dock.
The 10-Pound Pull Test
Grab the dock firmly with both hands and pull straight out with 10 lbs of force (like lifting a bag of sugar). If it shifts more than 1/8 inch, the mount is unsafe. For stud mounts, this means screws aren’t deep enough; back them out and redrill pilot holes 1/4 inch wider. For drywall anchors, remove and fill the hole with spackle before restarting 2 inches over.
Vacuum Docking Stability Verification
Hang your fully assembled vacuum on the dock, then mimic normal removal: grasp the wand handle and pull straight out at a 45-degree angle. If the dock tilts more than 5 degrees or makes creaking sounds, it’s overloaded. For heavy models like the Outsize, add a third mounting point centered below the main bracket.
Troubleshooting Loose Docking Stations: Fixes That Work
When your dock wobbles after installation, don’t ignore it—this accelerates wall damage. For minor looseness on stud mounts, tighten screws slightly while supporting the bracket upward. If screws spin freely, extract them and fill holes with wooden golf tees dipped in wood glue; let dry overnight before redrilling. For drywall anchors that pull out, switch to snap-toggle bolts: these self-drilling anchors expand behind drywall for instant 75-lb holding power without pre-drilling.
When to Call a Pro: Outsize and Animal Model Mounting Dangers

Heavy Dyson models (Outsize, Animal Pro, V15) demand professional installation if you lack tools or experience. Their 7+ lb weight requires mounting into two studs with 3-inch lag bolts—attempting this with basic hardware risks catastrophic failure. Similarly, tile or stone walls need diamond-tip drill bits and specialized anchors; one slip can crack entire surfaces. If your wall sounds hollow when knocked (indicating lath-and-plaster construction), hire a pro—they’ll use epoxy anchors that bond to the plaster mesh.
Final Note: A properly installed Dyson docking station should survive daily vacuum removal for 5+ years without shifting. Key to longevity: always mount into studs for heavy models, use toggle bolts for drywall, and test stability with aggressive pulling motions before regular use. Check mounts quarterly by tugging downward—early wobble detection prevents wall damage. For V10-V15 users, consider adding a secondary wand hook at shoulder height to reduce main dock stress. This isn’t just about convenience; it’s about protecting your $500+ investment from preventable falls. Ready to optimize further? Explore our guide to extending Dyson battery life through proper charging habits.

