Your Dyson V10 suddenly dies mid-clean despite a full charge? That frustrating power drop is almost always a failing lithium-ion battery – not a vacuum malfunction. As these sealed battery packs degrade after 2-3 years of normal use, you’ll notice progressively shorter runtimes until the motorhead won’t even power on. Replacing the battery yourself takes just 10 minutes and costs a fraction of professional service, instantly restoring your vacuum’s original 60-minute runtime. Skip the $150+ repair bill and unnecessary replacements by mastering this essential DIY fix. In this guide, you’ll learn exactly how to safely remove your old battery, install a compatible replacement, troubleshoot common pitfalls, and maximize your new battery’s lifespan – all using tools you likely already own.
Essential Tools for Dyson V10 Battery Replacement
Gather these specific items before starting to avoid mid-process delays or safety risks. Working on a cluttered or poorly lit surface increases the chance of damaging delicate components. Always prioritize safety over speed – rushing this process risks battery puncture or electrical shorts.
- Precision flat-head screwdriver (or 5p/10p coin alternative) – Must fit snugly into the latch slot to prevent slipping
- Clean, dry workspace with bright task lighting – Countertops work best; avoid carpeted areas where small parts could vanish
- Genuine Dyson V10 battery (or certified third-party equivalent) – Critical: Mismatched batteries cause fire hazards or motor damage
- Dry microfiber cloth – For cleaning electrical contacts without residue
Pro Tip: Unplug the charger from both the wall and vacuum before beginning. Residual current could accidentally activate the motor during battery removal. Verify your vacuum is completely powered off – no LED indicators visible – to prevent accidental starts.
Unlocking and Removing Your Dyson V10’s Old Battery
Forcing components during battery removal is the #1 cause of broken latches. This precise quarter-turn technique works on all V10 variants (Absolute, Animal, Motorhead) without damaging the locking mechanism.
How to Locate the Hidden Battery Latch Mechanism
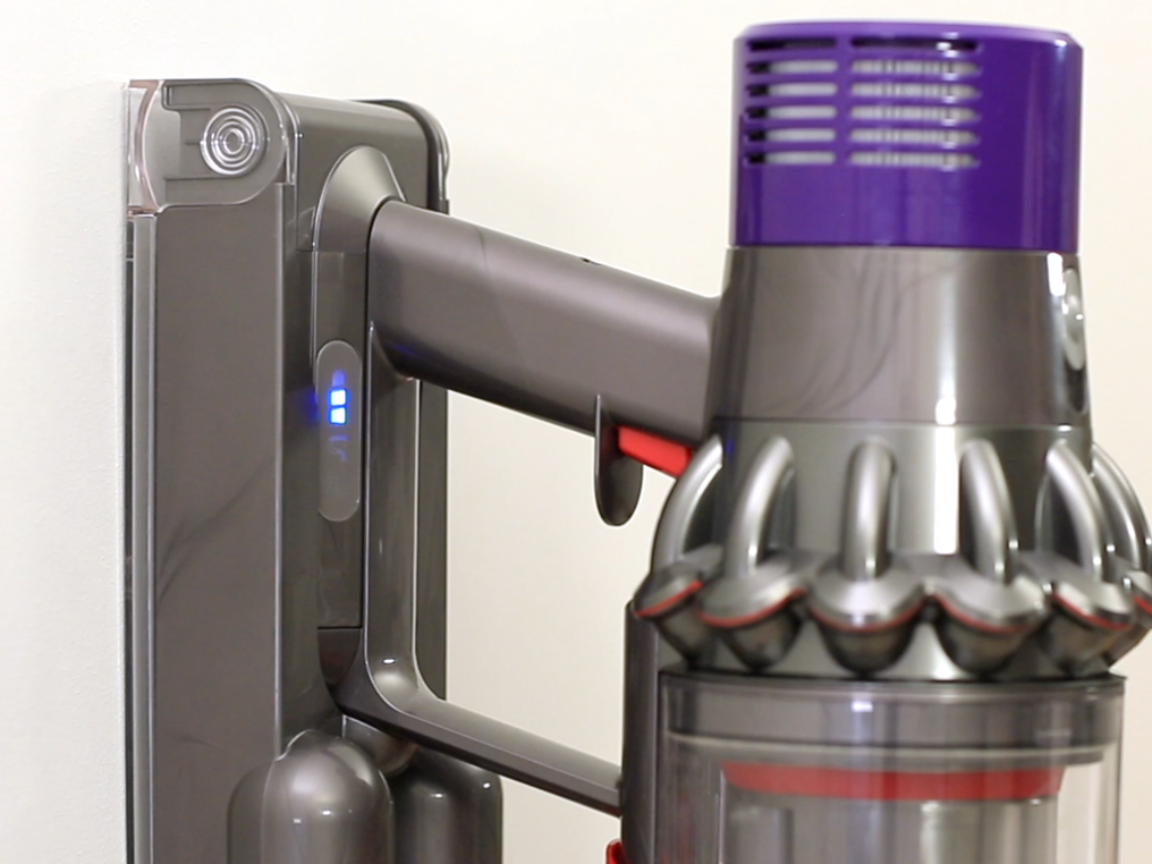
Flip your vacuum upside down to expose the motorhead base. The red rectangular battery pack sits near the bottom edge, directly above the dustbin release button. Look for a small circular latch with a centered slot – often overlooked due to its matte finish against the dark housing.
Executing the Quarter-Turn Unlock Safely
Insert your flat-head screwdriver tip fully into the latch slot. Apply gentle downward pressure while rotating counter-clockwise exactly 90 degrees. You’ll feel resistance followed by a distinct click as the internal pawl disengages. Never force beyond quarter-turn – excessive rotation strips the plastic gear. If no click occurs, reposition your tool; the latch won’t budge until fully unlocked.
Sliding Out the Battery Without Damage
Once unlocked, grip the red battery casing firmly with your thumb and forefinger. Pull straight downward in one smooth motion – no wiggling or twisting. The pack should slide free with moderate resistance. If stuck:
– Re-check latch position (a partially turned latch causes 95% of removal issues)
– Tap the vacuum base gently on a soft surface to loosen debris
– Never pry with metal tools – this punctures battery cells
Clicking in the New Dyson V10 Battery Pack Correctly

Misaligned installation causes immediate power failures. This section reveals the exact alignment cues most guides omit.
Aligning Electrical Contacts for Instant Power
Position the new battery with its gold electrical contacts facing the vacuum’s matching terminals. Notice the asymmetrical plastic guides on both components – the wider guide must slot into the corresponding wider channel on the vacuum base. Visual cue: The Dyson logo on the battery should read right-side-up when properly oriented.
Achieving the Audible Lock Confirmation
Press the battery straight upward with firm, even pressure until it stops. You’ll hear a solid click as the latch re-engages. Critical verification step: Try pulling the battery downward – it should not budge. If loose:
– Remove and recheck contact alignment
– Clean any plastic shavings from the channel with compressed air
– Ensure latch is fully reset (rotate clockwise until it stops)
Warning: Forcing a battery that won’t click risks bending pins on the main PCB – a $100+ repair. Stop immediately if resistance feels abnormal.
First Charge Protocol and Critical Safety Rules for V10 Batteries
New batteries arrive at 30-50% charge. Skipping proper conditioning sacrifices 20%+ of potential runtime.
Conditioning Your Replacement Battery
Plug the official Dyson charger into a wall outlet before connecting to the vacuum. The charger LED turns solid orange during charging and solid blue when complete (not pulsing – a common misinterpretation). For optimal cell health:
– Perform the first charge uninterrupted for 4 full hours
– Avoid using the vacuum during this initial cycle
– Never leave charging overnight – lithium-ion batteries degrade when held at 100%
Non-Negotiable Safety Practices
Extreme heat exposure (like car trunks in summer) permanently damages cells after just 2 hours. Always:
– Store vacuum below 35°C (95°F)
– Remove from charger immediately after blue light appears
– Never attempt to open the sealed battery pack – volatile electrolytes cause fires if exposed
Urgent: If the battery swells, emits vinegar-like odor, or feels hot during charging, stop use immediately. Place it outside on non-flammable surface and contact Dyson.
Why Your Dyson V10 Won’t Power On After Battery Swap (Quick Fixes)

80% of “dead” post-replacement vacuums suffer from these easily solvable issues.
Diagnosing a False Power Failure
With the vacuum upright, press the trigger while firmly holding the battery pack upward. If it powers on:
– The latch isn’t fully engaged (reinstall with more upward pressure)
– Debris is blocking the latch mechanism (clean with cotton swab)
– Pro Tip: Shine a flashlight into the battery slot – look for misaligned contact pins
Charger and Connection Troubleshooting Flow
- Verify wall outlet works with another device
- Inspect charger cable for kinks near connectors
- Clean both vacuum and charger ports with dry toothbrush
- Try a different Dyson-approved charger (same model)
Critical: If the LED shows no light when charging, the problem is either the charger, battery, or main PCB – not user error.
Maximizing New Battery Life and Safe Recycling Protocol
Your replacement battery’s lifespan depends entirely on charging habits. Avoid these costly mistakes.
Optimal Charging Schedule for 2+ Year Lifespan
- Daily use: Leave on charger between cleans (Dyson’s circuitry prevents overcharge)
- Long storage (>1 month): Store at 40-50% charge in cool, dry place
- Never let the battery fully deplete – recharge when runtime drops below 15 minutes
Eco-Conscious Disposal Steps for Old Batteries
Lithium-ion batteries cause landfill fires – tossing yours in trash is illegal in most regions. Instead:
1. Tape the battery’s terminals with non-conductive tape
2. Place in a sealed plastic bag
3. Drop at certified e-waste center (Best Buy, Staples, or municipal facilities)
4. Use Call2Recycle’s locator tool for nearest drop-off
Warning: Swollen batteries require special handling – transport in metal container away from flammables.
You’ve now restored your Dyson V10 to factory-fresh performance by mastering the precise battery replacement process. Remember that proper initial charging and avoiding extreme temperatures are non-negotiable for maximizing your new battery’s 2-3 year lifespan. If you encounter persistent power issues after verifying the lock mechanism and contacts, contact Dyson Support immediately – your vacuum may still be under warranty. For future maintenance, bookmark this guide as your go-to resource for extending your V10’s life through smart battery care. That satisfying click when installing the pack isn’t just mechanical satisfaction; it’s the sound of saving $150 and keeping your vacuum out of landfills. Now go conquer that dust pile with renewed suction power!

