Your Dyson vacuum powers on, suction works fine, but that critical motorized brush roll lies completely still—turning your high-performance cleaner into a glorified broom. This sudden failure happens to thousands of Dyson V7, V8, and V10 owners monthly when hair, debris, or electrical faults disable the Motorhead attachment. Don’t panic: 90% of these issues require no special tools and take under 15 minutes to resolve. By following this precise troubleshooting sequence—starting with the most common culprits—you’ll restore full cleaning power without replacing the entire unit. Let’s diagnose and fix your unresponsive Dyson Motorhead step by step.
Why Your Dyson Motorhead Suddenly Stopped Spinning (Check These First)
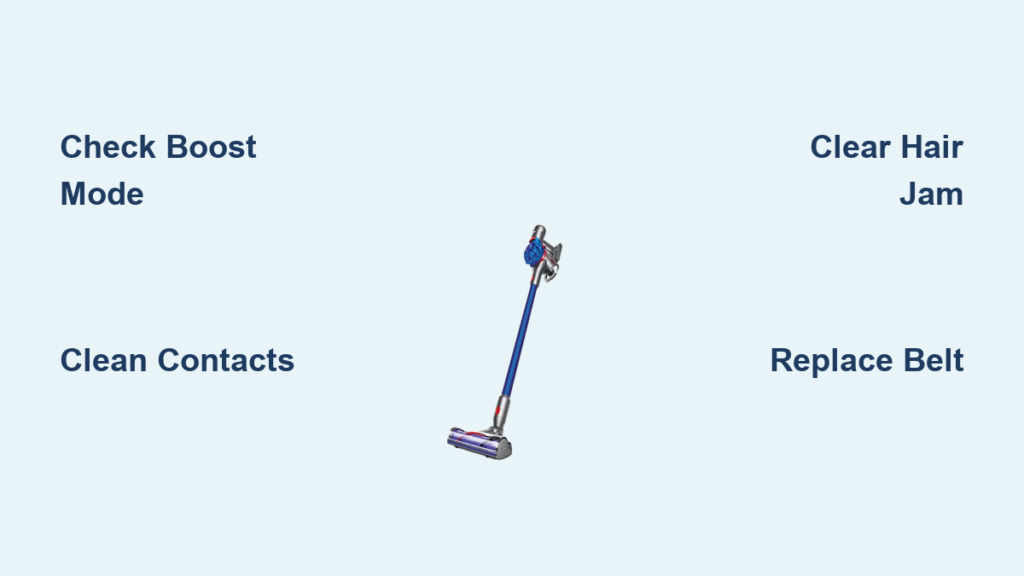
Before disassembling your vacuum, eliminate these three common false alarms that mimic motor failure. These fixes take under two minutes and solve most “dead brush roll” complaints.
Confirm You’re Not in Boost Mode Causing Brush Roll Shutdown
Dyson’s Boost or MAX mode intentionally cuts power to the Motorhead to maximize suction for deep carpet cleaning—a design feature many owners mistake for malfunction. If your brush roll died immediately after pressing the power boost button, this is almost certainly the culprit. Here’s how to fix it: Press the power mode button again to return to standard cleaning mode (usually indicated by a single blue light). The brush roll should restart within 3 seconds. If using a V10 Absolute or V11 model, note that Boost mode disables the Motorhead entirely—you must stay in standard mode for brush roll operation during floor cleaning.
Clean Oxidized Electrical Contacts Blocking Power Delivery
Dust and moisture create insulating corrosion on the metal contacts where the Motorhead attaches to the wand—a silent killer of brush roll function. You’ll notice intermittent operation (works when tilted sideways) or complete failure despite strong suction. Perform this contact cleaning: Unplug the Motorhead and inspect the 3-5 gold pins on both the wand tip and Motorhead base. Dampen a cotton swab with 90% isopropyl alcohol, scrub contacts firmly for 10 seconds, then dry with a clean swab. Reattach firmly—the brush roll should spin immediately if contacts were the issue. Pro Tip: Do this quarterly to prevent future failures.
Clear Hair Jamming the Brush Roll Axle Ends
Hair and carpet fibers wrap tightly around the brush roll bearings—a problem so common Dyson built quick-release latches into newer models. Here’s the fastest unclogging method: Flip the Motorhead over, locate the red release latch (V8/V10) or remove the 2-3 visible screws (older models). Slide out the brush roll and use scissors to cut hair strands wrapped within 1/4 inch of both end caps. Rotate the roller by hand—it should spin freely with no resistance. Reassemble and test. Warning: Forcing a jammed roller can crack the housing—always clear obstructions before forcing rotation.
Repairing Mechanical Failures in Dyson Motorhead Units
When basic checks fail, inspect these mechanical components. Most require only a coin or Phillips screwdriver and take 5-10 minutes.
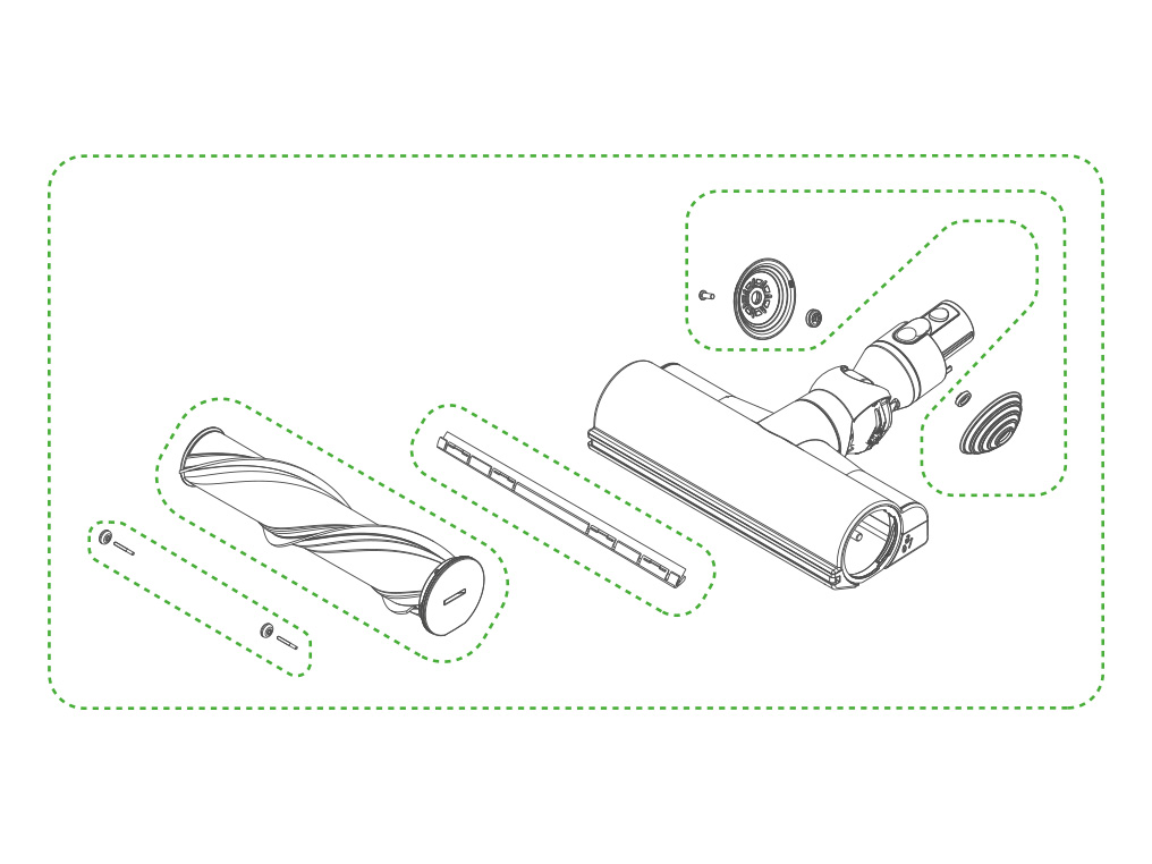
Replace the Snapped Drive Belt on V7-V10 Motorheads
A broken belt is the #1 mechanical cause of silent brush roll failure. You’ll hear the internal motor humming but see zero roller movement—often accompanied by a high-pitched whine. Follow these belt replacement steps:
1. Remove the brush roll as described in the jam-clearing section
2. Locate the thin rubber belt connecting the motor shaft to the roller axle
3. Inspect for cracks, stretching (>1/8″ gap when stretched), or complete separation
4. Purchase the exact belt for your model (e.g., “DYSON TP01-15-001” for V8 Motorhead)
5. Loop the new belt around the motor pulley first, then stretch onto the roller axle
Critical Note: Never operate without a belt—this overheats the motor. Replacement belts cost $8-$15 online and take 90 seconds to install once the head is open.
Diagnose Brush Roll Bearing Failure Causing Grinding Noises

If the roller spins freely by hand but seizes during operation, worn bearings are grinding the axle. Identify bearing failure by:
– Hearing metallic grinding during operation
– Feeling excessive heat at the roller ends after 30 seconds of use
– Observing uneven roller rotation (wobbles or sticks)
Fix it: Replace the entire brush roll assembly ($25-$45). For V10 Motorheads, note the roller has left/right orientation—match the red alignment mark during reinstallation. Time-Saver: Soak the new roller in warm soapy water for 5 minutes before first use to prevent initial stiffness.
Solving Electrical Motorhead Failures Without Soldering
For complete electrical silence (no hum, no vibration), tackle these internal issues. Skip complex repairs if under warranty—Dyson often replaces heads free within 2 years.
Repair Frayed Wires Near the Motorhead Pivot Point
Repeated flexing at the wand connection fractures internal wires—a hidden flaw causing total failure. Diagnose wire damage by:
1. Removing all housing screws (typically 4-6 Phillips #00)
2. Gently separating the top/bottom housing halves
3. Inspecting red/black wires where they enter the motor compartment
4. Looking for cuts, exposed copper, or insulation cracks near the pivot hinge
Fix frayed wires: Twist broken strands together, solder with a fine-tip iron, then seal with heat-shrink tubing. Safety First: Never tape repairs—heat from the motor melts tape, causing shorts. If uncomfortable soldering, replace the entire Motorhead ($70-$120).
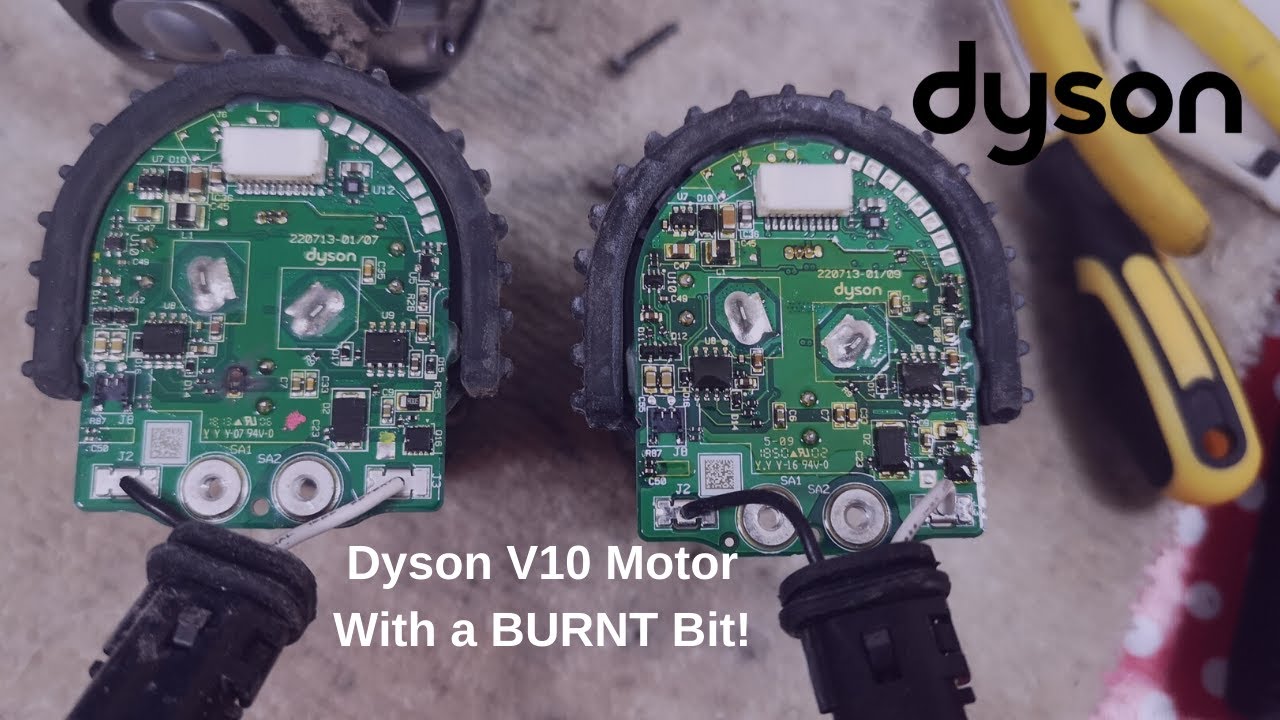
Test the Internal Motor with a Multimeter (No Soldering Needed)
When wires look intact but the motor stays dead, verify power delivery. Perform this motor test:
1. Set multimeter to DC voltage (20V range)
2. Attach probes to motor terminals while vacuum runs in standard mode
3. Healthy motors show 12-18V; 0V indicates upstream wiring failure
4. If voltage registers but motor won’t spin, the motor is dead
Pro Insight: Failed motors often show blue discoloration on copper windings. Replacement motors cost $15-$25 but require disassembling the motor housing—a 30-minute job for experienced DIYers.
When to Replace Your Dyson Motorhead Instead of Repairing
Some failures aren’t worth fixing given part scarcity and labor. Replace your Motorhead immediately if:
– You smell burnt plastic from the head (indicates circuit board meltdown)
– The PCB shows visible scorch marks or bulging capacitors
– Your model is discontinued (V6 Motorheads lack available parts)
– Repair costs exceed 60% of a new Motorhead price
Cost Reality Check: A new genuine Dyson Motorhead costs $99-$149. For out-of-warranty units, replacement often beats $60+ in parts and 2+ hours of labor for circuit board repairs.
Dyson Motorhead Troubleshooting Flowchart (Save Time!)
Follow this decision path before disassembling:
1. Vacuum in Boost mode? → Switch to standard mode
2. Contacts clean? → Alcohol-clean both sets
3. Roller spins freely by hand? → Clear axle-end hair jams
4. Hear motor hum? → YES = Replace belt; NO = Check wires/motor
5. Voltage at motor terminals? → YES = Bad motor; NO = Wiring fault
Final Fixes to Keep Your Dyson Motorhead Running Long-Term
Prevent repeat failures with these maintenance habits: After every carpet cleaning, spend 60 seconds clearing hair from roller ends—use the included cleaning tool or a seam ripper. Quarterly, clean electrical contacts with isopropyl alcohol to prevent corrosion. Never use Boost mode on hard floors—this strains the belt unnecessarily. If your Motorhead is over 3 years old, keep a $12 replacement belt on hand—it’s the most common failure point. For persistent electrical issues, contact Dyson Support—they’ll often send a refurbished head for free if your vacuum is within 3 years of purchase. Remember: Most “dead” Motorheads simply need contact cleaning or a $10 belt. By methodically working through these fixes, you’ll avoid unnecessary replacements and keep your Dyson vacuum performing like new for years.

