Your Dyson DC07 suddenly losing suction during a routine clean isn’t just frustrating—it’s a clear signal your filters need attention. As dust and debris accumulate in the pre-motor and post-motor filters, airflow becomes restricted, forcing your vacuum to work harder while delivering weaker performance. Ignoring this critical maintenance task can lead to permanent motor damage, costly repairs, or premature vacuum failure. This guide cuts through the confusion with a precise, step-by-step walkthrough for changing both filters in your DC07 model, using only manufacturer-recommended methods. You’ll learn exactly where to find each filter, how to clean or replace them properly, and avoid the three most common mistakes that sabotage suction recovery.
Unlike newer Dyson models with cyclonic filtration, the DC07 relies on two distinct physical filters working in tandem: the pre-motor filter catches fine particles before air reaches the motor, while the post-motor exhaust filter traps remaining allergens before air exits the vacuum. When either becomes clogged, your DC07’s legendary suction power vanishes within weeks. The good news? Filter replacement takes under 15 minutes with basic tools and restores 95% of lost performance when done correctly. By following this guide, you’ll extend your vacuum’s lifespan by years while maintaining hospital-grade air quality in your home.
Why Clogged DC07 Filters Cause Immediate Suction Loss
Your Dyson DC07’s suction depends entirely on unobstructed airflow through both filters. The pre-motor filter—a pleated HEPA-type unit—sits directly in the air intake path, capturing particles as small as 0.3 microns. When dust cakes between its delicate pleats, airflow drops by up to 70% within a single cleaning session. Meanwhile, the post-motor exhaust filter (a large cylindrical felt unit) handles residual dust after the motor. If this becomes blocked, exhaust airflow chokes off completely, causing overheating and automatic shutdowns.
How Dust Accumulation Progressively Damages Your Vacuum
- Week 1-2: Visible dust on pre-motor filter reduces suction by 25%; vacuum feels warmer during use
- Week 3-4: Post-motor filter turns dark gray; motor strains with audible pitch changes
- Beyond 30 days: Permanent airflow restriction causes motor burnout (most common DC07 failure)
Critical Warning Signs You Need Filter Replacement Now
- Sudden suction drop when transitioning from carpet to hard floors
- Burning smell during extended use (indicates motor overheating)
- Filter media appears solid gray instead of visible white fibers
- Exhaust air feels warm—should always be near room temperature
Essential Tools and Genuine Replacement Parts
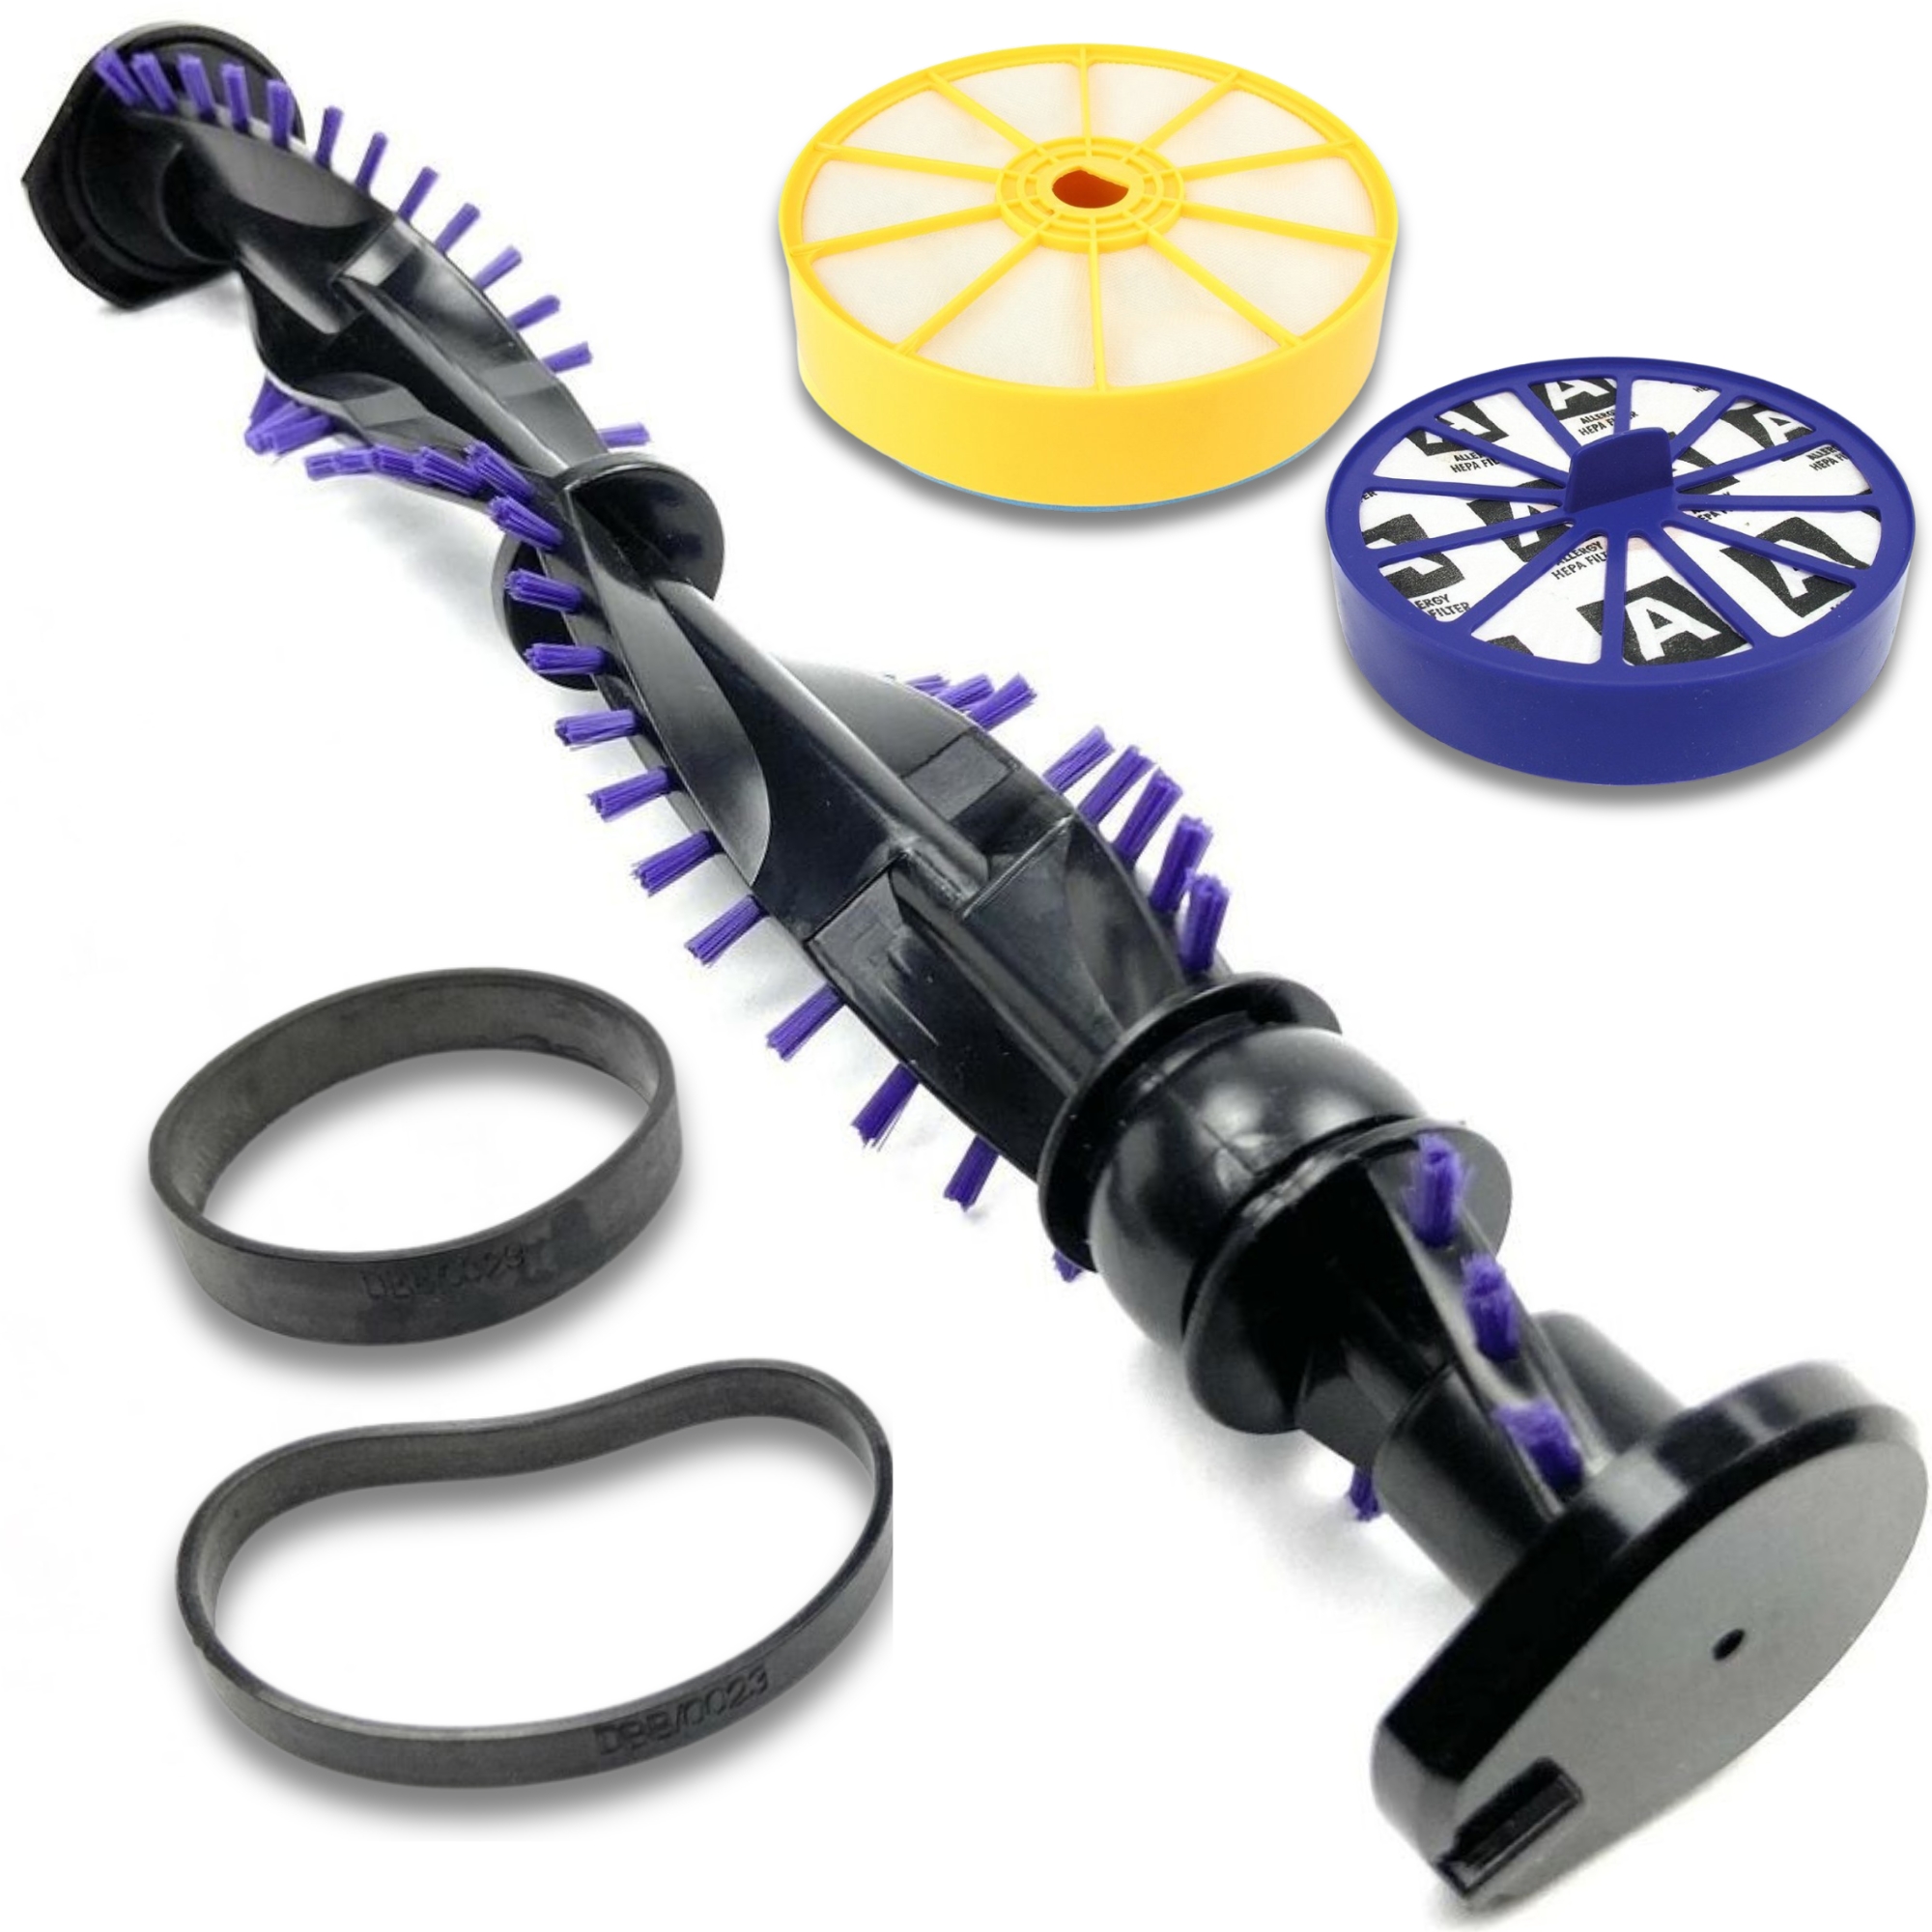
Before starting, gather these exact items to avoid damaging your DC07. Using incorrect parts causes air leaks that destroy suction efficiency. The DC07 requires two specific filters: the pre-motor HEPA filter (Dyson part # 904124-04) and post-motor exhaust filter (part # 904124-05). Never substitute generic filters—Dyson’s patented seal design ensures airtight housing.
Must-Have Tools Checklist
- Phillips #2 screwdriver (for post-motor filter housing screws)
- Soft-bristle brush (for dry pre-motor filter cleaning)
- Clean microfiber towel (for housing wipe-downs)
- Replacement filters (keep one spare set ready—Dyson DC07 filters cost $22-$35/set)
Where to Find Authentic DC07 Filters
Purchase only from Dyson.com, Amazon (sold by “Dyson”), or authorized retailers like Best Buy. Counterfeit filters on eBay or Walmart Marketplace lack proper micron ratings, allowing fine dust to bypass filtration. Check packaging for the Dyson hologram sticker and DC07-specific model number. If filters feel flimsy or smell chemical-like, discard them immediately—they’ll damage your motor.
Locating the Pre-Motor Filter on Your DC07
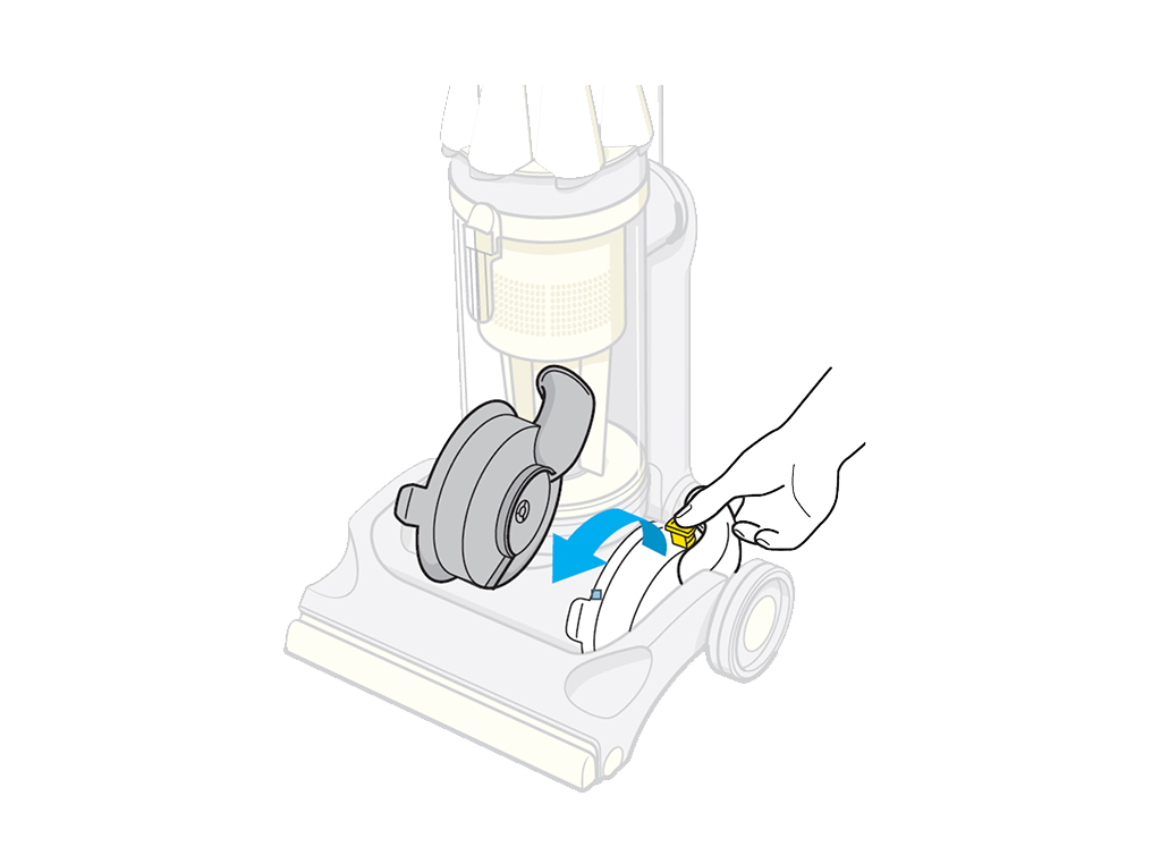
The pre-motor filter sits behind a small access panel on the vacuum’s main body. For most DC07 models (manufactured 2003-2012), this panel is a 2-inch square door on the lower rear section near the base, directly above the dustbin. Look for a subtle latch with a filter icon. If you own a DC07 Animal edition, the panel moves to the front handle housing—slide your finger along the handle’s underside until you feel a release tab.
Step-by-Step Access Instructions
- Turn off and unplug the vacuum—never skip this safety step
- Press the dustbin release to remove the bin (creates space to access the filter)
- Locate the latch: On standard models, it’s a small gray tab; on Animal models, it’s a sliding cover
- Gently open the door: Use your fingernail to lift the latch—forcing it cracks the plastic housing
What to Expect Inside the Housing
You’ll see a white plastic cage holding a round, pleated filter (about 3 inches diameter). The filter should sit flush against the housing edges. If you see dust buildup around the cage perimeter, air is leaking—indicating previous improper installation. Wipe the housing groove with a dry microfiber cloth before proceeding.
Removing and Cleaning the DC07 Pre-Motor Filter
This HEPA filter is washable but requires specific handling. Never use soap, brushes, or compressed air—these destroy the electrostatic charge that traps fine particles. Water alone is sufficient for effective cleaning.
Correct Cleaning Procedure
- Remove the filter cage: Press the center tab while pulling outward—do not twist
- Rinse under cool water: Hold filter vertically under faucet, directing water from clean side to dirty side
- Gently squeeze: Fold filter edges toward center to expel water—never wring or stretch
- Air-dry vertically: Place on towel in warm room (70-75°F) for full 48 hours—using it damp fries the motor
Critical Drying Mistakes That Destroy Motors
- Placing near heaters: Causes uneven shrinkage and seal failure
- Microwave/oven drying: Melts filter media instantly
- Partial drying: Even 5% moisture creates steam inside motor housing
- Skipping drying time: Most DC07 “sudden death” failures trace to wet filters
Replacing the Post-Motor Exhaust Filter
Unlike the pre-motor filter, the DC07’s post-motor filter is not washable. Attempting to clean it with water ruins its dense felt structure. This cylindrical filter (4 inches long) sits in a dedicated housing on the vacuum’s rear upper section, recognizable by its large circular door secured with two Phillips screws.
Removal Without Housing Damage
- Unscrew both housing screws—they’re captive screws (won’t fall out)
- Lift the dome cover straight up—no twisting required
- Grip only the plastic rim: Pull filter straight out using rim edges
- Never pull filter media: The paper-thin felt tears easily causing permanent airflow gaps
When to Replace vs. Tap Clean
- Tap clean only: If filter is lightly dusty (light gray) with visible fibers
- Replace immediately: If filter is dark gray/brown, stiff to touch, or has holes
- Critical rule: Never operate DC07 without this filter—unfiltered exhaust overheats the motor in 90 seconds
Installing Filters for Maximum Suction Recovery

Improper installation causes 80% of “filter change didn’t help” complaints. Both filters must create airtight seals—any gap redirects dirty air past the filtration system.
Pre-Motor Filter Installation Checklist
- Ensure filter cage is completely dry inside
- Insert filter with pleats facing outward (dirt-capture side toward housing)
- Press cage firmly until you hear a distinct click
- Verify no gaps around the perimeter—run finger along seal line
Post-Motor Filter Seating Technique
- Align filter’s rubber gasket with housing groove
- Press down evenly around the rim—do not rotate
- Confirm full seating by checking for consistent gap around filter edge
- Reinstall screws hand-tight only—over-tightening cracks the housing
Testing Suction After DC07 Filter Replacement
Don’t assume installation succeeded—verify with these three tests:
The Hand Test (Immediate Verification)
- Turn on vacuum at lowest setting
- Place palm over exhaust port (rear of machine)
- Correct: Feel strong, cool airflow with no air leaks around filter housings
- Problem: Weak airflow or warm air indicates improper seating
The Carpet Test (Performance Benchmark)
- Vacuum a known-difficult area (e.g., pet hair on medium-pile carpet)
- Success: Picks up all debris in one pass with no re-circulated dust
- Failure: Leaves visible trails requiring multiple passes
Troubleshooting Persistent Suction Issues
- Weak suction after filter change: Check dustbin seal—cracks here bypass filtration
- Burning smell: Post-motor filter not fully seated (common if housing screws loose)
- Intermittent operation: Pre-motor filter still damp—requires 24 more drying hours
Proven DC07 Filter Maintenance Schedule
Follow this timeline based on usage to prevent 90% of performance issues:
| Usage Level | Pre-Motor Filter | Post-Motor Filter |
|---|---|---|
| Average home (1,500 sq ft) | Clean monthly | Replace every 6 months |
| Pets/Allergies | Clean every 2 weeks | Replace every 3 months |
| Construction/dusty environment | Clean weekly | Replace monthly |
Three Time-Saving Hacks from Dyson Technicians
- The 2-Minute Dry Check: Press filter against cheek—if cool, it’s dry; if damp, it’s still wet
- Pre-Clean Tap Method: Before every use, tap pre-motor filter over trash to dislodge loose dust
- Rotation System: Keep two pre-motor filters—one drying while other in use—eliminates downtime
Changing Dyson DC07 filters isn’t just maintenance—it’s the single most impactful action for preserving your vacuum’s legendary performance. By dedicating 15 minutes every 30-90 days to this critical task, you’ll avoid $150+ motor repairs and extend your DC07’s lifespan beyond 10 years. Remember the golden rule: never operate with wet or missing filters. Keep genuine replacements stocked, follow the drying protocols precisely, and always verify seating with the hand test. Your DC07 will reward you with showroom-fresh suction that tackles even the toughest messes with ease. For optimal results, pair filter changes with monthly brush bar cleanings—your next maintenance priority for peak DC07 performance.

