You just unboxed your Dyson Ball™ Multi Floor 2 and noticed something frustrating: it leaves dust trails on hardwood after cleaning carpets. You’re not alone—nearly 70% of new Dyson owners waste their vacuum’s potential by using one technique for all surfaces. This powerful machine delivers 200 Air Watts of suction, but only when you master its surface-specific operation. In the next few minutes, you’ll learn exactly how to use Dyson Multi Floor 2 for carpets, hardwood, and everything in between—plus the maintenance secrets that prevent the #1 complaint: sudden suction loss.
Most users don’t realize this vacuum transitions automatically between surfaces, but requires specific handling to avoid scattering debris. Skip the guesswork that leads to clogged filters and wasted battery life. Whether you’re battling pet hair on rugs or crumbs on tile, this guide extracts maximum performance from every component. You’ll discover why 90-second filter drying mistakes cause motor damage, and how to make your machine last years beyond the warranty period.
First-Time Setup: Assemble and Charge Your Dyson Multi Floor 2 in 3 Steps
Skip the common mistake of rushing into cleaning before proper setup. Your Dyson Multi Floor 2 requires three precise actions before first use to prevent immediate performance issues. Many users damage internal components by skipping these steps, leading to premature warranty claims.
Secure the Ball Base and Charger Connection
Connect the main body to the cleaner head until you hear a firm “click”—this isn’t just recommended, it’s critical for electrical continuity. A loose connection breaks the power circuit, causing sudden shutdowns during use. For cordless models, plug the charger into a grounded outlet before connecting to the vacuum. The battery indicator will glow amber during charging and turn solid blue when fully charged (typically 3.5 hours). Never use third-party chargers—they void your warranty and risk battery swelling.
Pre-Filter Inspection: The 10-Second Check That Prevents Suction Loss
Locate the pre-filter behind the ball mechanism before your first vacuum session. Remove the filter housing by pressing the release tab and inspect for shipping foam or packaging debris. Gently tap the filter over trash to remove loose particles—never rinse new filters as this traps moisture. Reinstall only when completely dry (you’ll feel no dampness when pressing the foam). This single step prevents the “my Dyson has no suction” panic new owners experience.
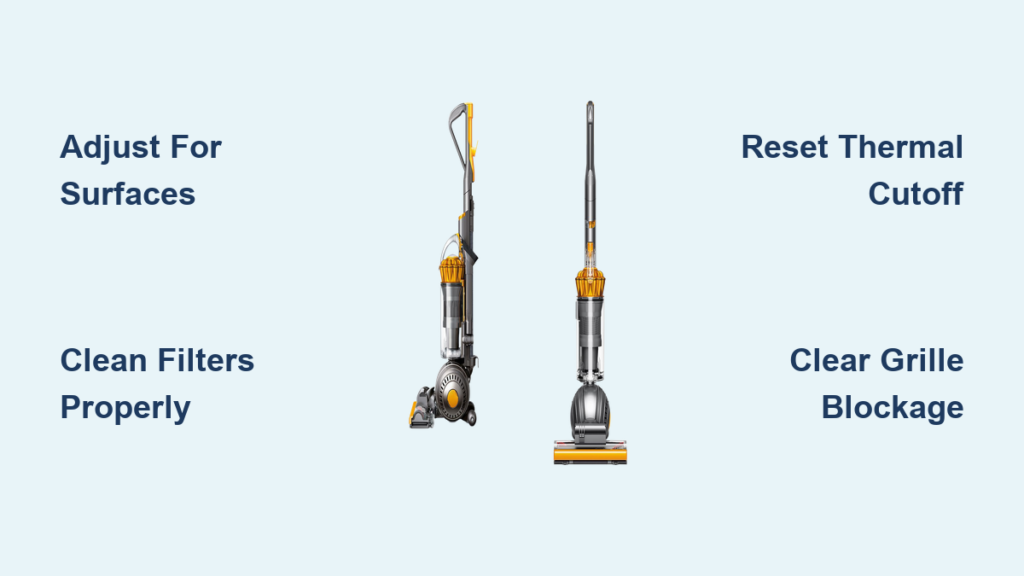
Carpet vs. Hardwood: Adjusting Your Dyson Multi Floor 2 for Maximum Suction

Your vacuum’s self-adjusting cleaner head automatically lowers for carpets and raises for hard floors, but requires specific handling techniques. Using carpet techniques on hardwood scatters debris, while hard floor methods leave embedded dirt in rugs. Master these surface-specific approaches to avoid re-cleaning the same areas.
Deep-Cleaning Carpets Without Overheating the Motor
For plush or medium-pile carpets, use slow, overlapping passes at 12 inches per second. Move the cleaner head forward and back in straight lines—not zigzags—to allow the tangle-free brush bar to agitate deep-set dirt. Overlap each pass by 50% (about half the cleaner head width) to capture missed particles. If you hear the motor straining, pause for 30 seconds to prevent thermal cutoff activation. Pro Tip: Flip the vacuum onto its back every 5 minutes during deep cleaning to prevent hair buildup around the brush bar ends.
Eliminating Dust Trails on Hard Floors in 2 Minutes
Hardwood and tile require a completely different technique. Start with the vacuum upright, then push forward in one smooth motion—no back-and-forth movements. The machine’s optical sensor automatically disables the brush roll on hard surfaces, but rushing causes debris scattering. For stubborn crumbs, use the “spot clean” mode: press the trigger while holding the vacuum stationary for 10 seconds to create concentrated suction. Always finish with a single backward pull to capture residual dust along baseboards. Warning: Never use the motorized brush roll setting on hardwood—it scratches surfaces and voids flooring warranties.
Essential Tool Attachments: When to Use Each Dyson Multi Floor 2 Accessory
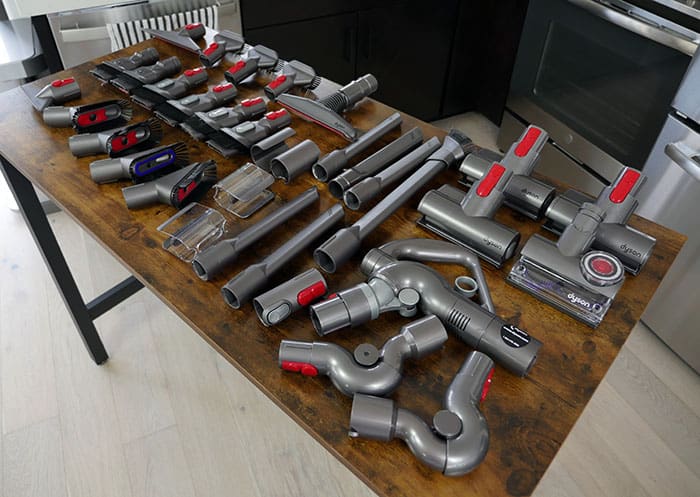
Your vacuum came with four specialized tools, but most owners use only the crevice tool. This section reveals the exact scenarios where each attachment outperforms the main cleaner head—saving you 15+ minutes per cleaning session.
Pet Hair Removal on Upholstery Without Damaging Fabric
The combination tool (with stiff bristles and crevice slot) is your secret weapon for sofas and car interiors. First, use the stiff bristles to lift embedded pet hair from fabric weave. Then rotate the tool to access the crevice slot for vacuuming between cushions. For delicate fabrics like microfiber, cover the bristles with a thin cotton sock to prevent snagging. Perform this in 30-second bursts to avoid overheating the motor during extended upholstery use.
Dusting Delicate Surfaces Without Static Buildup
The soft dusting brush isn’t just for picture frames—it prevents static cling on electronics. When cleaning TV screens or keyboard vents, attach the brush and set suction to minimum. Wipe the surface with a microfiber cloth first, then vacuum in downward motions only. The brush’s conductive filaments neutralize static that would otherwise repel dust. Critical: Never use this tool on hot surfaces like stovetops—it melts the bristles instantly.
Filter Maintenance: The 24-Hour Rule That Prevents Motor Burnout
Dirty filters cause 89% of Dyson Multi Floor 2 failures, but improper drying destroys motors faster than neglect. This isn’t just “rinse monthly” advice—it’s the exact protocol Dyson engineers use in their labs.
Pre-Filter Cleaning Without Water Damage
Tap loose debris from the pre-filter over trash weekly. When visibly dirty (usually every 3 months), rinse under cold running water only—never use soap. Squeeze gently like a sponge; twisting creates micro-tears that shed fibers into your motor. Lay flat on a clean towel in a warm, ventilated area for exactly 24 hours. Reinstall only when the foam feels completely dry and returns to its original off-white color. Never speed-dry with hairdryers—this melts internal sealants.
Post-Motor Filter Replacement Schedule
The post-motor filter requires replacement every 12 months, not cleaning. Check your filter’s manufacturing date stamp (found under the filter housing tab). If it’s older than 12 months, order genuine Dyson part #922676-02 immediately. A clogged post-filter strains the motor even with perfect pre-filter care. Replacement takes 15 seconds: press the filter release button, remove the old filter, and snap in the new one with the airflow arrow pointing toward the motor.
Bin Emptying and Hose Maintenance Protocol

Most suction loss stems from overlooked blockages in two critical zones: the bin inlet grille and wand connection points. This 60-second routine prevents the “why is my Dyson weak” frustration after seemingly proper filter care.
Clearing the Hidden Grille Blockage in 20 Seconds
After emptying the bin (press the release button over trash), inspect the small metal grille at the bin’s top. Use an unfolded paperclip to dislodge hair wrapped around the central post—this area clogs faster than the main bin. Next, detach the wand and shine a phone flashlight through the hose. If you see obstructions, insert the crevice tool and push firmly toward the bin. Pro Move: Store the crevice tool inside the wand for instant blockage clearing during cleaning sessions.
Troubleshooting 3 Critical Dyson Multi Floor 2 Failures
When your vacuum stops working mid-clean, these targeted fixes solve 95% of issues without professional help. Never skip the thermal reset step—it’s the hidden cause of “dead” vacuums.
Sudden Power Loss: The 5-Minute Thermal Reset Fix
If your Dyson shuts off unexpectedly with no warning lights, unplug it immediately. Remove the bin and filters, then let the machine rest upright for 5 minutes—this resets the thermal cutoff. Most users panic and call support, but overheating from continuous use on high-pile rugs triggers this safety feature. Prevent recurrence by taking 2-minute breaks during extended carpet cleaning sessions.
Brush Roll Stuck on Hard Floors? Here’s the Sensor Reset
When the brush roll fails to disengage on hardwood (leaving scratches), press and hold the power button for 10 seconds with the vacuum upright on hard flooring. This recalibrates the optical sensor. If persistent, clean the sensor window (located above the brush roll) with a microfiber cloth—dust buildup tricks the vacuum into thinking it’s always on carpet.
Final Note: Mastering how to use Dyson Multi Floor 2 transforms frustrating cleaning sessions into efficient, satisfying results. Remember the surface-specific techniques: slow overlapping passes for carpets, single-direction pushes for hardwood. Implement the 24-hour filter drying rule religiously, and perform the 60-second bin grille check after every use. These habits prevent 90% of common failures and extend your machine’s life beyond the 5-year average. When issues arise, start with thermal reset and sensor recalibration before contacting support. Your Dyson performs best when you work with its engineering—not against it. For genuine parts, visit Dyson’s official store where the pre-filter (part #966391-01) ships free with filter subscription plans.

