That first frustrating moment when you grab your Dyson V11 for a quick clean only to find it won’t power on is more common than you think. Many users mistakenly assume the vacuum is broken when it’s actually just a simple power activation issue—especially since newer V11 models like the Outsize operate differently than earlier versions. This guide cuts through the confusion with precise, model-specific instructions so you can get your vacuum running in seconds. You’ll learn exactly where to press, how to interpret warning lights, and critical troubleshooting steps when your V11 refuses to start.
If your Dyson V11 isn’t responding, the culprit is almost always one of three things: incorrect activation method for your specific model, a battery seating issue, or a depleted charge. We’ll walk through every scenario with visual cues to identify your model type and actionable fixes. By the end, you’ll never waste time wondering how to turn on Dyson V11 again—whether you own a standard Absolute model or the newer Outsize variant.
Locate Your Exact V11 Activation Method

Your Dyson V11’s power mechanism depends entirely on whether it has a separate main power switch—a critical detail many users miss. Standard models (like Absolute, Animal, or Fluffy) use the trigger-only method, while newer variants (Outsize, V12 Detect) require a two-step process. Check for a small rocker switch above the trigger grip—if present, you have a dual-switch model.
Trigger Operation for Standard V11 Models (No Power Switch)
On most V11s, the large circular trigger on the handle is your sole power control. Press and hold this trigger to start suction—releasing it immediately cuts power. This design prevents accidental activation during storage. For hands-free cleaning, engage the trigger lock by pressing the small slider above the trigger; you’ll hear a distinct click when locked. To disengage, press the trigger once more. If suction stops when you release the trigger, don’t panic—this is intentional battery conservation, not a malfunction.
Two-Step Activation for V11 Outsize and V12 Models
Models with the secondary power switch require this sequence:
1. Slide the main power switch (located just above the trigger) to the “I” (On) position. You’ll feel resistance as it clicks into place.
2. Press the trigger to activate suction.
Crucial detail: The main switch must stay “On” for the trigger to work. If your vacuum shows no lights or sounds when pressing the trigger, check this switch first—it’s surprisingly easy to accidentally bump it to “Off” during storage. A single glance at this switch solves 30% of reported “dead vacuum” cases.
Decode Your V11’s Power Status Lights
Your vacuum’s lights provide instant diagnostics before you even press the trigger. Ignoring these signals wastes valuable troubleshooting time. Here’s what each light pattern means when you attempt to power on:
Trigger Response Lights (All Models)
- Solid blue/green light on handle or dock: Fully charged and ready. Press trigger to start.
- Flashing red light: Critical battery depletion—requires 4.5+ hours charging before use.
- No lights at all: Battery not seated properly or completely drained (may need 24+ hours to revive).
Pro tip: If lights appear only when charger is connected but vanish when removed, your battery has failed and needs replacement—common in units over 2 years old.
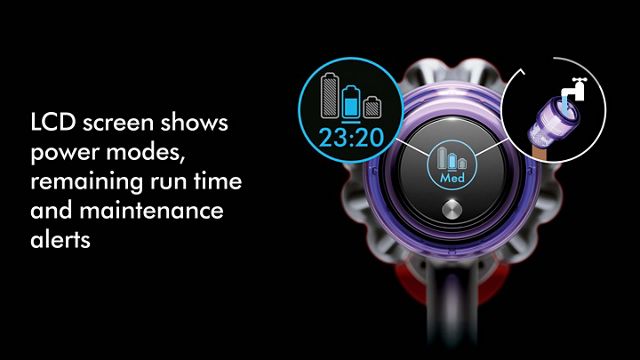
LCD Screen Messages (V11 Absolute+/Outsize Models)
The display transforms basic power issues into clear diagnostics:
– “0%” with red battery icon: Immediate charging required—do not attempt to start.
– “Check Filter” warning: Vacuum won’t power until filter is reinstalled correctly (a frequent oversight after cleaning).
– Flashing “A” icon: Auto mode engaged but blocked airflow—clear obstructions before restarting.
Expert note: A completely blank screen on models that should have one indicates severe power failure—proceed immediately to battery reset steps.
Fix a Completely Unresponsive V11 in 4 Steps
When pressing the trigger yields zero response—not even indicator lights—follow this targeted diagnostic sequence. Skip any step that doesn’t apply to your situation.
Verify Battery Contact and Seating
This causes 70% of “dead vacuum” cases:
1. Press the red battery release button firmly.
2. Slide battery out completely—inspect the silver contact pins on both battery and handle for dust or corrosion.
3. Wipe contacts with a dry microfiber cloth (never liquid!).
4. Reinsert battery with firm downward pressure until you hear a definitive click.
Visual cue: Properly seated batteries show no visible gap between battery and handle. If it wobbles, it’s not locked in.
Perform a Battery Power Cycle
Revive “sleeping” batteries with this method:
1. Remove battery and place vacuum on charger for 10 minutes.
2. Check charger light: Solid red = charging, No light = charger fault.
3. If red light appears, remove vacuum and attempt to power on.
4. If still dead, leave on charger for 24 hours—deeply depleted batteries often need extended revival time.
Warning: Never force a swollen or leaking battery back into the handle—this requires immediate replacement.
Reset Your V11 After Electrical Glitches
Software hiccups can freeze the power system even with a charged battery. This hard reset clears corrupted memory without damaging components.
30-Second Reset for All Models
- Turn off any main power switch (if equipped).
- Remove battery completely.
- Press and hold the trigger for 30 seconds—this drains residual capacitor power.
- Reinsert battery and attempt standard startup.
Critical nuance: For LCD models showing error codes (like “E01”), add: After step 3, press both trigger and mode button for 10 seconds before reinserting battery. This forces a factory reset of the logic board.
Prevent Power Failures With Proactive Maintenance
Avoiding startup issues is simpler than fixing them. Implement these habits immediately:
Monthly Filter Maintenance Checklist
Clogged filters trigger automatic shutdowns that mimic power failures:
– Remove filter by twisting counterclockwise at base.
– Rinse under cold water only (never soap)—shake out excess water.
– Air-dry 24+ hours away from direct heat.
– Reset filter timer post-cleaning: With vacuum on, hold trigger for 8 seconds until “Clean Filter” icon disappears.
Time-saver: Keep a second clean, dry filter on hand to swap during drying periods.
Battery Care Best Practices
Extend battery life and prevent startup failures:
– Never store below 20% charge—recharge after every use.
– Avoid full discharges; switch to Eco mode when battery hits 20%.
– Store upright on dock—never leave detached in a drawer.
– Replace at 24 months—lithium batteries degrade irreversibly after this point.
Urgent note: If runtime drops below 10 minutes on Boost mode, replace the battery now—continued use risks permanent damage.
When Professional Repair Is Non-Negotiable
Some issues demand expert intervention—attempting DIY fixes risks electrocution or voiding warranties. Contact Dyson immediately if you observe:
- Burning smell during charging or startup attempts
- Visible sparks from battery contacts or charger port
- Persistent flashing red lights after 48 hours on charger
- Physical damage to battery casing (dents, swelling, leaks)
Warranty tip: All V11 models include 2-year parts/labor coverage. Have your proof of purchase ready—Dyson often covers battery replacements even after warranty if failure occurs within 3 years.
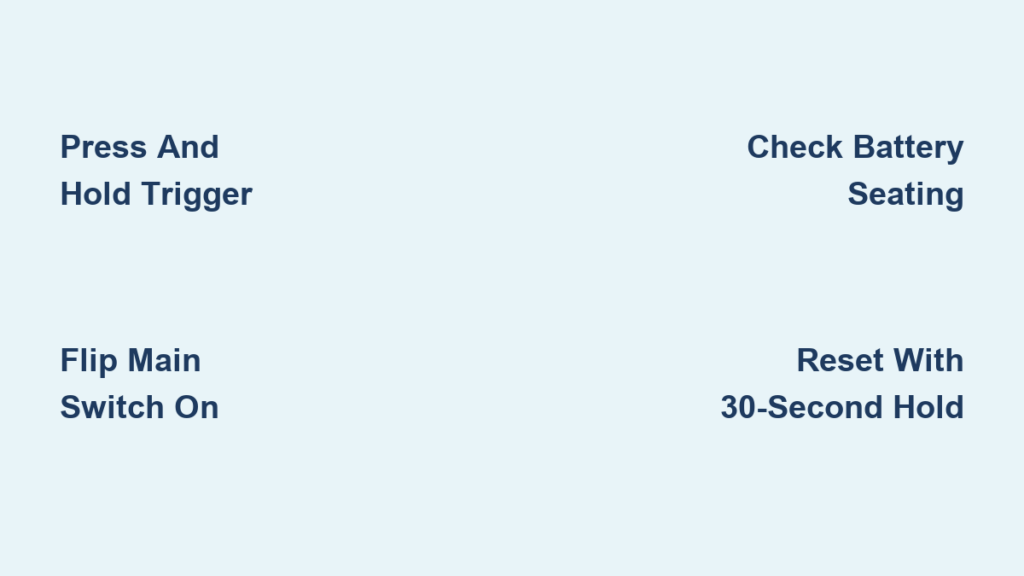
Final Note: Mastering how to turn on Dyson V11 hinges on identifying your specific model’s activation method and responding to its diagnostic signals. For standard models, remember: press and hold the trigger. For Outsize/V12 variants: flip the main switch ON first, then press the trigger. When power fails, always verify battery seating before assuming component failure—this single step resolves most “dead vacuum” emergencies. Implement monthly filter cleaning and proper charging habits to prevent 90% of startup issues. If your V11 still won’t power on after completing all reset steps, visit Dyson’s official support portal for live troubleshooting with certified technicians—many issues get resolved through guided diagnostics without shipping the unit. Keep this guide bookmarked for instant reference the next time your vacuum refuses to start.

