Your Dyson cordless vacuum suddenly dies after cleaning just one room. The battery indicator flashes red after 2 minutes of use. This frustrating scenario hits thousands of Dyson SV03, DC44, DC58, and DC59 owners as their original lithium-ion battery degrades past its 2-4 year lifespan. When runtime plummets from the original 6-10 minutes to barely enough for a single hallway, replacing the Dyson SV03 battery becomes the most cost-effective solution—saving you $200+ compared to buying a new vacuum. This step-by-step guide shows exactly how to replace your Dyson SV03 battery in under 15 minutes using just one tool. You’ll restore your vacuum’s original cleaning capacity and avoid unnecessary e-waste.
Identifying Your SV03 Model and Correct Battery Type
Before purchasing a replacement, confirm you have the specific SV03 battery model. This is critical—using the wrong battery risks damage or fire hazards. The Dyson SV03 battery pack lacks the red release button found on newer models like the V7 or V8. Instead, it secures with a single Phillips screw on the handle’s underside. Check your vacuum’s model number stamped near the charging port or on the original packaging. Compatible models include DC44 Animal, DC58 Absolute, and DC59 Origin. Never substitute batteries from other Dyson series.
Why SV03 Battery Compatibility Matters
Using non-SV03 batteries causes immediate problems. A DC62 battery (22.2V) forced into an SV03 handle (21.6V) overheats the motor. Third-party “universal” packs often lack the SV03’s precise connector shape, causing intermittent power cuts. Genuine SV03 replacements display “SV03” or “21.6V 2000mAh” on the label. Pro Tip: Search “Dyson SV03 battery” on Amazon and filter for “Ships from/Sold by Amazon” to avoid counterfeit packs.
Essential Tools for SV03 Battery Replacement
You need exactly three items for this repair—nothing more. Gather these before starting:
- PH2 Phillips screwdriver (the #2 size, not #1)—using the wrong size strips the screw head
- Verified SV03 replacement battery (21.6V, check label for “SV03” or “for DC44/DC58/DC59”)
- Non-slip work surface (wood table or rubber mat prevents tool slippage)
Critical Safety Note: Unplug the charger and power off the vacuum. Lithium-ion batteries can ignite if punctured—never work near water or flammable materials. Place the old battery in a non-conductive container (like a ceramic bowl) immediately after removal.
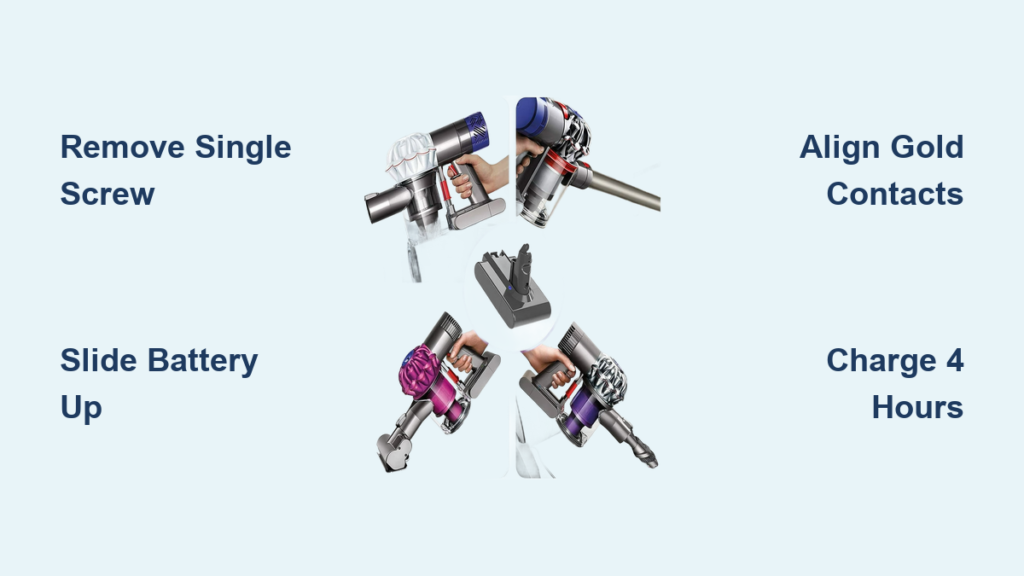
Removing the Old SV03 Battery in 3 Steps
Locating the Single SV03 Battery Screw
Turn the vacuum handle-side up. The screw sits centered on the handle’s underside, 1 inch below the trigger. Unlike newer Dysons, there are no hidden clips or secondary screws—just this single fastener. If you see a red button, you have the wrong model (likely V6/V7). Use a flashlight to confirm the screw head isn’t obstructed by hair or debris.
Proper Screw Removal Technique
Insert the PH2 screwdriver fully into the screw head. Apply firm downward pressure while turning counterclockwise—this prevents cam-out (slipping). Rotate slowly; the threads are plastic and strip easily. Once loose, unscrew completely and place the screw in a bowl (not on wood—metal screws vanish instantly). Never force the screwdriver—if it slips, stop and reposition.
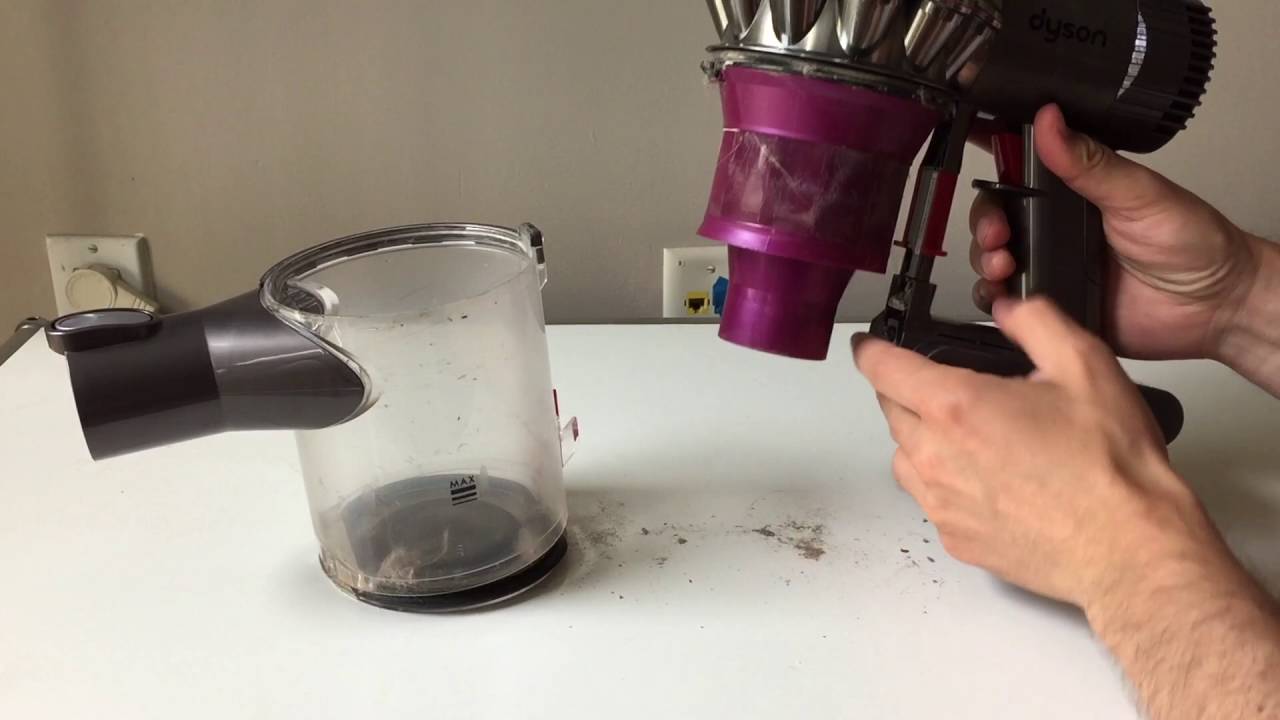
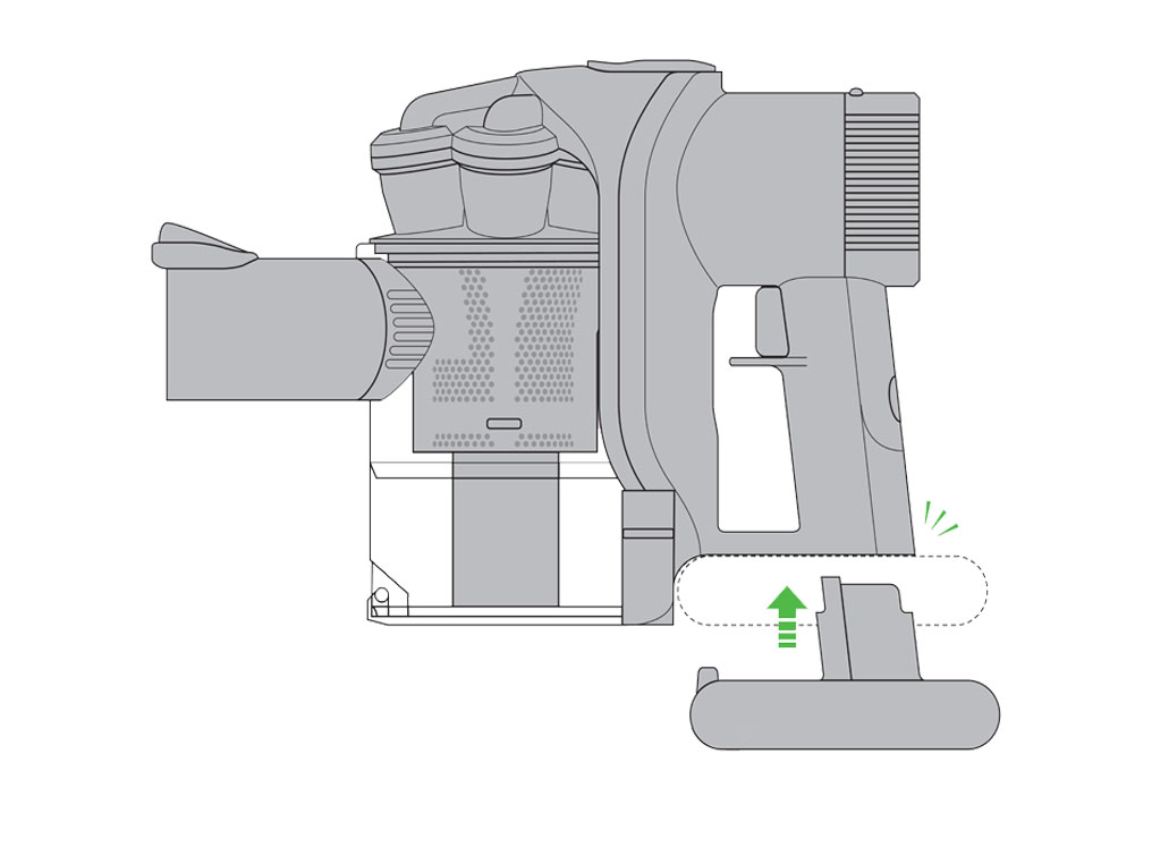
Extracting the Battery Without Damaging Contacts
With the screw removed, grip the battery pack firmly at both ends. Slide it upward toward the trigger (not downward toward the floor)—this disengages the electrical connector. If stuck, wiggle gently side-to-side while pulling up. Do NOT pry with tools. If resistance persists, check for a charging cable still plugged into the base port. Forcing it tears internal wires.
Installing Your New SV03 Battery Correctly
Aligning the Battery Connector
Hold the new battery with the label facing you. Notice the gold connector pins on its top edge—they must face the vacuum’s internal socket. Insert the bottom edge first, then tilt the top toward the handle. You’ll hear a soft click when seated properly. Warning: Forcing misaligned pins bends them, causing permanent charging failure.
Securing the Battery Without Stripping Threads
Position the screw hole over the handle’s threaded insert. Start the screw by hand—turn clockwise just until resistance increases. Now use the screwdriver with light pressure. Stop when the screw head sits flush with the handle. Over-tightening cracks the plastic housing—this is the #1 repair mistake. If the screw spins freely, the threads are stripped; use thread locker gel for reassembly.
First Charge and Calibration for Maximum Runtime
Why the Initial 4-Hour Charge Is Non-Negotiable
Lithium-ion batteries ship at 30% charge. Skipping the full initial charge reduces long-term capacity. Plug the charger directly into the vacuum (not the dock) for stable voltage. Set a timer for 4 hours—even if the light turns solid green at 3 hours. This conditions the battery management system. Never use the vacuum during this first charge.
Calibrating Your SV03 Battery in 2 Cycles
After the first full charge:
1. Run the vacuum on medium power until it auto-shuts off (≈8 minutes)
2. Recharge uninterrupted for 4 hours
3. Repeat once more
This trains the vacuum to report accurate battery levels. Expect restored 6-10 minute runtime—not the 15+ minutes of newer models. If runtime stays under 4 minutes, the replacement battery is defective.
Troubleshooting Post-Replacement Failures

Why Your Vacuum Won’t Turn On After Battery Swap
Check these in order:
1. Is the battery pushed fully upward until clicking? (90% of “dead” batteries are misseated)
2. Is the screw tightened enough to compress the contacts? (Loose screws cause no-power)
3. Did you complete the 4-hour initial charge? (New batteries need conditioning)
Fixing Intermittent Power Cuts During Use
Wipe the gold contacts inside the handle and on the battery with a dry microfiber cloth. Hair debris here causes voltage drops. If cutting out persists, remove/reinsert the battery 3 times—this cleans the connection through friction. Never use alcohol—it corrodes contacts.
Solving Poor Runtime Despite New Battery
Cheap replacement packs often overstate capacity. Verify your battery’s mAh rating: genuine SV03 packs are 2000mAh. If it shows 3000mAh+, it’s counterfeit. Return packs that deplete faster than your old battery—quality replacements last 18-24 months.
Where to Buy Genuine SV03 Replacement Batteries
Avoid marketplaces flooded with fakes. These sources guarantee compatibility:
* Dyson Parts Direct (official parts site—search “SV03 battery”)
* Vacuum Cleaner Repair (specialized retailer with SV03-specific listings)
* Amazon Renewed (refurbished genuine Dyson batteries with warranty)
Red Flags in Listings: “Universal fit,” voltages above 22V, or prices under $25. Genuine SV03 batteries cost $35-$45. Check reviews for “fit my DC58” comments—this confirms model compatibility.
Extending Your New SV03 Battery’s Lifespan
Daily Charging Best Practices
- Never store at 0%: Recharge when the vacuum shuts off (usually 15% remaining)
- Unplug after full charge: Leaving it on the dock degrades capacity 20% faster
- Store at 50% for vacations: Charge to half, then power off for >30 days
Environmental Factors That Kill Batteries
Heat is the #1 enemy. Never leave your Dyson in a car (140°F+ temperatures permanently reduce capacity). Store in closets or under sinks—not near radiators or dishwashers. Cold isn’t harmful short-term, but never charge below 32°F—this causes internal damage.
Responsible Disposal of Your Old SV03 Battery
Lithium-ion batteries cause 200+ household fires yearly when trashed. Never throw in regular garbage. Instead:
1. Tape the terminals with electrical tape
2. Place in a metal container (like an empty coffee can)
3. Take to Best Buy, Home Depot, or Call2Recycle drop-off
Most retailers accept dead batteries—even without a receipt. This process takes 2 minutes but prevents landfill contamination.
Replacing your Dyson SV03 battery takes less time than baking cookies and restores 100% of your vacuum’s original cleaning power. By using the correct 21.6V pack, securing the single screw without over-tightening, and completing the 4-hour initial charge, you’ll gain 2+ years of reliable service. Remember to recycle the old battery properly—this small step keeps toxic materials out of landfills. Now that your vacuum runs like new, maintain peak performance by unplugging after full charges and storing at 50% for extended breaks. For DC44/DC58/DC59 owners facing sudden battery death, this repair isn’t just economical—it’s the smartest way to extend your Dyson’s life. Ready for deeper maintenance? Learn how to clean your SV03 filter without voiding warranties in our next guide.

