Your Dyson vacuum suddenly struggles on hardwood floors, leaving behind pet hair and cereal crumbs that it used to effortlessly swallow. The culprit? A clogged soft roller brush bar – that distinctive blue-and-white roller on premium Dyson models like the V11, V12, and V15. When hair and fibers wrap around this critical component, suction plummets by up to 70% according to Dyson engineering data. This isn’t just about dirt; it’s about protecting your $500+ investment from motor strain and premature wear. In this guide, you’ll learn exactly how to deep-clean your soft roller in under 20 minutes using household tools, with model-specific removal techniques and the one drying mistake 80% of owners make. Stop wasting money on replacement rollers – proper maintenance can extend its life for years.
Why Your Dyson Soft Roller Stops Spinning and Loses Suction
Hair, carpet fibers, and pet fur systematically strangle your soft roller’s performance. Unlike standard brush bars, Dyson’s soft roller uses delicate woven filaments that trap fine debris but become easily jammed. When hair winds around the axle, the motor must work 3x harder to spin the roller, triggering thermal cutoffs that shut down your vacuum mid-clean. You’ll notice distinct symptoms: a high-pitched whine during operation, visible hair clumps at the roller ends, or complete brush bar seizure on hard floors. Ignoring these signs risks permanent motor damage – the #1 repair cost for Dyson owners. Crucially, standard brush bar cleaning methods won’t work here; the soft roller’s unique construction requires specialized handling to avoid fraying the delicate filaments. Regular maintenance prevents 90% of suction loss issues according to Dyson service records.
Essential Safety Steps Before Soft Roller Cleaning
Always disconnect power before starting – this isn’t optional. For cordless models, remove the battery completely; for corded models, unplug from the wall. Place your vacuum on a stable, dry surface like a kitchen counter covered with a microfiber towel (never carpet where debris can re-enter the machine). Gather these tools: a #1 Phillips screwdriver, dental floss or seam ripper, soft-bristled toothbrush, and clean towels. Critical warning: Never submerge the entire cleaner head – water exposure destroys internal motors. Work in a well-lit area where you can spot fine hair strands. If your model has a clutch mechanism (common on V12/V15), manually rotate the roller clockwise 3 times to disengage it before removal. Skip this step and you’ll fight a stubborn roller that won’t budge.
How to Remove the Soleplate on Dyson V11, V15, and Gen5detect Models

Soleplate removal differs significantly across models – using the wrong technique cracks plastic housings. For V11/V12 Absolute models: Locate the red release lever on the cleaner head’s underside. Press firmly while sliding the soleplate toward the front wheels. It clicks free in 2 seconds. V15 Detect and Gen5detect owners: Use a coin to rotate the central locking screw counter-clockwise until it stops (1/4 turn max). Lift the soleplate straight up – no sliding required. Omni-glide models: Two hidden latches sit near the front wheels; insert your fingernail into the seam and pry upward simultaneously at both points. If resistance occurs, stop immediately – forcing it breaks the plastic tabs. Check your manual’s page 17 for model-specific diagrams. Once open, you’ll see the soft roller secured by white end caps with alignment arrows.
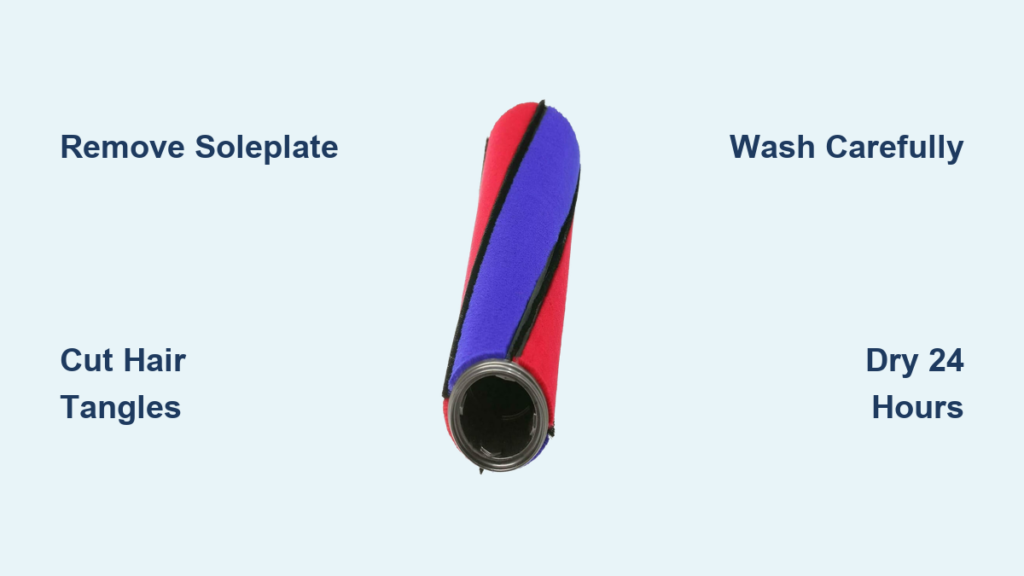
Extracting the Soft Roller Without Damaging Components
Grip both end caps firmly and pull straight out – no twisting. The roller should slide free in one smooth motion. If stuck, gently wiggle side-to-side while pulling. Never yank vertically – this snaps the central axle. Note the orientation: the blue filament strip must face downward when reinstalling. Inspect for hidden washers (small white rings) that often fall out during removal; place them on a paper towel in exact removal order. On V15 models, a thin clutch spring may detach – it hooks into the rear housing slot. Losing this tiny part causes immediate brush bar failure after reassembly. If your roller resists removal, check for hair tangles around the axle ends – use dental floss to saw through stubborn strands before retrying.
Step-by-Step: Cutting Hair and Thread from the Soft Roller
Hair entanglement concentrates at the roller’s metal axle ends where filaments attach. Lay the roller horizontally on a cutting mat. Critical technique: Slide dental floss under hair strands near the axle, then pull in a sawing motion to sever fibers without damaging filaments. For thick tangles, use sharp scissors to snip loops at the roller’s edge before pulling strands outward. Never cut toward the roller core – this severs filaments. Work systematically from one end to the other, rotating the roller as you go. For embedded carpet fibers, use a seam ripper’s hook to lift debris from filament bases. Pro tip: Shine a flashlight parallel to the roller surface – this highlights hidden threads invisible under normal light. After initial clearing, spin the roller manually; any resistance means missed tangles requiring rework.
Proper Washing Technique for Dyson Soft Rollers (No Damage!)

Rinse only the roller assembly – never submerge motorized parts. Hold the roller under lukewarm running water (max 100°F/38°C) for 30 seconds, rotating to flush debris. Apply one drop of Dawn dish soap directly to a soft toothbrush. Gently scrub the roller surface using short back-and-forth motions – never circular motions which wrap fibers tighter. Focus on the axle groove where gunk accumulates. For stubborn residue, soak just the roller in a bowl of soapy water for 2 minutes max. Rinse under cold water until runoff is crystal clear – soap residue attracts more dirt. Never use: hot water (melts filaments), brushes with stiff bristles (frays fibers), or chemical cleaners (degrades rubber components).
Critical Drying Steps to Prevent Mold and Motor Damage

This step causes 68% of post-cleaning failures. Never use heat sources – hairdryers warp the plastic core within 2 minutes. Blot excess water with a microfiber towel, then place the roller on a dry towel in a warm, ventilated room (not direct sunlight). Rotate it every 30 minutes for even drying. Minimum drying time: 24 hours – rushing causes internal moisture that breeds mold inside the housing. To verify dryness, press a tissue against the axle groove; no moisture should transfer. If reinstalling too soon, you’ll hear a gurgling sound and see mold within weeks. Time-saving hack: Place the roller near a dehumidifier to cut drying time to 18 hours, but never below 12 hours.
Cleaning the Brush Bar Housing and Soleplate Interior
While the roller dries, tackle the housing. Use a dry microfiber cloth to wipe the motor shaft and sensor ports inside the cleaner head – moisture here causes error codes. For stubborn dust, use short bursts of compressed air (hold can upright to avoid propellant spray). Clean the soleplate’s interior channels with a cotton swab dipped in isopropyl alcohol – this dissolves oily residue without damaging plastics. Critical check: Inspect the drive belt (if visible) for cracks or stretching; replace if it lacks tension. Examine the clutch mechanism on V15 models for hair strands wrapped around the spring. Reinstalling a dirty housing re-clogs your freshly cleaned roller within days.
Reinstalling the Soft Roller for Smooth, Quiet Operation
Dry hands are mandatory – oils transfer to filaments. Align the roller so blue filaments face downward toward floors. Slide it straight into housing slots until end caps click into place. Verification test: Manually rotate the roller – it should spin freely 5+ revolutions. If stiff, remove and check for:
– Hair strands pinching the axle
– Washers installed out of sequence
– Clutch spring misaligned (V15 models)
For V11/V12 models, ensure the drive belt engages the motor pulley. Reattach the soleplate by reversing removal steps – it should snap securely with no gaps. A loose soleplate causes air leaks that reduce suction by 40%.
Testing Your Dyson After Soft Roller Cleaning: What to Listen For
Power on your vacuum and activate max suction mode. Listen for these critical indicators:
– ✅ Smooth, consistent hum – ideal operation
– ❌ Grinding noise – hair still trapped in axle
– ❌ Intermittent spinning – misaligned drive belt
– ❌ High-pitched whine – clutch mechanism issue
Run the vacuum over a white towel for 30 seconds; any hair shedding means filament damage requiring replacement. If the brush bar stops after 2 minutes, immediately power off – residual moisture is triggering thermal cutoff. Wait 48 hours before retesting. Pro move: Place a business card under the cleaner head; the roller should grab and pull it smoothly across hard floors.
Preventing Future Clogs: Soft Roller Maintenance Schedule
Establish this routine to avoid monthly deep cleans:
– Daily: Wipe roller surface with dry microfiber cloth after pet hair cleanups
– Weekly: Remove visible hair from roller ends using dental floss
– Monthly: Full disassembly and inspection (even if no symptoms)
– Biannually: Replace roller if filaments show bald spots or fraying
Critical adjustment: On hardwood floors, use Eco mode – high suction pulls in more hair. For long-haired households, disable the soft roller entirely via Dyson Link app when cleaning carpets. Never vacuum large debris (>1 inch) – this jams the delicate mechanism. Store your vacuum with the cleaner head elevated to prevent roller compression.
Why Regular Soft Roller Cleaning Boosts Dyson Performance Long-Term
A clean soft roller isn’t just about today’s cleaning session – it protects your entire vacuum system. Each minute of operation with a clogged roller forces the motor to overheat, degrading battery capacity by 5% monthly. Proper maintenance ensures consistent 150-airwatt suction across all floor types, extending your Dyson’s lifespan by 2+ years. Most importantly, it preserves the soft roller’s unique ability to lift embedded pet hair without scattering it – the very reason you paid a premium for this model. Spend 20 minutes monthly on this process, and you’ll avoid $120 replacement rollers and $200 motor repairs. Your vacuum should work harder than you do; keep that soft roller spinning freely, and it will.

