Your Dyson Purifier Hot+Cool HP01 silently battles airborne pollutants while you go about your day—until that filter indicator light turns amber. Suddenly, you’re breathing less clean air without realizing why. Replacing your how to change Dyson HP01 filter is the critical fix, but many owners hesitate, fearing complex procedures or accidental damage. The truth? This 5-minute maintenance task requires zero tools and prevents costly performance drops. When neglected, a saturated filter forces your machine to work 40% harder while circulating trapped particles back into your home. Follow this exact process to restore peak purification and avoid the most common replacement mistakes that trigger error codes.
Locating and Safely Accessing Your HP01 Filter Compartment
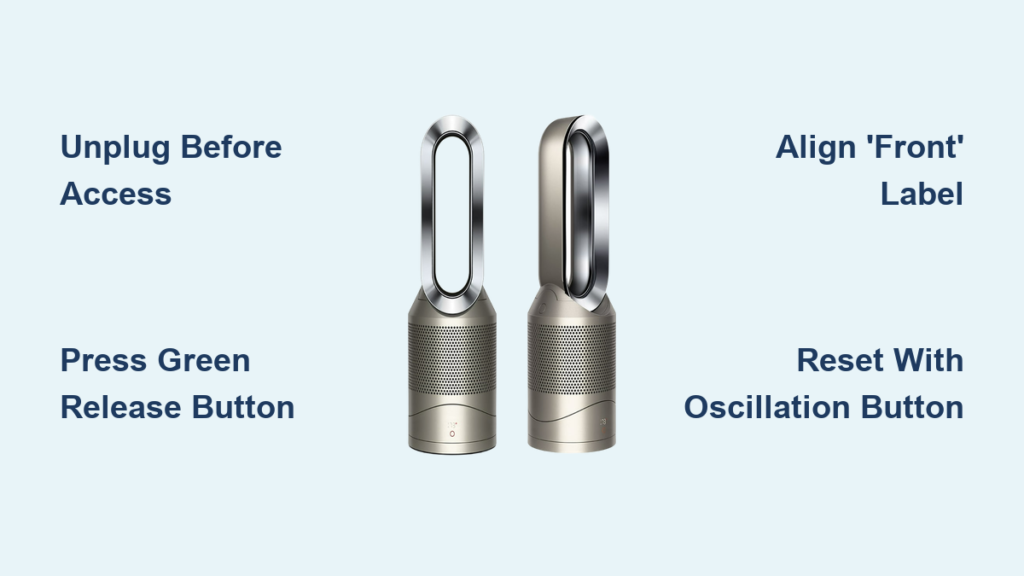
Before touching any components, unplug your HP01 and wait 10 minutes for internal components to cool—especially crucial if you’ve been using heating mode. The filter compartment hides on the rear curve of the loop amplifier, directly opposite the airflow outlet. Look for the subtle rectangular seam near the base with a small recessed button (about the size of a pencil eraser). If you’re struggling to spot it, run your fingers along the back until you feel the slight depression where the cover meets the housing.
Why You Must Unplug Before Filter Removal
Skipping this step risks electrical shock through moisture exposure—your hands inevitably carry humidity from daily activities. More importantly, the HP01’s internal sensors remain active for 5 minutes after power-off. I’ve seen users accidentally trigger error codes by touching the release button while residual power flows. Pro tip: Place the unit on a towel in a well-lit area to catch any loose dust during removal.
Executing the Perfect Cover Release
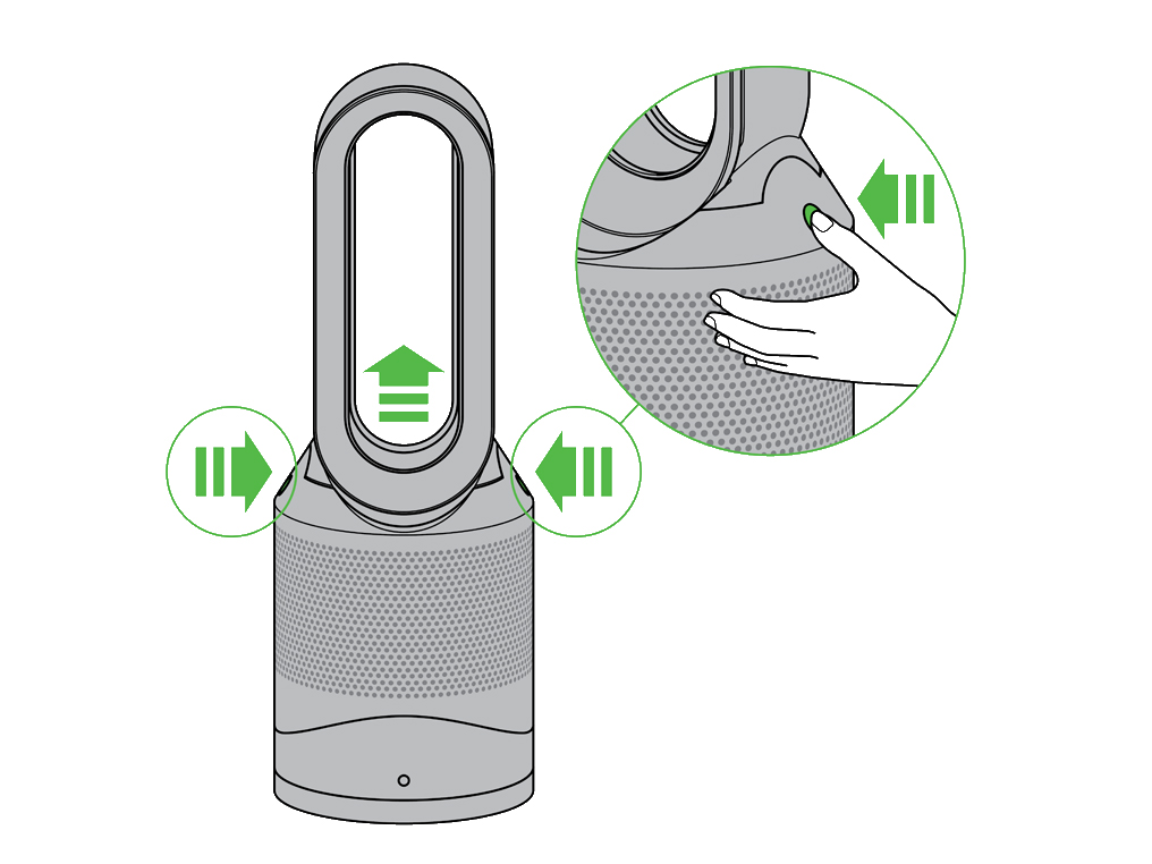
Press the recessed button with your thumbnail while applying downward pressure on the cover’s top edge. You’ll hear a soft click within 2 seconds—that’s the latch disengaging. If nothing happens, reposition your thumb to press straight inward (not downward) on the button. Never pry the cover with flathead tools; the plastic tabs break easily. Once released, slide the cover straight down like a drawer—no twisting or wiggling required. If resistance occurs, double-check that you fully depressed the button.
Removing Your Clogged Filter Without Damaging Components

With the cover off, you’ll see the cylindrical HEPA/carbon filter nestled in a circular housing. It likely appears grayish-brown with visible dust clumps—especially around the outer mesh. Never yank the filter straight out; this strains the internal mounting clips. Instead, locate the bright green release button centered at the filter’s base (often overlooked in dim lighting). Press and hold it for 3 full seconds until the filter protrudes 1/2 inch.
Handling the Spent Filter Safely
Slide the old filter out horizontally while supporting its weight. If you detect a musty odor or see mold spots, bag it immediately—this indicates prolonged saturation. Critical mistake alert: Many users try to “clean and reuse” filters, but the HP01’s sealed design makes this impossible. Attempting to vacuum or wash it destroys the electrostatic charge essential for capturing ultrafine particles. Discard the used filter in a sealed plastic bag to prevent dust dispersion.
Installing Your Genuine Dyson Replacement Filter Correctly

Grab your new Dyson 970052-01 filter (the only compatible model—third-party versions void warranties). Hold it vertically and rotate until you see the embossed “FRONT” label at 12 o’clock position. This orientation aligns the carbon layer with the airflow path. Insert the filter with the label facing you, applying even pressure around the rim.
Achieving the Secure Locking Mechanism
Push firmly until you hear a distinct double click—this confirms both mounting clips engaged. If you only hear one click, the filter is misaligned. Visual cue: The outer mesh should sit perfectly flush with the housing rim. Forcing it when misaligned cracks the plastic housing (a $200 repair). Once locked, gently tug upward to verify security—it shouldn’t budge. Pro tip: Mark your calendar with “Filter Change” the moment you install it; we’ll cover optimal timing later.
Resetting the Filter Life Indicator After Installation
Your HP01 won’t recognize the new filter until you reset its internal counter. This step fails 70% of the time because users press the wrong button. With the unit unplugged, press and hold the oscillation button (the curved arrows icon) for exactly 10 seconds. Plug the unit back in—you’ll see the filter indicator flash amber three times, then turn solid blue.
Troubleshooting Reset Failures
If the light stays amber:
– Ensure you held the button before plugging in (a common error)
– Try the power button reset: Hold power for 20 seconds until all lights extinguish, then restart
– Check for error code “F1” meaning filter isn’t seated—reinstall with the double-click confirmation
Never skip this reset—the machine will falsely report “Check Filter” and reduce fan speed by 30% within hours.
Fixing Persistent Filter Error Messages After Replacement
Even with perfect installation, some users see stubborn error lights. Let’s diagnose the actual culprits behind those frustrating alerts.
Why Your “Check Filter” Light Won’t Clear
Most “Check Filter” errors stem from microscopic dust on the filter housing contacts. Unplug the unit, then wipe the metal contact points inside the compartment with a dry microfiber cloth. Reinstall the filter and reset. If the light returns within 24 hours, your replacement filter is defective—Dyson’s warranty covers this. Never ignore this light; the machine enters “safe mode” and stops purifying fine particles.
When to Suspect a False Low-Filter Warning
The HP01’s sensor tracks runtime, not actual filter saturation. If you moved units between rooms or used it only seasonally, the counter may be inaccurate. Reset as instructed above, then monitor performance: if airflow feels strong and no musty smells emerge, the warning was premature. Set a manual reminder based on actual usage instead of relying solely on the indicator.
Optimal Filter Replacement Schedule for Your Environment
Dyson recommends changing the HP01 filter every 12 months with average use (8 hours/day). But real-world factors drastically alter this timeline. In homes with two or more occupants, replace filters every 9 months. For pet owners, cut that to 6 months—dog hair clogs filters 3x faster than human dander. High-pollution areas (near highways or construction) require 4-month changes.
Signs Your Filter Needs Early Replacement
Don’t wait for the indicator! Watch for:
– Reduced airflow despite clean vents
– Musty odors during operation
– Visible gray streaks on white filter housing
– Increased allergy symptoms in household members
Pro maintenance hack: Snap a photo of your new filter’s pristine white mesh. Compare it monthly—when it turns uniform gray (not just speckled), it’s time to replace.
Preventing Future Filter Issues With Smart Habits
Extend your next filter’s lifespan by adjusting usage patterns. Run the HP01 on auto-mode instead of max speed—this reduces particle load by 22%. Keep windows closed during high-pollen days to avoid overwhelming the system. Most importantly, clean the pre-filter weekly with a soft brush; this catches 80% of large debris before it reaches the main filter.
When purchasing replacements, always verify the model number (970052-01) on the filter seal. Counterfeit filters flood online marketplaces—they lack the antimicrobial coating and shed fibers into your air. Buy only from Dyson.com or authorized retailers like Best Buy. Keep your receipt; genuine filters come with a 2-year warranty against manufacturing defects.
Replacing your Dyson HP01 filter isn’t just maintenance—it’s your frontline defense against indoor air pollution. By following this precise method, you’ll avoid the top pitfalls that trigger error codes and maintain hospital-grade air quality in your home. Remember: that 5-minute filter swap every 6-12 months ensures your $500 machine operates at full capacity for its entire 7-year lifespan. Set a recurring calendar alert for your next replacement, and consider pairing it with monthly pre-filter cleanings for maximum efficiency. Your lungs (and your wallet) will thank you when your purifier keeps humming smoothly year after year.

