Ever wonder how your Dyson cordless vacuum magically stays charged and organized without cluttering your floor space? The answer lies in Dyson’s ingenious wall mount system—a clever integration of mechanical engineering and electrical design that transforms your vacuum from a floor-stored appliance into a permanent cleaning station. Understanding how does Dyson wall mount work reveals why this system keeps your vacuum fully charged, tools perfectly organized, and your living space clutter-free. In this guide, you’ll discover the precise mechanics behind the click-and-charge functionality, installation requirements for different wall types, and practical troubleshooting for common issues.
Unlike conventional charging docks, Dyson’s wall mount system functions as a unified storage and charging solution engineered specifically for cordless vacuums like the V7, V8, and similar models. The system’s deceptively simple design hides a sophisticated mechanism that ensures your vacuum is always ready when you need it. By the end of this guide, you’ll know exactly how to install, maintain, and troubleshoot your wall mount for optimal performance.
The Precise Mechanics Behind Dyson Wall Mount Charging
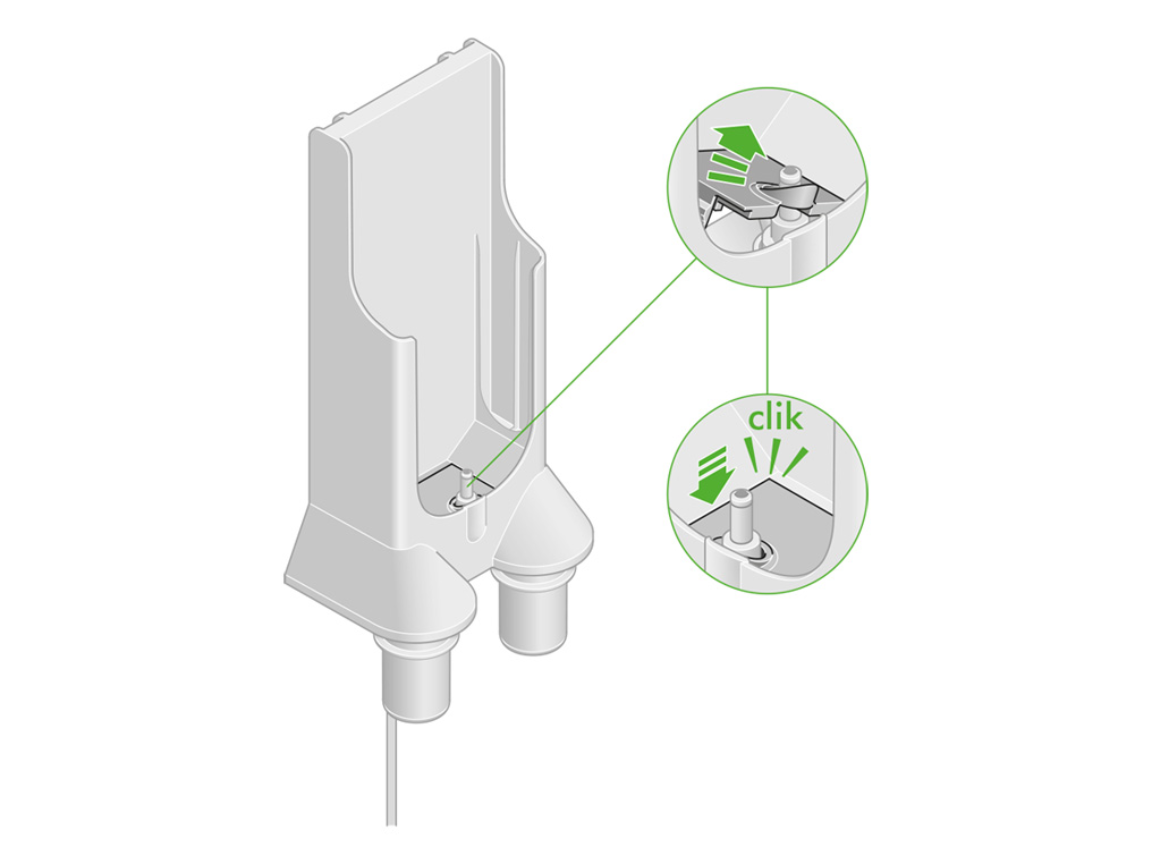
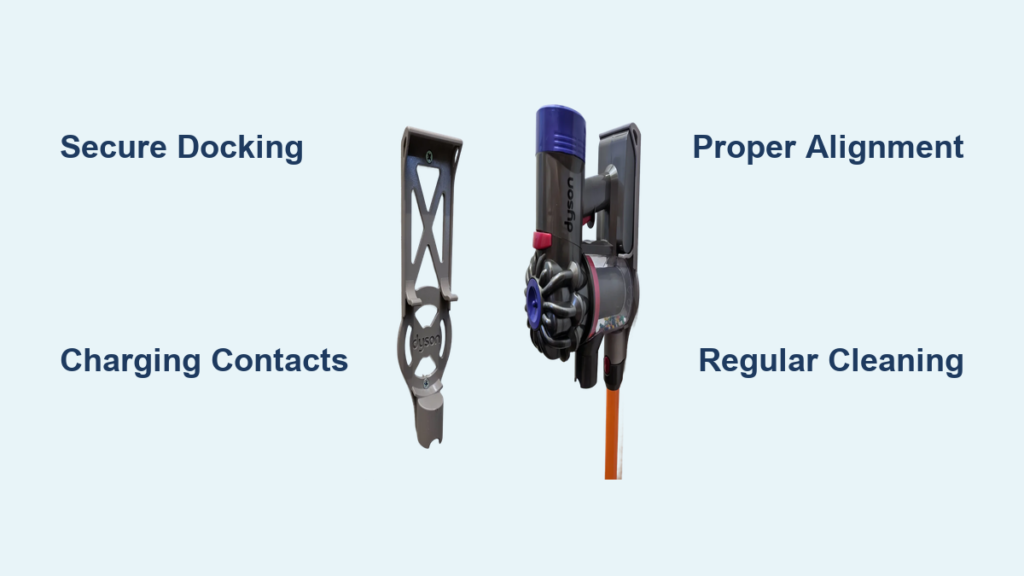
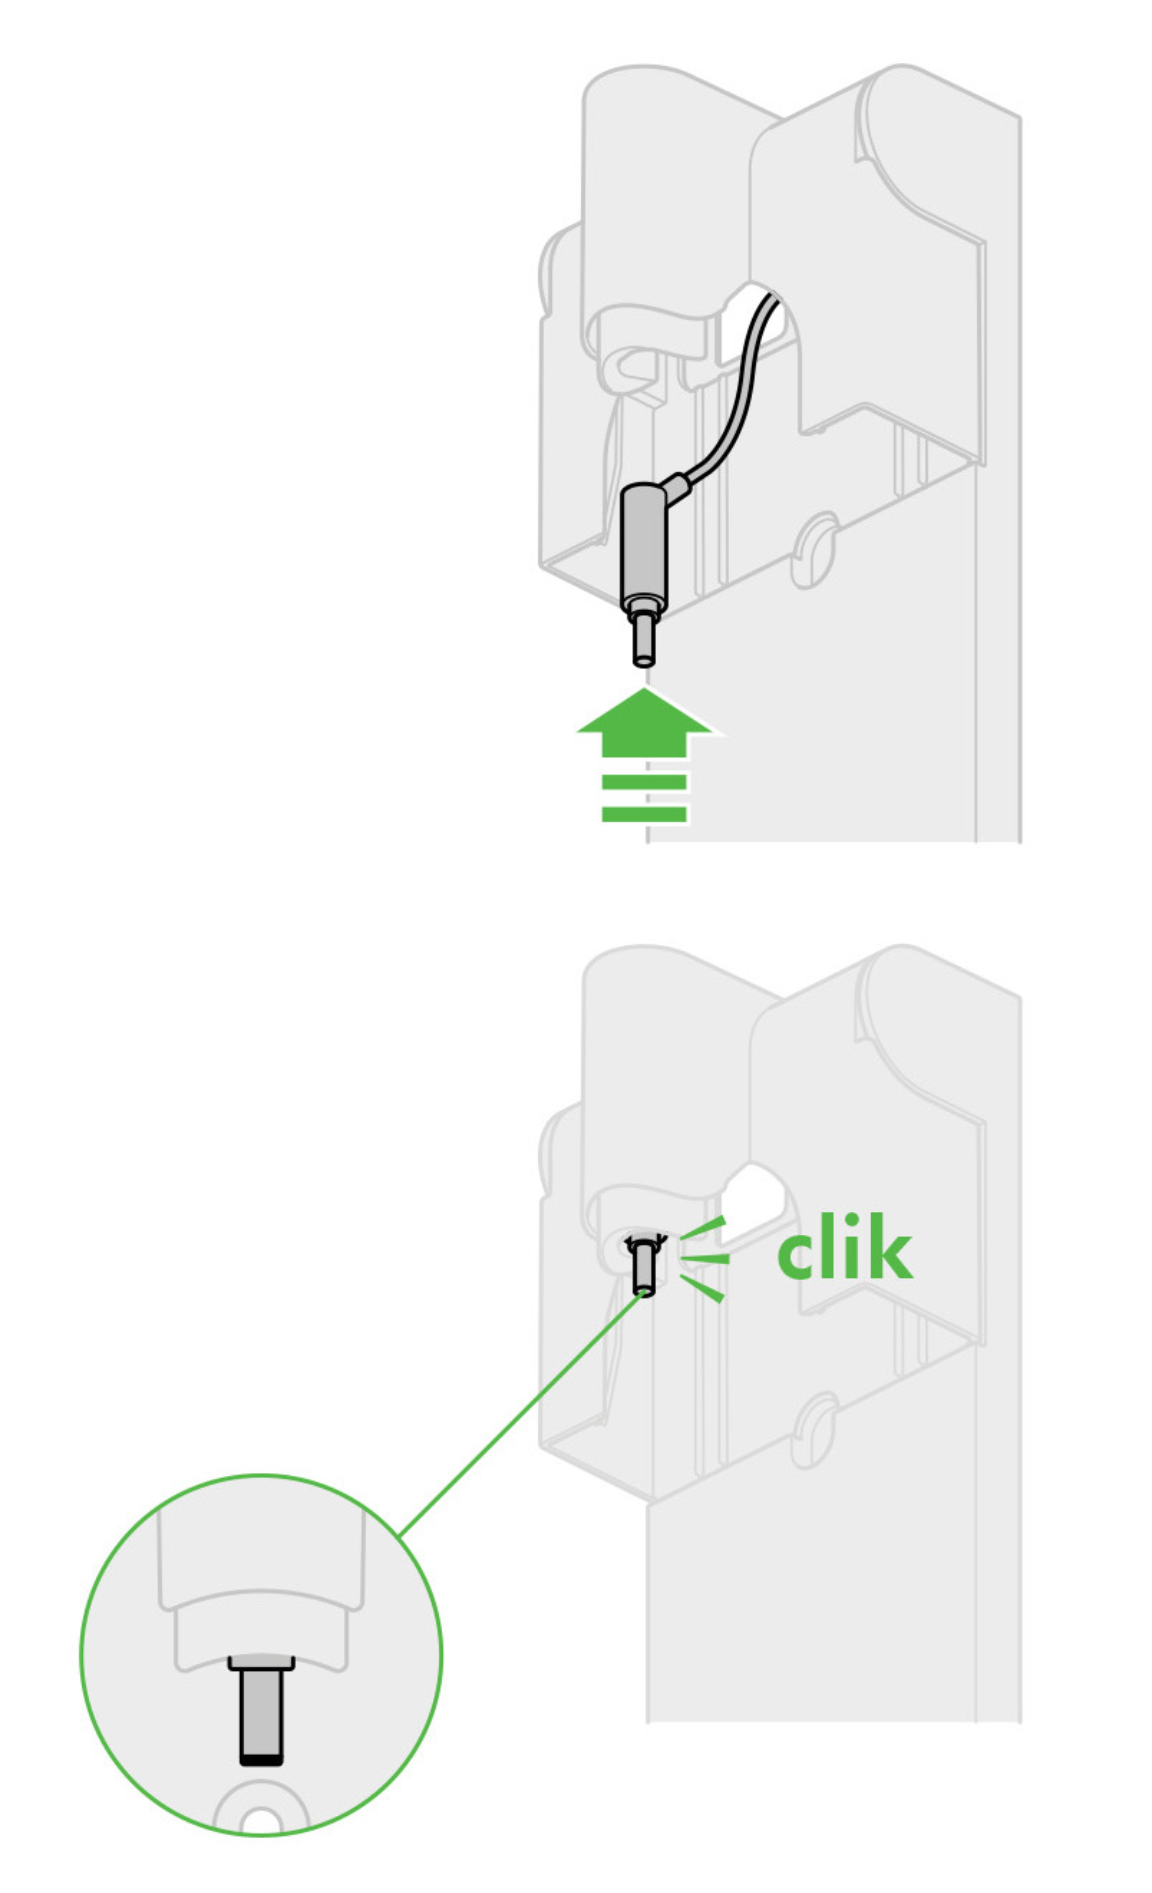
Dyson wall mounts work through a carefully engineered system that combines secure mechanical docking with efficient electrical contact. When you dock your vacuum, the charging port on the handle makes direct contact with spring-loaded, gold-plated pins inside the dock. This metal-to-metal connection bypasses traditional plug-and-socket systems, creating a seamless charging experience that begins the moment your vacuum clicks into place.
How the Charging Contact System Actually Works
The magic happens through five precisely engineered components working in concert. First, the wall plate provides a stable foundation that securely attaches to your wall using appropriate anchors for your wall type. When you mount the charging dock onto this plate, it creates the perfect alignment for the vacuum. The docking cradle features precisely shaped guides that ensure your vacuum slides into the exact position needed for charging. As you push the vacuum into place, spring-loaded gold-plated contacts in the dock mate with corresponding points on your vacuum’s handle. These corrosion-resistant contacts deliver 25.2V DC power directly to your vacuum’s battery management system, which regulates the charging process for optimal battery health.
You’ll know it’s working when you see the charging indicator light activate—typically a solid or pulsing LED on the vacuum handle or dock. This direct contact system eliminates the wear and tear of traditional plug connections, making it more durable while ensuring consistent charging performance. For best results, clean these contacts monthly with a dry cotton swab and isopropyl alcohol to prevent dust buildup from interfering with the electrical connection.
Why Your Vacuum Clicks Securely Every Time
The satisfying “click” you hear when docking your Dyson isn’t just for show—it’s a critical mechanical feature that ensures proper alignment for both security and charging. This locking mechanism consists of precision-molded plastic guides that channel the vacuum into the exact position needed. The vacuum’s handle contour matches the dock’s cradle shape, creating a snug fit that prevents accidental dislodging. When properly engaged, the system can support up to 15kg of static load—more than five times the weight of your vacuum—providing peace of mind that your investment stays securely in place.
If you don’t hear that definitive click, your vacuum isn’t properly docked, which explains why charging sometimes fails. The solution is simple: remove the vacuum completely, realign it with the dock’s guides, and firmly push it back into place until you hear the secure click. This proper engagement ensures both the mechanical stability and electrical contact needed for reliable charging.
Installing Your Dyson Wall Mount for Perfect Charging Every Time
Proper installation makes all the difference between a wall mount that works flawlessly and one that causes constant frustration. The key to understanding how does Dyson wall mount work lies in following precise installation techniques tailored to your specific wall type—whether drywall, concrete, or tile.
Choosing the Right Location and Height for Maximum Functionality
Selecting the optimal wall location prevents 90% of installation problems before they start. Mount your Dyson wall dock 1.2-1.5 meters from the floor—high enough to keep it away from foot traffic but low enough for comfortable access. Ensure you have a power outlet within 1-2 meters, as the charging cable has limited reach. Avoid areas with temperature extremes (like near heaters) or moisture exposure (such as bathrooms), as these conditions can damage both the dock and your vacuum’s battery over time.
For drywall installations, always use a stud finder to locate wall studs—mounting directly into wood provides the most secure hold. If you must mount between studs, use heavy-duty drywall anchors rated for at least 50 pounds (23 kg), not the basic plastic anchors included in the kit. Concrete or brick walls require masonry anchors with proper drilling technique to prevent wall damage. The mounting plate must sit perfectly level; even a slight angle can cause misalignment that prevents proper charging contact.
Step-by-Step Installation for Different Wall Types
For Drywall Installations:
1. Locate wall studs using a stud finder with wire detection
2. Mark your desired height (1.2-1.5m from floor) with a pencil
3. Position the mounting plate and use a level to ensure perfect horizontal alignment
4. Drill pilot holes—into studs if possible, or into drywall for anchor placement
5. Insert heavy-duty drywall anchors if not mounting to studs
6. Secure the mounting plate with 4mm x 50mm screws
7. Click the charging dock into place until you hear the secure click
8. Connect the power supply and test with your vacuum
For Concrete/Brick Walls:
– Use a masonry drill bit sized for your wall anchors
– Drill holes at least 25mm deep for proper anchor expansion
– Insert plastic wall plugs designed for masonry
– Secure the mounting plate with appropriate screws
– Allow anchors to set for 24 hours before heavy use if using adhesive anchors
Troubleshooting Common Dyson Wall Mount Problems
Even perfectly installed wall mounts can develop issues over time. Knowing how does Dyson wall mount work helps you quickly diagnose and fix problems before they become major headaches.
Fixing Intermittent Charging Issues in 3 Steps
When your vacuum doesn’t charge consistently on the dock, follow this diagnostic process:
-
Check the charging contacts: Inspect both the dock’s pins and your vacuum’s charging port for dust buildup. Clean both with a cotton swab lightly dampened with 99% isopropyl alcohol—never use water or household cleaners.
-
Verify power supply function: Test the outlet with another device and ensure the adapter is fully plugged in at both ends. A multimeter should read approximately 25.2V DC at the dock’s output.
-
Confirm proper docking technique: Remove all accessories from the vacuum and firmly push the bare vacuum into the dock until you hear the definitive click. Misalignment from accessories can prevent proper contact.
If charging still fails after these steps, the issue may be with the power adapter itself—contact Dyson support for a replacement rather than risking damage with incompatible chargers.
Securing a Loose Wall Mount Without Remounting
A wobbling dock often indicates inadequate wall anchors, but you don’t necessarily need to start over. For drywall installations, insert a self-tapping drywall anchor rated for 50+ pounds next to the existing screw holes. For concrete walls, fill the existing holes with epoxy and redrill with a slightly larger bit for a new anchor. You can also add a thin plywood backing plate behind the mounting plate for extra stability without removing the entire assembly.
Essential Maintenance for Long-Term Wall Mount Performance
Your Dyson wall mount requires minimal maintenance, but these simple practices ensure it functions perfectly for years. Monthly cleaning of the charging contacts with isopropyl alcohol prevents the #1 cause of charging failures—dust and debris buildup. Every three months, check all mounting screws for tightness; vibrations from daily use can gradually loosen them. Annually, remove the dock from the mounting plate to inspect the wall behind for moisture or damage you can’t see otherwise.
For optimal safety and performance, always use the original Dyson power adapter designed for your specific model. Third-party chargers may deliver incorrect voltage that damages your battery or voids your warranty. And remember—while the wall mount keeps your vacuum charged, lithium-ion batteries perform best when stored at 40-60% charge if not used for extended periods.
Understanding how does Dyson wall mount work transforms it from a simple storage solution into an integral part of your cleaning routine. By installing it correctly for your wall type, maintaining the charging contacts, and troubleshooting common issues, you ensure your vacuum remains organized, fully charged, and ready whenever cleaning duty calls. The next time you hear that satisfying click as your vacuum docks, you’ll appreciate the precise engineering that makes your cordless vacuum both powerful and perfectly organized.

