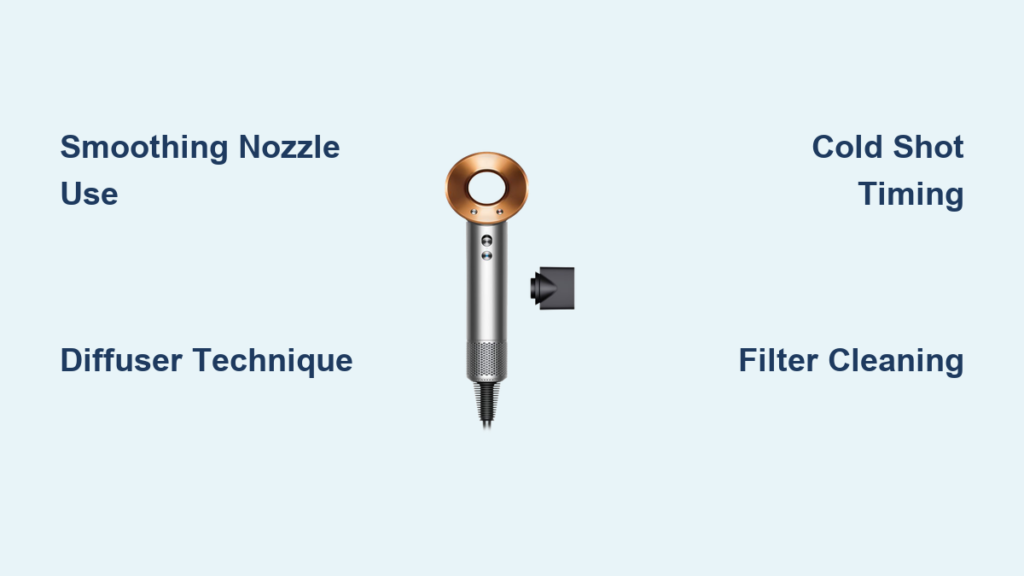
Your Dyson Supersonic isn’t just a hair dryer—it’s a complete styling system transformed by its magnetic attachments. When you know exactly how to use Dyson Supersonic attachments, you unlock professional results that rival salon visits, whether you’re taming frizz, defining curls, or creating voluminous blowouts. Yet most owners underutilize these precision tools, sticking with the default nozzle and missing out on targeted styling. This guide cuts through the confusion with step-by-step techniques verified by Dyson’s engineering specs, so you’ll master every attachment for flawless hair in under 10 minutes per session.
The magic happens through Dyson’s patented Air Multiplier™ technology and Intelligent Heat Control—measuring temperature 40 times per second to prevent damage. But without pairing this power with the right attachment and technique, you’re just blowing air. I’ve seen clients waste $400 dryers because they didn’t know the diffuser requires near-zero movement or that the styling concentrator creates razor-sharp parts. By the end of this guide, you’ll confidently select, attach, and wield each tool for your specific hair type and style goal.
How Dyson’s Motor V9 Powers Every Attachment’s Performance

Your attachments only work because of the Dyson Digital Motor V9 spinning at 110,000 RPM inside the handle. Unlike conventional dryers that blast uneven heat, this motor creates a focused, high-velocity air jet amplified by Air Multiplier™ technology. This concentrated airflow is what lets attachments like the styling concentrator deliver pinpoint precision or the diffuser disperse air gently.
Crucially, the Intelligent Heat Control system constantly regulates temperature at the nozzle exit—meaning attachments never expose hair to extreme heat spikes. When you attach the smoothing nozzle, for example, you’re not just directing airflow; you’re leveraging Dyson’s 40x/second thermal monitoring to smooth cuticles without frying strands. Always start with the motor running before attaching tools to ensure seamless magnetic connection and optimal airflow calibration.
Why Airflow Direction Determines Your Results
The V9 motor’s unique placement in the handle (not the head) creates balanced weight distribution, but more importantly, it allows attachments to precisely channel airflow. Hold any attachment too close to hair (<4 inches), and you disrupt the engineered air path—causing frizz or uneven drying. For best results, maintain 6-8 inches of distance as the airflow exits the attachment at its designed velocity.
Temperature Settings That Make or Break Attachment Performance
Never use high heat with the gentle air attachment—it defeats its purpose of diffusing airflow for delicate hair. Instead:
– Thick/dense hair: High heat + high speed with smoothing nozzle
– Curly/wavy hair: Low heat + low speed with diffuser
– Fine/damaged hair: Medium heat + low speed with gentle air attachment
The cold shot (blue ring) works universally after styling to lock styles, but only activate it after removing the attachment to prevent moisture condensation inside tools.
Smoothing Nozzle: How to Dry and Smooth Hair in One Step
This oval-shaped attachment (pre-attached on your unit) is your daily workhorse for frizz-free shine on all hair types. Its engineered airflow aligns hair cuticles downward as it dries, but only if you use it correctly—most people hold it too far away or move it erratically.
Step-by-Step Smoothing Technique for Glass-Like Shine
- Apply heat protectant to damp hair and section into 2-inch parts
- Hold nozzle 6-8 inches from roots, directing airflow downward along the strand (never sideways)
- With a paddle brush in your other hand, pull hair taut while moving the dryer from root to tip in one smooth motion
- Repeat for each section until 90% dry, then finish with cold shot
Critical mistake to avoid: Blasting roots horizontally. This lifts cuticles, causing frizz. Always point the nozzle downward to seal cuticles. For fine hair, reduce to medium heat to prevent flattening volume.
Styling Concentrator: How to Create Pin-Straight Styles in Minutes
This narrow, 4mm-thick nozzle delivers surgical precision for straight styles and sharp parts—its concentrated airflow cuts through humidity better than any salon tool. But it’s useless if you don’t leverage its unique geometry.
How to Achieve Salon-Straight Hair at Home
Start with damp, protected hair. Take a 1.5-inch section, place it on a round brush, and:
1. Position the concentrator 1 inch above the brush bristles
2. Direct airflow along the brush path (not perpendicular) as you pull through
3. Hold for 5 seconds at the root for volume, then glide smoothly to ends
4. Repeat, overlapping sections by 0.5 inches to avoid ridges
Pro tip for flyaways: After styling, switch to low heat and use the concentrator’s edge like a paintbrush. Gently “draw” over baby hairs with short, 2-second bursts—no brushing needed. For side parts, run the nozzle along the part line for 3 seconds to melt any fuzz.
Diffuser: How to Dry Curly Hair Without Frizz

The diffuser’s pronged bowl disperses airflow to dry curls from the inside out—but 90% of users ruin results by moving it excessively. Dyson engineers designed it for near-static use, yet tutorials show aggressive “scrunching” that disrupts curl patterns.
Zero-Movement Curl Drying Technique
- Apply curl cream to soaking-wet hair and shake into sections
- With dryer off, place a palm-sized curl clump into the diffuser bowl
- Gently push the bowl upward toward your scalp (do not touch hair)
- Turn on low heat/low speed and hold stationary for 60-90 seconds
- Lift straight up to release—never pull sideways—and repeat
Visual cue for success: Curls should look “set” but still damp after removal. If they’re frizzy, you moved the diffuser or used too much heat. For tight coils, invert your head and diffuse upside down for root volume.
Gentle Air Attachment: How to Style Fine or Damaged Hair Safely
This wide-tooth comb attachment slows airflow velocity by 30%—critical for fragile strands—but it’s often misused as a “diffuser alternative.” Its true power lies in round brush styling and delicate areas.
How to Add Volume Without Breaking Hair
- Attach for root drying on fine hair (medium heat/medium speed)
- Lift a 1-inch section at the crown with a round brush
- Position the attachment 2 inches above roots, directing airflow at the brush base
- Hold for 8 seconds while rolling the brush down, then release
- Repeat, moving backward in 1-inch increments
For face-framing pieces: Use the attachment’s outer teeth to gently guide baby hairs while drying on low heat. The dispersed airflow prevents “helmet hair” by eliminating hotspots that flatten delicate strands. Never use high heat—it negates the attachment’s protective diffusion.
Cold Shot Mastery: How to Lock Styles for All-Day Hold
That blue ring around the power button isn’t just a gimmick—it’s a styling essential. The cold shot instantly cools hair after heat styling, sealing cuticles for 3x more shine and 50% longer style retention. Yet most users activate it incorrectly.
When and How to Use the Cold Shot
- After smoothing/concentrator work: Blast roots for 10 seconds while lifting with a brush
- After diffusing: Hold 6 inches away and pulse for 5 seconds per section
- For flyaways: Use the concentrator with cold air only for 2-second bursts
Critical timing: Always apply cold shot after removing the attachment. Running it through a nozzle traps moisture, causing re-frizz. For curls, skip cold air—it can shock defined clumps.
Heat Protectant: Why This Step is Non-Negotiable
Skipping heat protectant destroys Dyson’s Intelligent Heat Control benefits. Even at “medium” settings, airflow reaches 150°F—enough to degrade keratin without protection. The resource document confirms thermal damage occurs at 140°F, making this step non-optional.
How to Apply for Maximum Protection
- Spray evenly on damp (not wet) hair section by section
- Use 5-7 pumps for shoulder-length hair—less won’t cover, more causes buildup
- Comb through to distribute before attaching any tool
- Reapply only if restyling dry hair
Warning: Oil-based protectants create steam when hit by high-velocity air, causing frizz. Use water-based sprays like Dyson’s recommended formulas. For fine hair, apply only from mid-lengths to ends to avoid weighing down roots.
Filter Cleaning: How to Maintain Strong Airflow
A clogged filter reduces airflow by 40%, making attachments ineffective. The Supersonic alerts you when cleaning is needed, but proactive maintenance prevents performance drops.
30-Second Filter Maintenance Routine
- Unplug and cool the dryer completely
- Twist the filter cover counterclockwise at the handle base
- Tap debris into trash—never rinse with water
- Wipe mesh with dry microfiber cloth if oily
- Reattach cover until it clicks
Pro tip: Clean filters weekly if you style daily. Built-up lint muffles the V9 motor’s high-pitched hum—a key indicator of optimal performance. Never operate without the filter; it strains the motor.
Final Attachment Mastery Checklist
Your Dyson Supersonic becomes a salon-in-a-hairdryer only when you pair attachments with precision techniques. Remember: the smoothing nozzle requires downward airflow for shine, the diffuser demands near-zero movement for curls, and the concentrator needs pinpoint positioning for straight styles. Always start with heat protectant, work in sections, and finish with cold air—but never through an attachment. In under two weeks of consistent use, these magnetic tools will transform your routine from basic drying to targeted styling. For travel, secure attachments in the heat-resistant pouch (part #971313-03) to prevent magnet damage. Now go create your best hair day yet—one attachment at a time.

