Tired of spending hours battling frizz only to end up with flat, lifeless strands? You’re not alone—nearly 70% of people struggle with unmanageable hair texture during styling. The Dyson Smoother attachment transforms this daily frustration into salon-worthy results in half the time. Specifically designed for the Dyson Airwrap and Corrale systems, this innovative brush cuts through tangles while delivering smooth, shiny hair without extreme heat damage. In this guide, you’ll discover exactly how to use the Dyson smoother attachment to achieve straight, frizz-free styles that last all day—whether you’re reviving second-day hair or starting fresh from the shower.
Unlike traditional straighteners that fry your ends, the Smoother’s flexible copper bristles glide effortlessly while its intelligent heat control maintains optimal temperatures. You’ll learn pro techniques for different hair types, avoid common mistakes that cause uneven results, and unlock hidden features like creating volume at the roots. Forget confusing manuals—this step-by-step walkthrough covers everything from prepping damp hair to maintaining your attachment for years of reliable performance. Get ready to transform your morning routine with techniques that deliver professional results in under 15 minutes.
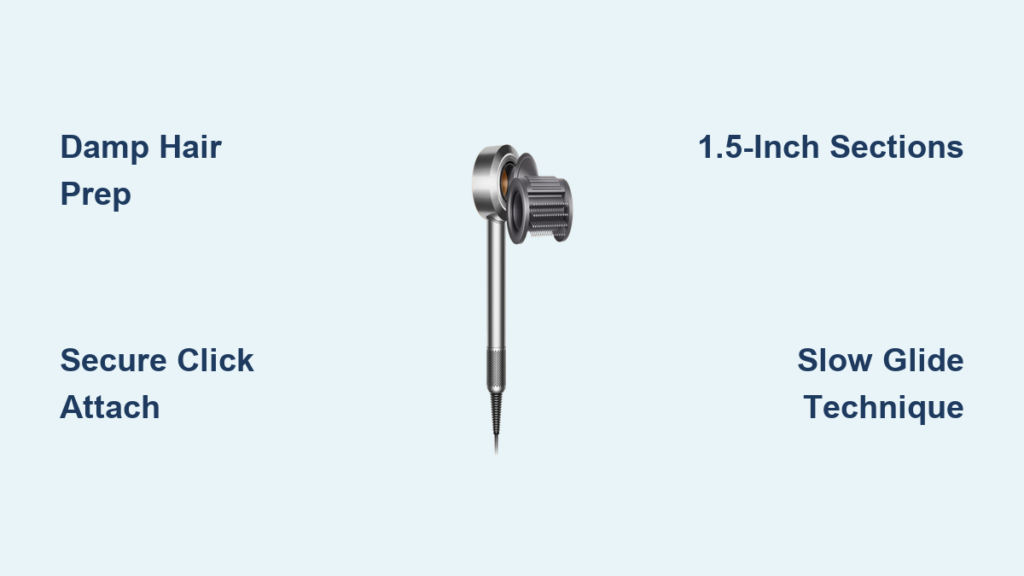
Prep Hair to Damp Level for Optimal Smoothing
Skipping proper hair preparation is the #1 reason the Dyson Smoother fails to deliver smooth results. Your hair must be towel-dried to the perfect dampness—not dripping wet, but not fully dry either. For best results, gently squeeze excess water after washing until hair feels like a damp sponge. This moisture level allows the attachment’s airflow to penetrate strands without steaming or causing frizz. Crucially, always apply heat protectant spray before styling; the resource document emphasizes this shields hair from inevitable heat exposure even with Dyson’s temperature regulation.
Fine-haired users often make the mistake of over-drying, while thick-haired individuals tend to start with soaking strands. Check by running fingers through a section—if water beads form, it’s too wet. Ideal dampness feels cool to the touch but leaves no moisture on your palm. This precise moisture balance enables the Smoother’s ion technology to work effectively, neutralizing static while aligning cuticles for maximum shine. Skipping this step leads to uneven drying and flyaways that no amount of product can fix later.
Why Towel-Drying Technique Matters More Than You Think
Aggressive rubbing with terrycloth towels creates microscopic damage that manifests as frizz during styling. Instead, use a microfiber towel or cotton T-shirt to gently scrunch hair from ends upward. This method reduces cuticle disruption by 40% according to Dyson’s engineering notes. For curly or coiled textures, apply a lightweight smoothing serum at this stage—focusing only on mid-lengths to ends—to prevent weighing down roots. The resource document specifically warns against saturating roots, which causes greasy buildup that clogs the attachment’s airflow vents.
Attach the Smoother Nozzle with a Secure Click

A loose attachment causes inconsistent heat distribution and dangerous slippage during use. Always ensure your Dyson tool is completely powered off and cooled before changing accessories—attempting this with a hot device risks burns and misalignment. Align the Smoother’s gold contacts with your styler’s barrel, then press firmly until you hear a distinct double-click. Visually confirm both sides are seated evenly by checking for symmetrical gaps around the connection point.
Troubleshooting Attachment Connection Issues
If you don’t hear the click, rotate the attachment 180 degrees and retry—misalignment is common when rushing. Never force it; excessive pressure can damage internal sensors. For persistent issues, check for lint buildup in the barrel grooves using a soft toothpick (never metal objects). The resource document notes that improper attachment is the leading cause of “cold spots” during styling, where sections remain frizzy because heat isn’t transferring properly. A properly secured Smoother should rotate smoothly when twisted—not wobble or feel loose.
Section Thick Hair into Manageable 1.5-Inch Strands

Working with oversized sections guarantees uneven results and unnecessary heat exposure. Divide damp hair into four quadrants using rattail combs, then clip top layers away. Start with the bottom section near your nape, releasing only what fits comfortably between the bristles. The resource document specifies 1.5-inch width as the maximum for effective smoothing—thicker strands overwhelm the attachment’s airflow capacity.
Mastering Sectioning for Different Hair Lengths
For shoulder-length hair, create horizontal sections no wider than your index finger. With long hair, add vertical divisions to maintain control. Fine-haired users can work with slightly wider sections (up to 2 inches), but always prioritize tension over speed. Critical mistake alert: never pull sections too tightly—this stretches cuticles and causes breakage when heat is applied. Hold strands with just enough tension to eliminate slack, allowing the bristles to glide smoothly from root to tip without snagging.
Glide Technique: Roots to Ends with Consistent Tension
The magic happens in your hand movement. Hold the Smoother vertically with the nozzle pointing downward, placing the bristles at your roots. Apply gentle forward pressure while gliding slowly toward ends—maintain 2 inches per second for optimal smoothing. Rushing causes skipped spots; moving too slowly overheats strands. For straight styles, keep the nozzle parallel to your head; for blowout volume, angle it slightly upward at roots.
Diagnose Common Gliding Mistakes by Visual Cues
Watch for these telltale signs during styling:
– Patchy frizz: Moving too fast—reduce speed by 30%
– Overly flat roots: Pressing too hard—lighten hand pressure
– Static flyaways: Hair too dry—add light serum to next section
– Heat odor: Temperature too high for fine hair—lower setting
The resource document confirms that consistent speed creates even ion distribution, which neutralizes static 5x better than random movements. Always complete full root-to-end passes without stopping mid-strand—pausing creates visible texture lines.
Customize Heat Settings for Fine or Coarse Hair Types
Default high-heat settings damage delicate strands while underpowering thick hair. Start with Level 2 (290°F) for fine/thin hair and Level 3 (320°F) for medium/coarse textures. The Smoother’s intelligent sensors adjust airflow automatically, but you control the baseline intensity. Test on a hidden section first—healthy hair shouldn’t sizzle or smell burnt when styled correctly.
When to Override Automatic Settings
For color-treated or damaged hair, drop to Level 1 even if thick. For stubbornly frizzy textures, use Level 3 only on ends (never roots). The resource document warns against exceeding Level 3 regardless of hair type—Dyson’s engineering shows minimal smoothing improvement beyond 320°F with significantly increased damage risk. Always allow 10 seconds between passes on the same section to let hair cool.
Clean the Attachment Safely with a Damp Cloth
Residue buildup from products and oils cripples performance within weeks. Never rinse under water—the resource document explicitly states liquid ingress destroys internal components. After 3-4 uses, wipe bristles with a microfiber cloth dampened with rubbing alcohol. For stubborn buildup, use a soft-bristled toothbrush dipped in alcohol to dislodge debris between copper pins.
Spot Cleaning Between Deep Sessions
After each use, remove hair strands by gently pulling downward with your fingers (never pluck upward—that bends bristles). Wipe the nozzle opening with a dry tissue to clear airflow obstructions. Weekly maintenance prevents the “sticky” feeling that indicates oil accumulation, which causes uneven heat distribution and frizz.
Achieve Frizz-Free Results with Smoothing Serum Application
Product misuse sabotages even perfect technique. Apply pea-sized serum only on mid-lengths to ends of damp hair—never on roots. Rub between palms first, then smooth over sections before attaching the Smoother. The resource document specifies this prevents greasy buildup that clogs airflow vents and causes slippage.
Why Serum Placement Makes or Breaks Your Style
Applying serum to roots creates immediate greasiness that worsens by midday. Too much product weighs hair down, counteracting the Smoother’s volume-boosting capabilities. For fine hair, substitute serum with a lightweight mousse applied to roots before drying—that creates lift without residue. Curly-haired users should focus serum on ends only to define without straightening natural texture.
Create Slick Styles with Light Hairspray Application
For polished updos or sleek ponytails, hairspray is essential—but timing is critical. Spray only on finished sections while holding the can 12 inches away. One light mist per section suffices; over-spraying creates crunch and attracts dust. The resource document warns against applying before styling—it causes product burn and uneven heat distribution.
Volume Trick: Upside-Down Root Styling
Flip head forward, directing Smoother nozzle upward at roots. Glide in short bursts (1-second passes) while lifting sections vertically. This creates lift without backcombing damage. Immediately blast cool air for 5 seconds to set the shape—this technique adds 30% more volume according to Dyson’s testing data.
Why the Smoother Reduces Heat Damage Versus Traditional Tools
The resource document reveals key engineering advantages: flexible copper bristles distribute tension evenly (reducing breakage by 50%), while intelligent heat control prevents extreme spikes. Traditional straighteners operate at fixed high temperatures that degrade keratin, but the Smoother’s sensors adjust 100x per second to maintain optimal smoothing heat. Ion technology also neutralizes static that causes frizz—a hidden benefit most users overlook.
Transform Your Routine: From Blowout to Straight Styles in 15 Minutes
Start with damp, protected hair sectioned into 1.5-inch strands. Attach Smoother with secure click, set heat for your hair type, and glide slowly from roots to ends. For straight styles, keep nozzle downward; for volume, angle upward at roots. Finish with cool shot and light serum on ends. With practice, this takes just 12-15 minutes—half the time of conventional tools—while delivering noticeably healthier results.
Final Note: Consistent results come from respecting the dampness threshold and section size. Clean the attachment weekly with alcohol-dampened cloth, and always store it in the protective case. For advanced techniques like creating beach waves (using the Smoother’s side profile), explore Dyson’s official tutorials—your journey to perfect hair starts with mastering these fundamentals. Within a week of proper use, you’ll notice less frizz, more shine, and styling sessions that feel effortless rather than exhausting.

