Is your Dyson cordless vacuum dying mid-clean or refusing to power on after charging? You’re not alone—dyson vacuum battery issues affect thousands of users each year as their powerful cordless cleaners lose steam. When your once-reliable vacuum suddenly can’t complete a simple room cleaning, the culprit is almost always the battery. This comprehensive guide reveals exactly how to diagnose, troubleshoot, and solve common battery problems across all Dyson models—from the V6 through the latest V15 and V16 series—so you can restore peak performance without unnecessary replacement costs.
Dyson’s cordless vacuums revolutionized home cleaning with their powerful suction and cord-free convenience, but their performance lives and dies with the battery. Lithium-ion batteries naturally degrade over time, typically lasting 2-3 years with daily use before showing significant wear. Recognizing early warning signs and implementing proper maintenance can extend your battery’s lifespan by up to 50%, saving you the $100-$200 cost of premature replacement. Whether your vacuum cuts out after two minutes or won’t power on at all, this guide provides actionable solutions tailored to your specific Dyson model and symptoms.
Why Your Dyson Battery Fails Before Its Time
Dyson batteries don’t just randomly die—they degrade due to specific, preventable factors that accelerate wear beyond their expected 300-500 charge cycles. Understanding these causes helps you avoid common pitfalls that prematurely kill your battery.
Critical Factors That Destroy Dyson Battery Lifespan
Extreme Temperature Exposure: Leaving your vacuum in a hot car or garage during summer can permanently damage cells. Lithium-ion batteries suffer irreversible capacity loss when exposed to temperatures above 104°F (40°C). Never charge your Dyson when the unit feels warm to the touch—allow it to cool for 30 minutes after heavy use first.
Complete Discharge Cycles: Regularly letting your vacuum run until it dies (0% charge) stresses the battery. Each full discharge cycle wears cells faster than partial cycles. For optimal longevity, recharge when your battery reaches 20-30% remaining.
Long-Term Storage at Full Charge: Storing your vacuum with a 100% charged battery for weeks or months causes chemical stress. The ideal storage charge is 40-60%—this neutral state preserves cell health during inactivity. If storing longer than a month, remove the battery and check its charge level every 3 months.
How Dyson’s Battery Management System Affects Performance
Your Dyson vacuum contains a sophisticated Battery Management System (BMS) that protects against overheating, overcharging, and short circuits. When this system detects potential danger—like blocked airflow causing motor strain—it triggers safety cutoffs that shut down power unexpectedly. This isn’t always a battery failure; often it’s the vacuum protecting itself from damage. Clear all blockages in the brush roll, wand, and filters before assuming the battery has failed.
Step-by-Step Diagnostic Process for Dyson Battery Problems

Follow this systematic approach to pinpoint whether your issue stems from the battery, charger, or another component—saving you from unnecessary replacements.
Verify Power Flow from Wall to Vacuum
- Test the outlet: Plug in another device to confirm power delivery
- Inspect the charger cable: Look for fraying, kinks, or damaged connectors
- Check charging indicators: A pulsing light means charging; solid light indicates full charge
- Try a different outlet: Rule out circuit issues by testing on another electrical circuit
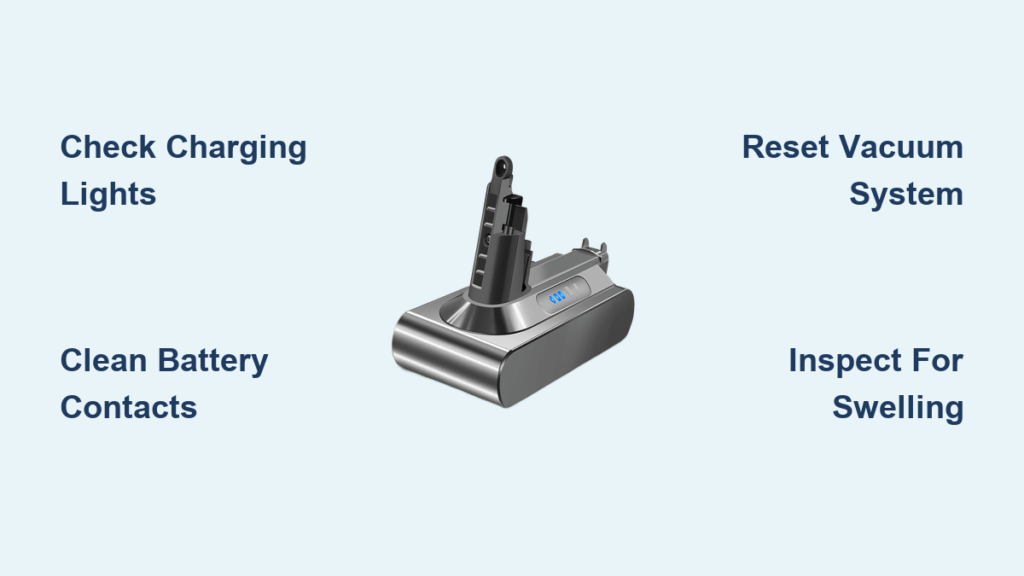
Perform Critical Battery Health Checks
Voltage Test: Using a multimeter, measure the battery terminals. A fully charged V7-V11 should read 21.6V; V12-V15 models should show 25.2V. Readings below 19V (or 22V for newer models) indicate significant capacity loss requiring replacement.
Physical Inspection: Examine for swelling, cracks, or unusual warmth. If you notice any bulging, stop using immediately—this indicates dangerous cell failure requiring professional disposal.
Contact Cleaning: Rub battery and vacuum contacts with a dry microfiber cloth. Corrosion here prevents proper connection, mimicking battery failure.
Execute the Ultimate Dyson Reset Procedure
Most electronic glitches respond to this professional-grade reset:
- Remove the battery from your vacuum
- Press and hold the power trigger for 15 seconds
- Wait 10 minutes for complete system discharge
- Reinsert the battery and attempt to power on
This clears temporary errors in the BMS that often cause false “dead battery” symptoms.
Proven Battery Maintenance Strategies That Double Lifespan
Implement these manufacturer-approved techniques to maximize your Dyson battery’s service life—many users report 4+ years of reliable performance with proper care.
Optimal Charging Protocol for Maximum Cycles
- Charge at room temperature (65-77°F/18-25°C)—never in direct sunlight or freezing conditions
- Unplug after full charge—though Dyson chargers stop at 100%, residual current causes slow degradation
- Avoid overnight charging—set reminders to unplug after 4 hours (typical full charge time)
- Use only genuine Dyson chargers—third-party adapters often deliver incorrect voltage
Long-Term Storage That Preserves Battery Health
For storage exceeding one month:
- Charge to exactly 50% (halfway on the LED indicator)
- Store in a cool, dry place away from direct sunlight
- For storage beyond 3 months, remove the battery completely
- Check charge level every 8 weeks and top up if below 30%
This prevents the “parasitic drain” common in newer Dyson models where onboard electronics slowly deplete the battery even when powered off.
When to Replace Your Dyson Battery (And How to Choose Wisely)
Don’t replace prematurely—confirm these definitive failure signs first:
- Runtime less than 50% of original (e.g., V10 lasting under 30 minutes instead of 60)
- Battery won’t hold charge for more than 24 hours when stored
- Visible swelling or deformation of the battery casing
- Consistent failure to reach full charge after multiple attempts
Genuine vs. Third-Party Battery Comparison
| Feature | Genuine Dyson Battery | Quality Third-Party |
|---|---|---|
| Price | $100-$200 | $40-$80 |
| Warranty | 1-year | 6-12 months |
| Compatibility | Guaranteed | Variable |
| Safety Features | Full BMS integration | May lack protection |
| Longevity | 2-3 years | 1-2 years |
Pro Tip: When installing a new battery, perform 3-4 full calibration cycles (charge to 100%, use until shutdown, recharge) to optimize the BMS’s charge monitoring.
Troubleshooting Specific Dyson Battery Scenarios
“My Vacuum Dies After 2 Minutes of Use”
This classic symptom indicates either:
– Severely degraded battery cells unable to sustain load
– Blocked airflow causing motor strain and thermal shutdown
– Faulty temperature sensor triggering false safety cutoff
Immediate fix: Deep clean all filters and clear blockages in the brush roll and wand. If the problem persists, the battery likely needs replacement.
“Charger Lights Up but Battery Won’t Charge”
Check these often-overlooked issues:
– Bent pins in the charging port (use a toothpick to straighten carefully)
– Corrosion on battery contacts (clean with isopropyl alcohol)
– Faulty wall adapter (test output with multimeter—should read 25.2V)
– Battery protection circuit triggered (perform the 15-second reset)
When to Contact Dyson Support Instead of Replacing
Contact Dyson immediately if:
– Battery shows any swelling or deformation (serious fire hazard)
– You smell burning or see smoke during charging
– The unit is under warranty (2 years on machine, 6 months on battery)
– Genuine replacement costs exceed 50% of a new vacuum’s price
Critical reminder: Never attempt to disassemble a Dyson battery pack. Lithium-ion cells can ignite if punctured or short-circuited—leave repairs to certified technicians.
A properly maintained Dyson battery should deliver reliable cleaning power for years, not months. By implementing these diagnostic techniques and maintenance practices, you’ll maximize your investment and avoid unnecessary replacements. Remember that reduced runtime often stems from blocked filters or components rather than battery failure—always perform a complete system check before assuming the worst. For ongoing reliability, store your vacuum at 50% charge in a cool, dry place when not in use for extended periods, and never let it sit fully depleted. With these strategies, your Dyson will maintain peak performance through thousands of cleaning cycles.

