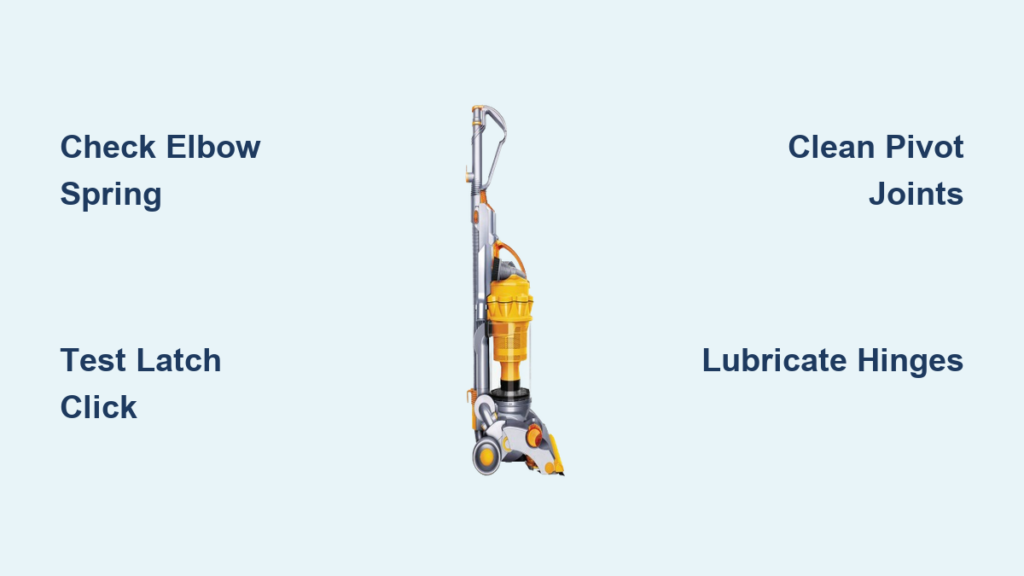
You push your Dyson DC14 upright after vacuuming, but instead of staying put, it immediately topples over—threatening furniture, toes, or your prized vase. This frustrating instability isn’t just annoying; it’s a safety hazard that turns your reliable cleaner into a clumsy hazard. The culprit almost always hides in the vacuum’s base, where the elbow mechanism and changeover valve work together to lock the unit upright. When either fails, your Dyson DC14 won’t stand upright reliably. The good news? This common DC14 flaw is usually fixable with basic tools and 30 minutes of your time. By the end of this guide, you’ll diagnose the exact failure point and restore rock-solid stability to your vacuum.
Most DC14 stability failures stem from three interconnected components: the spring-loaded elbow assembly at the base rear, the latch inside the changeover valve, and their shared pivot points. Unlike newer Dyson models, the DC14 relies on precise mechanical engagement between these parts—no electronics involved. Wear from daily reclining motions, carpet fiber buildup, or accidental drops gradually degrades this system. But before grabbing tools, understand this: forcing the vacuum upright when the mechanism is broken risks cracking plastic housings. Instead, follow this targeted approach to pinpoint and resolve why your Dyson DC14 won’t stand upright without guesswork.
Diagnose Your DC14: Why It Won’t Stand Up
Your DC14’s refusal to stay upright always traces back to one of four mechanical failure points. Start with this on-the-floor test: Lay the vacuum completely on its left side (safety position) and manually lift the elbow assembly—a curved plastic hook near the base rear. If it doesn’t snap into place with an audible click, you’ve confirmed a latch mechanism failure. If it clicks but still won’t hold upright, inspect these specific culprits:
- A broken or weakened spring inside the changeover valve latch assembly, failing to provide tension for the hook
- Worn pivot pins on the elbow mechanism causing excessive play and misalignment
- Cracked plastic components in the elbow catch or latch housing (common after impacts)
- Debris jamming the pivot joints or latch path (carpet fibers are the #1 offender)
Critical red flags include a loose, wobbly elbow that flops freely or a latch that engages intermittently. Never ignore these symptoms—continued use accelerates wear and risks complete mechanism failure. For DC14 models, the changeover valve area (the dial above the brush roll) is the epicenter of 80% of upright stability issues due to its complex internal springs and plastic hooks.
The Essential Safety and Preparation Checklist
Before touching a single screw, prioritize safety: Switch off and unplug your Dyson DC14. Lay it on its left side on a clean, flat surface—this stabilizes the vacuum and prevents accidental toppling during inspection. Working on carpet risks losing small parts; use a hard floor with a towel underneath to catch screws.
Required Tools and Workspace Setup
Gather these essentials to avoid mid-repair delays:
– Phillips-head screwdriver (size #2)
– Needle-nose pliers for spring handling
– Silicone-based lubricant spray (NOT oil or grease—silicone repels dust)
– Small stiff brush (an old toothbrush works)
– Magnetic parts tray for screws
– Work light to illuminate the base mechanism
Organize screws by location using a labeled container or tape grid. Take a photo of the disassembly area before removing parts—DC14 bases have up to 8 small screws in tight spaces. Skipping this risks misalignment during reassembly, which worsens the upright stability problem.
Step-by-Step Diagnosis and Repair

Step 1: Inspect the Elbow and Catch Mechanism
Lay the vacuum on its left side and locate the elbow assembly—a curved plastic hook protruding from the base rear. Manually lift it toward the changeover valve (the large dial above the brush roll). Look for:
– Visible cracks in the elbow’s plastic housing (common at pivot points)
– Stiffness or resistance when moving the elbow (indicates debris buildup)
– Excessive wobble (more than 1-2mm play signals worn pivot pins)
– Missing spring tension (the elbow should spring back when released)
If the elbow moves freely but won’t lock, the issue lies deeper in the latch assembly. If it’s stiff or stuck, proceed to Step 2.
Step 2: The Click Test for Latch Engagement
Perform this critical diagnostic:
1. With the vacuum on its side, lift the elbow assembly fully upward.
2. Listen and feel for a distinct click as it engages the catch.
3. Gently nudge the elbow downward—if it releases easily, the latch lacks tension.
No click? The latch spring is broken or detached.
Click but releases? The latch hook is worn, cracked, or jammed with debris.
Smooth movement but no lock? Pivot joint wear misaligns the hook and catch.
This test takes 60 seconds but reveals 90% of DC14 upright failures. Skip it, and you’ll waste time replacing functional parts.
Step 3: Accessing the Changeover Valve Latch Assembly
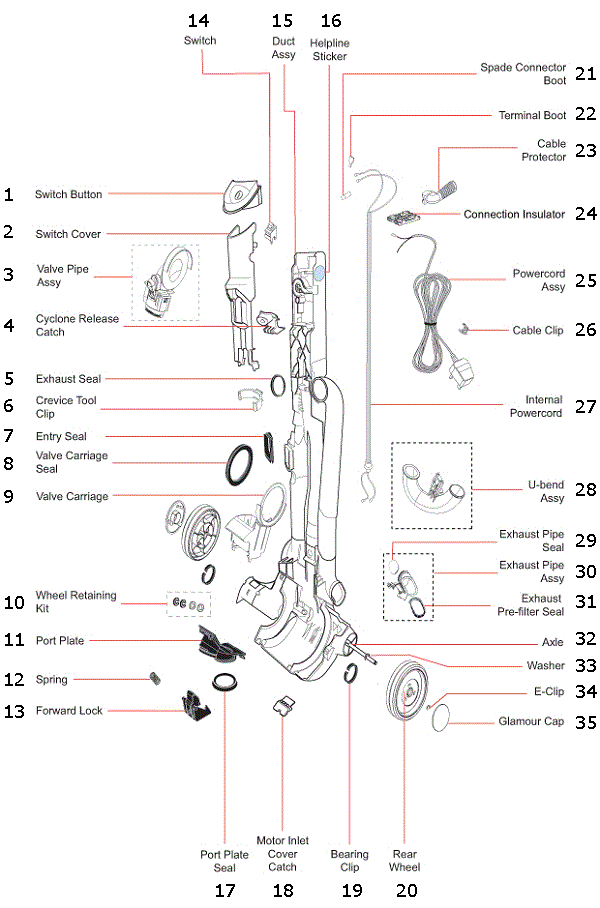
When the click test fails, access the latch mechanism:
1. Remove all screws from the base plate beneath the changeover valve.
2. Carefully pry off the plastic cover (it snaps into place).
3. Immediately photograph the internal components—springs can launch when dislodged.
Inside, inspect:
– Latch spring: Should be coiled tightly against the hook. A loose or broken spring won’t hold tension.
– Latch hook: Check for cracks on the plastic hook that grabs the elbow.
– Pivot pins: Worn pins create play, preventing full engagement.
– Debris: Fibers often jam the spring channel—use your brush to clear them.
Pro Tip: Shine a flashlight through the changeover valve opening while lifting the elbow. You’ll see exactly where engagement fails.
Step 4: Common Faults and Fixes
Fixing a Latch That Won’t Catch
Symptoms: Elbow clicks but releases when upright.
Cause: Broken latch spring or worn hook (common after 2+ years of use).
Repair:
1. Remove the broken spring with needle-nose pliers.
2. Insert a replacement spring (Dyson part #904374) into the latch channel.
3. Compress it gently with pliers until it seats against the hook.
4. Test tension—lifting the elbow should now require noticeable force.
Time Saver: If springs are intact but weak, reposition them for tighter coil tension.
Fixing a Stiff or Stuck Elbow
Symptoms: Elbow won’t move smoothly or gets stuck mid-motion.
Cause: Carpet fibers jamming pivot joints (85% of cases).
Repair:
1. Remove the elbow assembly by sliding out its pivot pins.
2. Brush all debris from pivot holes and pins.
3. Apply one drop of silicone lubricant to each pivot point.
4. Reinsert pins and work the elbow 10 times to distribute lubricant.
Warning: Over-lubrication attracts more dirt—use sparingly!
Repairing a Loose or Wobbling Elbow
Symptoms: Excessive play prevents secure locking.
Cause: Worn pivot pins or cracked bushings (common in high-use vacuums).
Repair:
1. Replace pivot pins with OEM parts (Dyson #904375).
2. If bushings are cracked, swap the entire elbow assembly.
3. Reassemble and test for <1mm play.
Expert Note: Never force pins into worn holes—they’ll strip the plastic. Replace the whole component if wear is severe.
Step 5: Reassembly and Stability Testing
1. Reattach the base plate, tightening screws firmly but not to the point of cracking plastic.
2. Lay the DC14 on its side and manually engage the elbow 10 times—each click should feel crisp.
3. Critical test: Stand the vacuum upright and apply gentle backward pressure. It should resist tipping with 5+ lbs of force.
4. Perform 5 full recline/stand cycles to confirm consistent locking.
If instability persists, revisit Step 3—debris may still be jamming the mechanism. Never skip this validation; incomplete repairs risk sudden failure during use.
When to Call a Professional
Seek expert help if you encounter:
– Cracks in the changeover valve housing (structural damage requires part replacement)
– Multiple simultaneous failures (e.g., broken spring AND worn pivot pins)
– Electrical issues coinciding with mechanical problems (indicates internal damage)
– Complete latch assembly disintegration (common in vacuums dropped on hard floors)
Dyson-certified technicians have specialized tools for resetting internal springs and alignment jigs to ensure perfect hook engagement. For complex failures, professional repair costs ($75-$120) beat replacing a $300 vacuum.
Regular Maintenance to Prevent Future Problems
Avoid recurring DC14 upright failures with this 5-minute routine:
– After every use: Wipe the elbow mechanism with a dry cloth to remove hair/fibers.
– Monthly: Lay the vacuum on its side and work the elbow 15 times to prevent stiffness.
– Every 6 months: Apply silicone spray to pivot points—never oil-based lubricants.
– Annually: Inspect for hairline cracks around the elbow pivot (use a magnifying glass).
Pro Tip: Store your DC14 reclined, not upright. Constant spring tension in the locked position accelerates wear.
Conclusion and Key Takeaways
When your Dyson DC14 won’t stand upright, the fix is almost always mechanical—not mysterious. By methodically testing the elbow mechanism, latch spring, and pivot points, you’ll pinpoint whether debris, wear, or breakage is to blame. Most repairs take under 30 minutes with basic tools: clean jammed components, replace a $5 spring, or lubricate stiff joints. Crucially, never force the vacuum upright when the mechanism feels loose—this compounds damage. With proper maintenance, your DC14’s stability system should last 5+ years. Implement the monthly checks outlined here, and you’ll avoid the frustration of a toppling vacuum while extending your cleaner’s lifespan. Now that you’ve restored rock-solid stability, return to cleaning with confidence—knowing your Dyson stands as strong as the day you bought it.

