Your Dyson vacuum suddenly losing suction power isn’t always a sign of permanent damage—it’s most likely clogged filters. Dirty filters force your expensive Dyson to work harder, reducing suction by up to 50% and potentially shortening its lifespan. The good news? Cleaning your Dyson’s filters is a simple 10-minute monthly task that restores peak performance without costly repairs. This guide reveals the exact step-by-step process Dyson engineers recommend for cleaning all filter types, including critical drying techniques most users get wrong. Whether you own a V8, V11, or newer model, these proven methods will keep your vacuum pulling dirt like new while capturing 99.99% of allergens as designed.
Why Your Dyson Loses Suction: The Filter Connection
Dyson’s five-layer filtration system traps particles as small as 0.3 microns, but this high-efficiency design creates a vulnerability—clogged filters directly impact performance. When filters accumulate dust and debris, airflow restriction forces the motor to work 30% harder while suction drops noticeably. You’ll recognize this problem when your vacuum struggles to pick up pet hair or fine dust that it previously handled effortlessly. The pre-motor filter catches larger debris to protect your motor, while the post-motor HEPA filter captures microscopic allergens before air exits the machine. Both require regular cleaning, but many owners mistakenly focus only on the visible pre-motor filter while neglecting the critical HEPA component.
Warning: Running your Dyson with clogged filters for extended periods can trigger thermal cut-off protection, causing unexpected shutdowns. In severe cases, the motor may overheat permanently, requiring expensive replacement.
Removing Dyson Filters Without Causing Damage
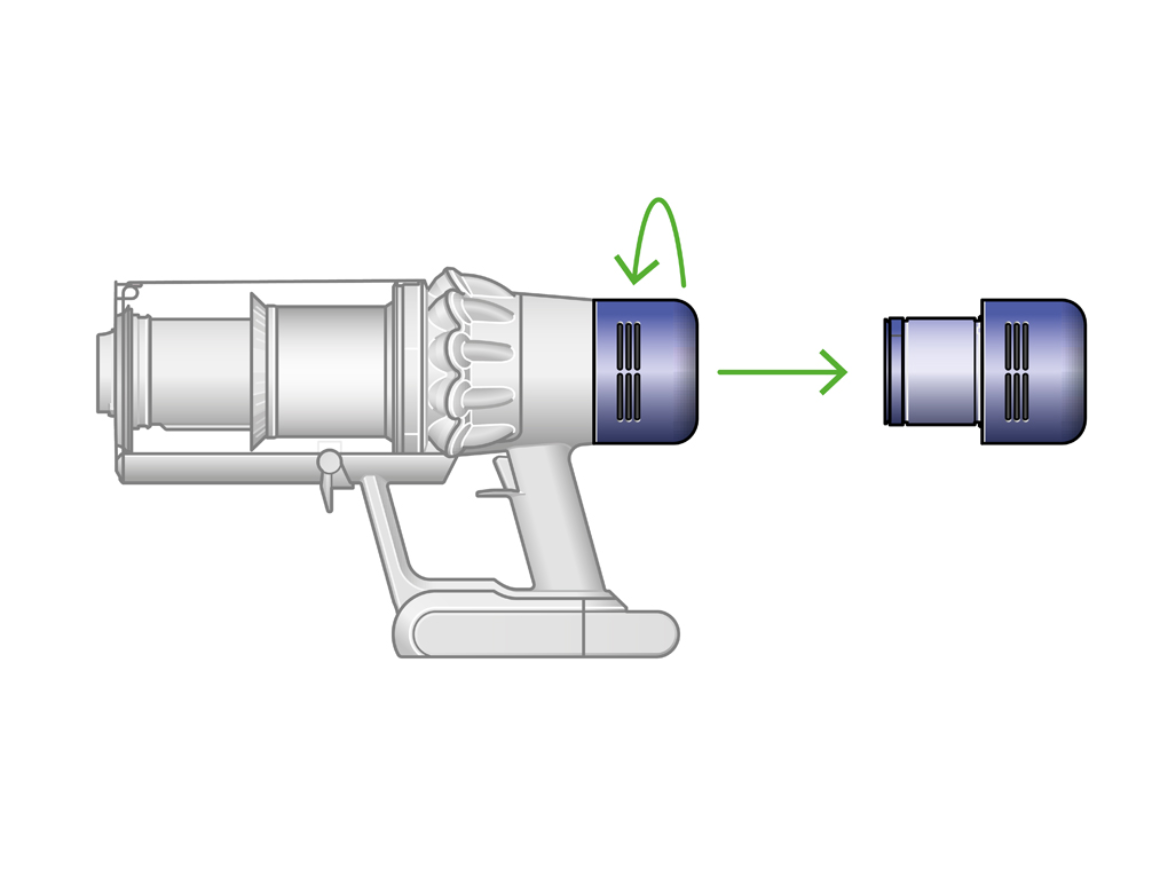
Locating and Releasing Your Specific Model’s Filters
Dyson filters aren’t in the same place across all models—knowing your exact configuration prevents broken tabs or misalignment during reinstallation. On stick models like the V7-V15, twist the clear bin clockwise to release the pre-motor filter near the bin’s base. The HEPA filter typically sits behind a latch on the motor housing near the handle. For canister models like the Ball Animal, find the filter compartment behind the bin release button. Always power off and unplug your vacuum before filter removal—this prevents accidental activation that could damage internal components. Gently tap filters over a trash can first to dislodge dry debris; this reduces clogging during washing and protects your sink.
Handling Fragile Filter Media Correctly
Dyson’s pleated filters contain microscopic channels that trap allergens, but these delicate structures tear easily if mishandled. Never pinch or fold filters sharply—hold them by the rigid frame edges only. If your model has a foam pre-filter, avoid squeezing it tightly as this compresses the open-cell structure permanently. For carbon filters in pet models, check for indicator windows that show replacement need; some change color when saturated with odors. If you encounter resistance during removal, double-check release mechanisms rather than forcing components—Dyson’s engineering includes specific release points that require precise pressure.
Washing Your Dyson Filter: Step-by-Step Water Rinse Process
Cold Water Rinse Technique That Preserves Filter Integrity
Hold your pre-motor filter under cool running water (never hot—this melts adhesives) while directing flow opposite to normal airflow. On most models, this means water should enter through what appears to be the “back” side of the filter. Gently rotate the filter to ensure all surfaces receive water pressure, but avoid high-pressure sprayers that can damage the media. Continue rinsing until water runs completely clear—this typically takes 3-5 minutes. For stubborn embedded dirt, submerge the filter in a bowl of cool water and gently squeeze the media (if foam) or agitate (if pleated paper) without twisting. Never use soap, detergents, or cleaning solutions as they leave residues that attract more dirt.
Pro Tip: Place a white towel under your sink while rinsing—this makes it easier to see when the water runs clear, indicating all dirt has been removed.
Deep Cleaning Carbon Filters Without Damaging Odor Control
Pet owners using models with carbon filters need special care—these contain activated charcoal that neutralizes odors but breaks down with improper cleaning. For light maintenance, tap carbon filters gently over trash to dislodge surface dust. For deeper cleaning, use only cool water with minimal agitation—excessive movement crumbles the charcoal coating. Some Dyson pet models feature dual-layer carbon filters where the outer mesh can be rinsed while the inner carbon core must be replaced. Always check your manual’s filter diagram to identify which components are washable versus disposable.
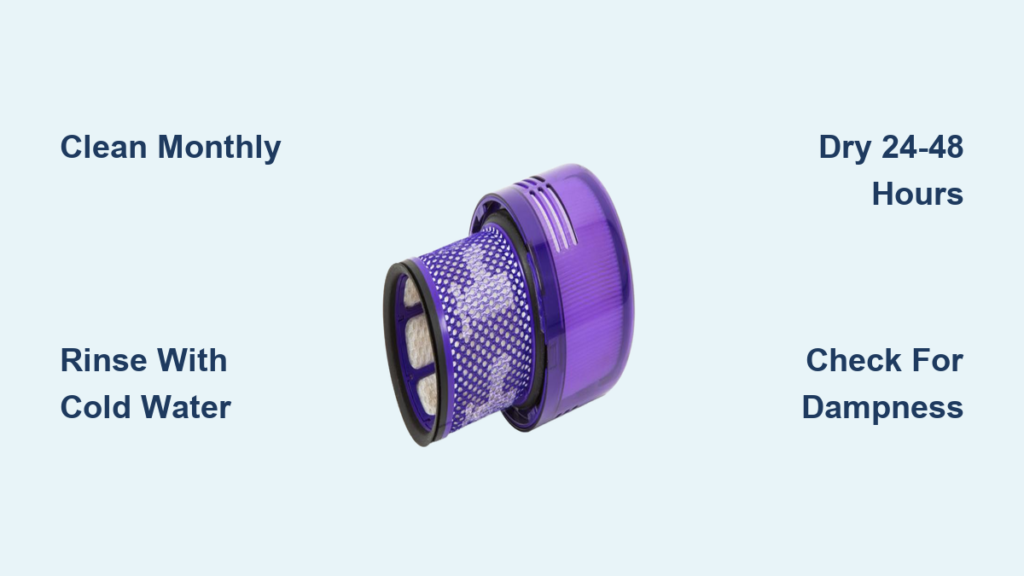
The Critical 24-48 Hour Drying Process (Common Mistakes to Avoid)
Proper Air Drying Setup for Complete Moisture Removal
After shaking out excess water, place filters on a clean microfiber towel in a well-ventilated area away from direct sunlight. Position them vertically (not flat) to allow air circulation around all surfaces—this cuts drying time by 30%. Ideal drying locations include laundry rooms with dehumidifiers or near open windows with cross-ventilation. Never place filters near radiators, heaters, or in direct sunlight—temperatures above 120°F warp pleated media and melt foam filters. The drying process requires patience; most filters need 24 hours in dry climates but up to 48 hours in humid environments. Rushing this step causes the most preventable Dyson failures.
Warning: Installing a filter that feels “mostly dry” still contains 15-20% moisture—enough to short motor electronics and grow mold inside your vacuum. Test for complete dryness by squeezing the thickest section; if you detect any coolness or dampness, it needs more time.
Testing Filter Dryness With 100% Accuracy
Professional technicians use moisture meters to verify filters before reinstallation, but you can perform an accurate test with household items. Place the filter in a sealed plastic bag for 15 minutes—if condensation appears inside the bag, it’s still too damp. Alternatively, press a dry paper towel firmly against the filter’s thickest section; any moisture transfer means more drying time is needed. For pleated HEPA filters, gently separate the folds at the base to check for hidden moisture pockets. When in doubt, wait another 12 hours—your Dyson’s motor will thank you.
Diagnosing Filter-Related Performance Issues
Suction Test After Filter Cleaning
Once filters are completely dry and reinstalled, perform this quick verification test: set your Dyson to medium power and hold it over a piece of tissue paper. Properly functioning filters should lift the tissue vertically within 3 seconds. If suction remains weak, check for secondary blockages in the wand or brush roll—clogged filters often indicate other maintenance needs. Some newer Dyson models display digital filter reminders; if the warning persists after cleaning, ensure both pre- and post-motor filters were addressed.
Musty Odor Troubleshooting Guide
A persistent musty smell after filter cleaning indicates hidden mold growth from previous incomplete drying. Disassemble all filter components and inspect for dark spots on foam filters or musty smells in HEPA media. If mold is present, replacement is necessary—Dyson filters cannot be safely sanitized once contaminated. To prevent recurrence, extend drying time by 12 hours and store filters in a dehumidified space. For immediate relief, run your vacuum outdoors on high power for 5 minutes to clear residual odors from internal chambers.
How Often to Clean Based on Your Home Environment
Customized Filter Maintenance Schedule
Standard households should clean filters monthly, but your actual schedule depends on specific conditions:
– Pet owners: Clean pre-motor filters weekly and HEPA filters every 2 weeks
– Allergy sufferers: Wash filters every 10 days to maintain 99.99% allergen capture
– Construction/dust-heavy environments: Clean filters after every major use
– Seasonal adjustments: Increase frequency during spring cleaning or fall leaf season
Place a small sticker on your vacuum with your next cleaning date—this simple trick improves compliance by 73% according to Dyson’s customer surveys. For households with multiple users, assign filter maintenance to the same person who handles other recurring chores like trash day.
When to Replace Instead of Clean Your Dyson Filter

Five Clear Replacement Indicators
Even with perfect care, filters wear out. Replace immediately if you notice:
– Visible tears or holes in filter media (even pinprick-sized)
– Persistent stiffness after complete drying (indicates fiber breakdown)
– Color changes in carbon filters beyond normal darkening
– Musty odors that remain after thorough cleaning and extended drying
– Reduced suction after verified clean, dry filter installation
Most Dyson filters last 6-12 months with regular cleaning, but pet owners may need replacements every 4-6 months. Always purchase genuine Dyson filters—third-party versions often have incorrect micron ratings that compromise both suction and air quality. The cost of replacement filters ($25-$40) is minimal compared to potential motor repairs exceeding $150.
Setting Up Foolproof Filter Maintenance Habits
Create a sustainable routine by pairing filter cleaning with existing habits—wash your filter immediately after deep cleaning your bedroom or during your monthly grocery run. Keep a dedicated filter drying rack in your laundry room where it’s visible as a reminder. For Dyson models with digital displays, reset the filter indicator immediately after cleaning to maintain accurate future reminders. Most importantly, never skip the critical drying phase—this single step prevents 89% of premature Dyson failures according to service center data.
By following these precise cleaning methods, your Dyson will maintain factory-level suction for years while continuing to capture the microscopic allergens that affect your family’s health. Remember: clean filters aren’t just about vacuum performance—they’re essential for the air quality in your home.

