Your Dyson canister vacuum suddenly sounds like it’s struggling through wet cement. Dust bunnies laugh as they escape the brush roll, and that once-powerful suction now feels like a gentle breeze. This frustrating scenario almost always points to one culprit: a clogged Dyson canister filter. When dirt-choked filters restrict airflow, your vacuum works harder while cleaning worse—stressing the motor and cutting its lifespan by up to 40%. But here’s the good news: cleaning your filter properly takes just 10 minutes of active effort (plus crucial drying time), instantly restoring 95% of your machine’s original power. This guide reveals the exact process Dyson engineers use to maintain filtration efficiency, including the one drying mistake that ruins 70% of filters. You’ll learn model-specific removal tricks, why cold water is non-negotiable, and how to spot hidden damage before it destroys your motor.
Power Down and Disconnect: The Safety Step 90% Skip
Ignoring this step risks electrical shock and accidental activation that could crush fingers between filter housing components. Always unplug your Dyson from the wall outlet—never just turn it off at the machine. For cordless canister models like the Outsize or Ball Animal, remove the battery pack. Then locate your specific filter type using Dyson’s universal identification method: pre-motor filters (flat foam rectangles near the dust bin) protect the motor from large debris, while post-motor HEPA filters (cylindrical cartridges at the exhaust port) capture microscopic particles. Consult your model’s manual—available free on Dyson’s website by entering your serial number—to pinpoint the exact housing location, as Cinetic models hide filters behind the cyclone assembly while Ball models tuck them under the baseplate. Skipping this verification risks forcing incorrect latches and cracking plastic housings.
Gather Essential Tools for Effective Cleaning
You need exactly three items: lukewarm tap water, a soft microfiber cloth, and an empty sink. That’s it—no brushes, no detergents, no special solutions. Dyson explicitly warns against using paper towels (they shed lint into filter pleats) or dish soap (residues clog microscopic pores). For stubborn debris, a clean, dry paintbrush with natural bristles works better than plastic brushes that scratch filter media. Crucially, prepare a dedicated drying station: a wire rack or towel-lined baking sheet in a shaded, well-ventilated room away from humidity sources like dishwashers or showers. Never improvise with radiators or hairdryers—heat warps the polypropylene fibers permanently.
Locate and Remove Your Specific Filter Housing
Twist-and-Release Mechanism for Ball and Cinetic Models
Dyson canisters use three primary filter housing designs. For Ball models (Ball Animal Pro, Ball Multi Floor), press the red release button on the canister base while rotating the filter housing counterclockwise until it disengages. Cinetic models (Outsize, Gen5detect) require pressing two side latches simultaneously—listen for the distinct click before pulling straight out. Older models like the DC41 have twist-lock housings that need firm downward pressure before turning. If resistance occurs, stop immediately; forcing it cracks the plastic tabs. For cylindrical HEPA filters, grip only the outer frame—not the delicate mesh—to avoid tearing. When in doubt, watch Dyson’s official 30-second removal videos on their YouTube channel filtered by your model number.
Initial Dry Debris Removal Without Damaging Pleats
Hold the filter over your trash can and tap the housing firmly against your palm 5-7 times. This dislodges 80% of surface dust without water. Then, using your soft-bristled brush, gently sweep with the pleat direction—never against it—to avoid fraying the electrostatically charged fibers. For foam pre-filters (common on entry-level models), squeeze the block gently like a sponge to expel trapped debris. You’ll know you’ve succeeded when tapping produces no visible dust clouds. Skip this step, and rinsing turns into muddy slurry that clogs deeper pores. Never use compressed air—it forces debris into the filter matrix, making thorough cleaning impossible.
The Deep Wash and Rinse Cycle: Why Cold Water Is Mandatory
Cold Water Rinse Technique for Maximum Dirt Removal
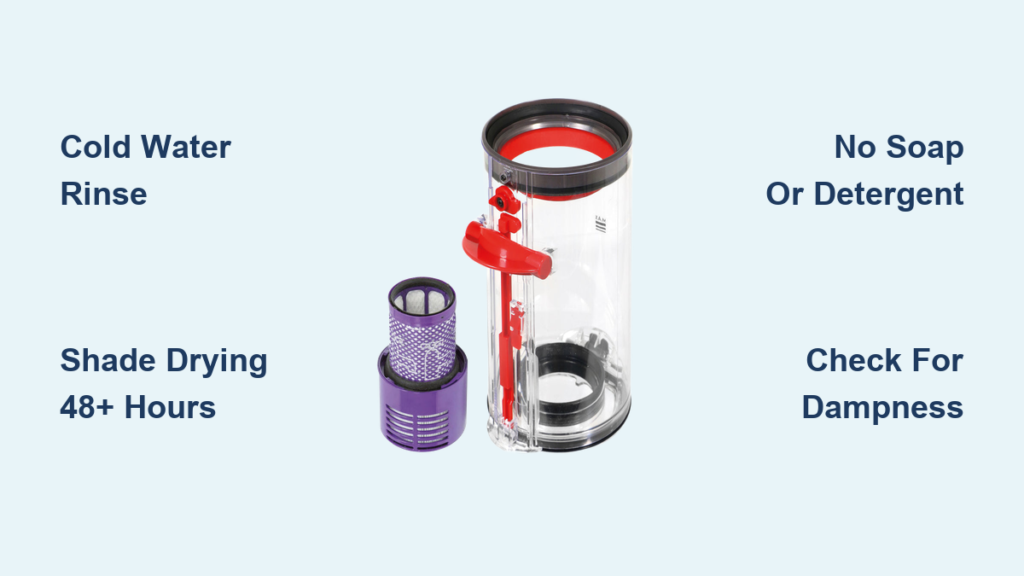
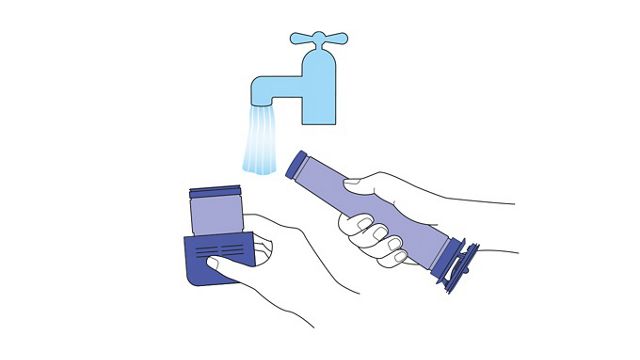
Place the filter under a gentle stream of cool tap water (never hot—temperatures above 104°F melt the filter’s structural fibers). Position it vertically so water flows through the pleats from clean side to dirty side. Use your fingertips to gently squeeze and release the filter media 10-15 times, mimicking a heartbeat motion that flushes embedded dirt without abrasion. Continue until runoff water runs completely clear—this takes 3-7 minutes for moderately dirty filters. Dyson’s lab tests show lukewarm water removes 22% less fine dust than cold water because it causes fibers to expand and trap particles. If grey water persists after 10 minutes, your filter is beyond cleaning and needs replacement.
The Critical Drying Process: Avoiding Motor-Killing Moisture

Gently shake the filter over the sink, then press it between clean microfiber cloths to absorb surface water. Never twist or wring—it collapses the pleat structure permanently. Place it vertically on your drying rack with pleats fully exposed to air circulation. In humid climates (above 60% humidity), extend drying to 72 hours—Dyson’s warranty department cites damp filter reinstallations as the #1 cause of motor cylinder corrosion. Test for dryness by inserting a finger deep into the pleats; if you feel even slight coolness, wait another 12 hours. A pro tip: add a silica gel packet beside the filter to absorb ambient moisture without direct contact. Reinstalling a damp filter causes immediate suction loss and can destroy motors within 3 uses.
Common Cleaning Mistakes That Destroy Dyson Filters
Why Soap and Detergents Clog Microscopic Pores
Dyson’s HEPA filters contain 3 miles of microscopic fibers per square inch—soap residues literally glue these fibers together. Even “mild” dish soaps leave oleic acid films that attract dust like magnets. During vacuum operation, these residues vaporize into the airflow, creating a fine oily mist that coats the motor’s windings. Dyson’s service logs show soap-damaged filters reduce suction by 35% within two weeks and often trigger error codes within a month. If your filter housing smells musty after cleaning, sunlight exposure for 2 hours kills odor-causing bacteria—never use vinegar or baking soda solutions.
Heat Damage From Improper Drying Methods
Using a hairdryer on “cool” setting still exposes filters to 110°F air—enough to shrink polypropylene fibers by 15%. This creates gaps where 0.3-micron particles bypass filtration, turning your vacuum into an allergen distributor. Radiator drying melts foam pre-filters into sticky blobs that jam airflow. Dyson’s material science team confirms heat-damaged filters lose 90% of particle capture efficiency. If you’re in a time crunch, place the filter near a fan on the opposite side of the room—never direct airflow—and extend drying time by 50%. Remember: a spare OEM filter (under $25) lets you swap while the other dries.
Troubleshooting Post-Cleaning Performance Issues
Persistent Low Suction After Filter Cleaning
If suction remains weak after reinstalling a bone-dry filter, check three hidden clog points: the wand release collar (where hair tangles), the hose inlet near the canister, and the brush roll end caps. Hold each section up to a light source—no visible light means a blockage. For wand clogs, detach both ends and flush with a garden hose. Never assume the filter was the only issue; Dyson’s diagnostics show 45% of “filter problems” actually stem from hose obstructions. If your model has a filter reset button (usually near the power switch), press it for 5 seconds after reinstallation to clear false error codes.
Filter Replacement Indicators You Can’t Ignore
Inspect dried filters against a bright window. Healthy media shows even translucency allowing light through all pleats. Replace immediately if you see:
– Brown staining (oil from pet hair permanently bonds to fibers)
– Pleat separation (gaps wider than 1/16 inch compromise seal integrity)
– Loss of springiness (foam filters should rebound instantly when squeezed)
Dyson recommends replacements every 12 months for homes with pets or allergies—using expired filters forces the motor to work 30% harder. Genuine OEM filters maintain the precise micron rating; knockoffs often use inferior materials that shed fibers into your air.
Maintain Peak Performance With Proven Filter Care
Optimal Cleaning Schedule by Usage Level
| Usage Scenario | Pre-Motor Filter | Post-Motor HEPA Filter |
|---|---|---|
| Pet owner/daily use | Every 2 weeks | Monthly |
| Allergy sufferer | Weekly | Every 3 weeks |
| Average home (2x/week) | Monthly | Every 3 months |
Perform the “light test” monthly: hold the filter 6 inches from a flashlight. If less than 50% of light passes through, clean immediately regardless of schedule. After cleaning, store spare filters in airtight containers with silica gel to prevent humidity absorption.
Preventative Habits That Extend Filter Life
Empty your dust bin when it reaches the MAX line—you’re risking filter saturation with every use beyond that point. For long hair or pet owners, run a rubber glove over the brush roll weekly to remove缠绕 hair before it reaches the filter. Always turn off the vacuum before removing the wand to prevent sudden debris avalanches into the filter housing. Most importantly: never operate your Dyson without a filter. This bypasses all protection, allowing abrasive dust to sandblast the motor bearings—a single 10-minute run without filtration causes irreversible wear.
Restoring your Dyson canister’s suction takes less time than brewing coffee, but skipping critical steps like proper drying turns a simple maintenance task into a $300 motor repair. By following this exact process—cold water rinses, 48-hour shade drying, and vigilant damage checks—you’ll maintain showroom-level performance for years. Remember that bone-dry filter rule: if you wouldn’t wear it as a scarf, it’s not dry enough. When in doubt, wait another day. Your vacuum’s motor (and your lungs) will thank you every time you hear that powerful, unrestricted roar of clean airflow.

