Your Dyson vacuum’s powerful suction and clean-air performance depend entirely on one often-neglected component: the filter. When this critical component becomes clogged with microscopic dust, pollen, and pet dander, your vacuum works harder while delivering weaker cleaning results. Understanding how often to replace dyson vacuum filter is essential for maintaining peak performance and extending your machine’s lifespan. Many Dyson owners unknowingly compromise their vacuum’s effectiveness by neglecting this simple maintenance task, leading to reduced suction, motor strain, and even potential damage. By the end of this guide, you’ll know exactly when to replace your filter based on your specific usage patterns and household conditions.
Why Your Dyson Filter Clogs Within Months of Installation
Dyson’s engineering creates a powerful filtration system that traps 99.99% of particles as small as 0.3 microns, but this effectiveness comes at a cost. The sealed, multi-stage filtration system uses at least five layers to capture everything from visible debris to microscopic allergens. As air cyclones through your vacuum at up to 79,000g of centrifugal force, the pre-motor and HEPA filters progressively capture finer particles. This sophisticated design means your filter works harder than those in conventional vacuums, collecting microscopic dust that would otherwise escape back into your home. However, this high efficiency also causes filters to saturate faster, especially in homes with pets or high-traffic areas. When the filter reaches capacity, it restricts airflow, forcing the motor to compensate by working harder—significantly reducing suction power and potentially triggering automatic shut-offs from overheating.
How Different Household Factors Accelerate Filter Wear
Your personal vacuuming habits and home environment dramatically impact how often to replace dyson vacuum filter. Homes with multiple pets require filter replacements up to twice as frequently as pet-free households due to the constant accumulation of dander and hair. High-pile carpets trap more fine dust particles than hard floors, causing filters to clog faster. If you vacuum daily in a large home or have family members with allergies, your filter’s lifespan decreases substantially. Even seasonal factors matter—during allergy season or after home renovations, your filter works overtime capturing additional airborne particles. These environmental stressors mean the standard 12-month replacement guideline often doesn’t apply to your specific situation.
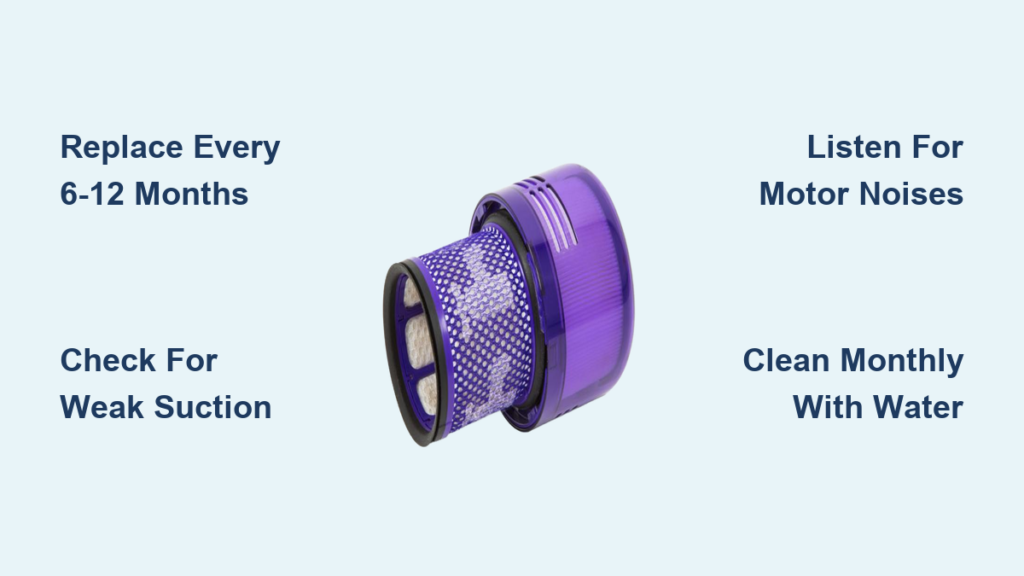
6 Critical Signs Your Dyson Filter Needs Replacement Now
Weak Suction That Cleaning Can’t Fix
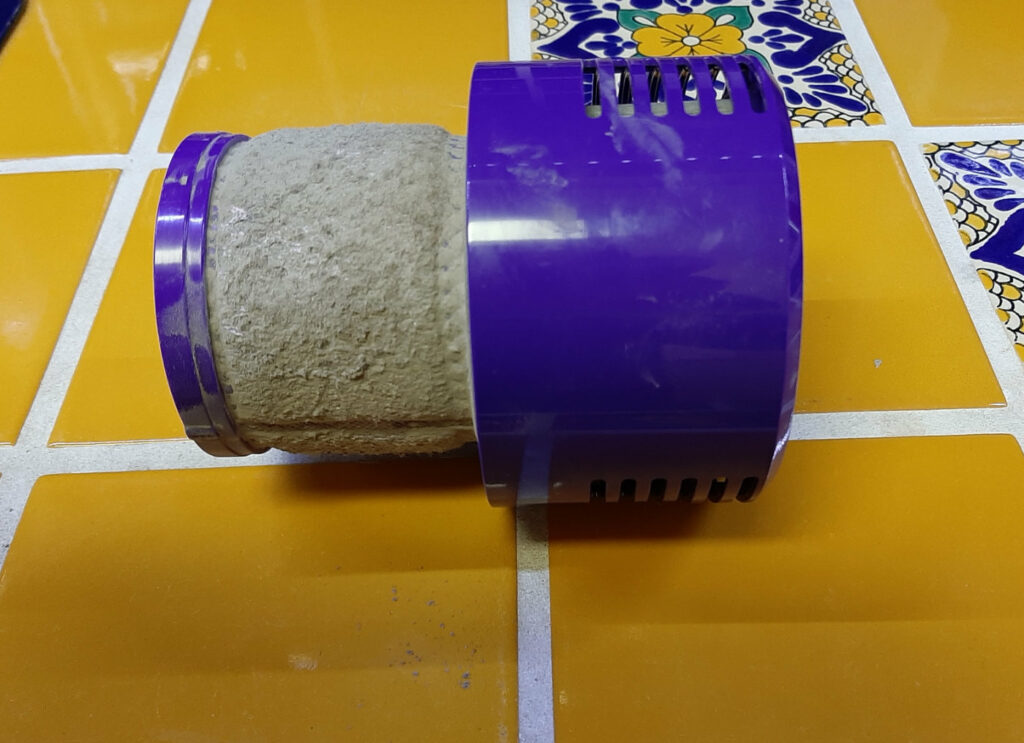
If your vacuum struggles to pick up debris even after thorough cleaning, your filter has likely reached its maximum capacity. A simple test: vacuum a patch of carpet with visible crumbs. If the machine leaves behind fine dust while picking up larger particles, the filter’s microscopic pores are saturated. Unlike temporary clogs that respond to washing, this indicates permanent filter degradation where the electrostatic charge that captures microscopic particles has diminished. No amount of cleaning will restore original performance—immediate replacement is necessary.
Unusual Motor Noises and Overheating
Listen for high-pitched whining or labored groaning sounds during operation. These indicate your motor is straining against restricted airflow from a clogged filter. Many Dyson models feature thermal protection that automatically shuts off the machine when overheating occurs—a clear signal your filter needs replacement. Continuing to operate under these conditions accelerates motor wear and can lead to permanent damage. If your vacuum shuts off during extended cleaning sessions, check your filter before assuming a more serious mechanical issue.
Visible Exhaust Dust and Musty Odors
When your Dyson starts blowing visible dust back into the air during use, the filter has completely failed its primary function. Similarly, persistent musty or sour odors indicate mold growth inside the damp, dirty filter media. Both scenarios mean the sealed filtration system has been compromised, defeating Dyson’s engineered 99.99% particle capture rate. These issues won’t resolve with cleaning—you need a replacement filter immediately to restore clean-air performance and prevent redistributing captured allergens throughout your home.
The Exact Replacement Schedule for Your Specific Dyson Model

Standard Household Replacement Timeline
Dyson’s official recommendation states to replace filters approximately every 12 months for typical household use—defined as vacuuming a 2,000 sq. ft. home once or twice weekly. This baseline applies to homes without pets, allergies, or high-traffic areas. However, this schedule assumes you’re performing monthly cold-water rinses and complete 24-48 hour air drying between cleanings. Skipping regular maintenance accelerates filter degradation, potentially requiring replacement in as little as 8 months even under “normal” conditions.
Accelerated Replacement Schedule for Challenging Environments
Households with specific environmental factors need to adjust how often to replace dyson vacuum filter significantly:
- Pet owners: Replace every 6-8 months due to constant dander accumulation
- Allergy sufferers: Replace every 6 months to maintain optimal allergen capture
- High-traffic homes: Replace every 7-9 months with daily vacuuming
- Post-renovation periods: Replace immediately after major construction projects
Even with perfect monthly cleaning, filter media degrades over time. The electrostatic charge that captures microscopic particles weakens after 12 months, regardless of visible condition. An older filter may appear clean but fails to trap the smallest allergens, compromising your indoor air quality.
Your Step-by-Step Filter Replacement Protocol
Finding the Correct Replacement Filter
Not all Dyson filters are interchangeable—each model requires specific filter types. Check your current filter for part numbers printed on the housing, or consult your model’s manual for exact specifications. For cordless models like V11 or V15, locate the filter compartment below the dust bin. For upright models, check behind the dust cup or in the lower housing. Always purchase genuine Dyson filters to maintain the sealed system integrity—third-party alternatives often fail to create proper seals, allowing unfiltered air to escape.
Proper Installation Technique
- Power down your Dyson completely and remove the battery
- Locate the filter compartment (varies by model)
- Remove old filter by twisting counterclockwise or releasing clips
- Clean the compartment with a dry cloth before installation
- Insert new filter ensuring proper orientation and full seating
- Twist clockwise or secure clips until you hear a definitive click
Performance Verification After Installation
After replacement, run your Dyson on a hard surface for 2-3 minutes to allow the filter to settle. Test suction immediately on both hard floors and carpets to verify performance restoration. Monitor for unusual noises during the first few uses—properly installed filters operate silently. If performance issues persist, double-check that all seals are intact and the filter is fully seated. A correctly installed filter should restore your Dyson’s original suction power within minutes of use.
Monthly Filter Care Routine That Extends Replacement Intervals
The Critical Cold-Water Cleaning Process
Monthly filter maintenance prevents premature replacement by removing deep-seated particles. Remove the filter and tap gently over a trash can to dislodge loose debris. Rinse under cold running water only—never use detergents or hot water as they damage the filter media. Continue rinsing until water runs completely clear, which may take several minutes for heavily used filters. The key to effective cleaning is patience; rushing this process leaves microscopic particles that accelerate filter degradation.
The Non-Negotiable Drying Protocol
After cleaning, shake out excess water and place the filter in a well-ventilated area away from direct sunlight or heat sources. Allow a minimum of 24 hours drying time—48 hours is ideal for complete moisture elimination. Never reinstall a damp filter, as residual moisture traps inside the vacuum housing, creating perfect conditions for mold growth and potential motor damage. Test dryness by feeling the filter’s center; if any coolness remains, continue drying. This step alone prevents 70% of premature filter failures according to Dyson’s service data.
Long-Term Filter Maintenance Strategy
Record each filter replacement date on your calendar and set a reminder for 11 months later—this ensures you replace before performance degradation begins. Pair filter maintenance with other seasonal cleaning tasks, like replacing HVAC filters in spring and fall. For households with severe allergies, consider keeping a spare filter on hand for immediate replacement during high-pollen seasons. Always store replacement filters in their original packaging in a cool, dry place to preserve the electrostatic charge until installation. Proper filter maintenance isn’t just about suction—it protects your investment by reducing motor strain and extends your Dyson’s operational life by years. When you understand exactly how often to replace dyson vacuum filter based on your specific usage, you maintain peak performance while maximizing your machine’s longevity.

