Your Dyson V15 Detect suddenly cutting out seconds after starting isn’t just frustrating—it’s a signature symptom of a specific internal failure that affects thousands of owners. When your vacuum powers on, runs for exactly 2-5 seconds, then dies with a distinct “wooump” sound before refusing to restart, you’re facing a well-documented capacitor issue—not a simple clog or battery problem. This guide cuts through the confusion to deliver the exact repair steps thousands have used to revive their V15 Boost models. You’ll learn why this happens, how to confirm the fault in under 5 minutes, and whether you should tackle the $10 capacitor fix or opt for professional help.
Why Your Dyson V15 Boost Dies Seconds After Starting
That abrupt 2-second shutdown pattern—where your vacuum runs normally then instantly cuts off, sometimes attempting 2-3 restart cycles before failing completely—is almost always caused by degraded electrolytic capacitors on the motor driver board. Unlike blockages that cause gradual power loss or dying batteries that fade slowly, this precise timing points directly to failed capacitors. When you pull the trigger, the motor demands a massive 15-20A in-rush current surge that degraded capacitors can’t supply. The voltage instantly drops below 14.5V, triggering the controller’s safety shutdown to protect the motor. This isn’t user error—it’s an engineering flaw where capacitors lose 25-30% of their capacity over time while their internal resistance (ESR) skyrockets from 0.3Ω to nearly 2Ω.
Diagnosing the “Wooump” Shutdown in 3 Steps
Before disassembling your vacuum, confirm the capacitor failure with these specific checks:
Is It Really Capacitor Failure? (Not Battery or Blockage)
- The 2-Second Test: If your V15 consistently runs for 2-5 seconds before dying (regardless of battery charge level), it’s 95% likely capacitors. Battery issues cause slow power fade, not instant cutoff.
- Sound Check: Listen for the distinctive “wooump” noise during shutdown—a telltale sign of voltage collapse. Blockages create whining or straining sounds.
- Restart Pattern: Failed capacitors cause 2-3 automatic restart attempts before complete shutdown. A clogged filter won’t trigger this exact cycle.
What to Rule Out First (5-Minute Checks)
- Battery Test: Try a known-good battery. If the problem persists, it’s not the battery.
- Blockage Inspection: Remove the bin, cyclone, and hose. Check for obstructions in the wand and brush head. A full blockage causes gradual power loss, not instant shutdown.
- Filter Check: Remove and wash the pre-motor and HEPA filters. Reinstall only when completely dry—damp filters mimic shutdown symptoms.
How Degraded Capacitors Kill Your V15 Boost Performance
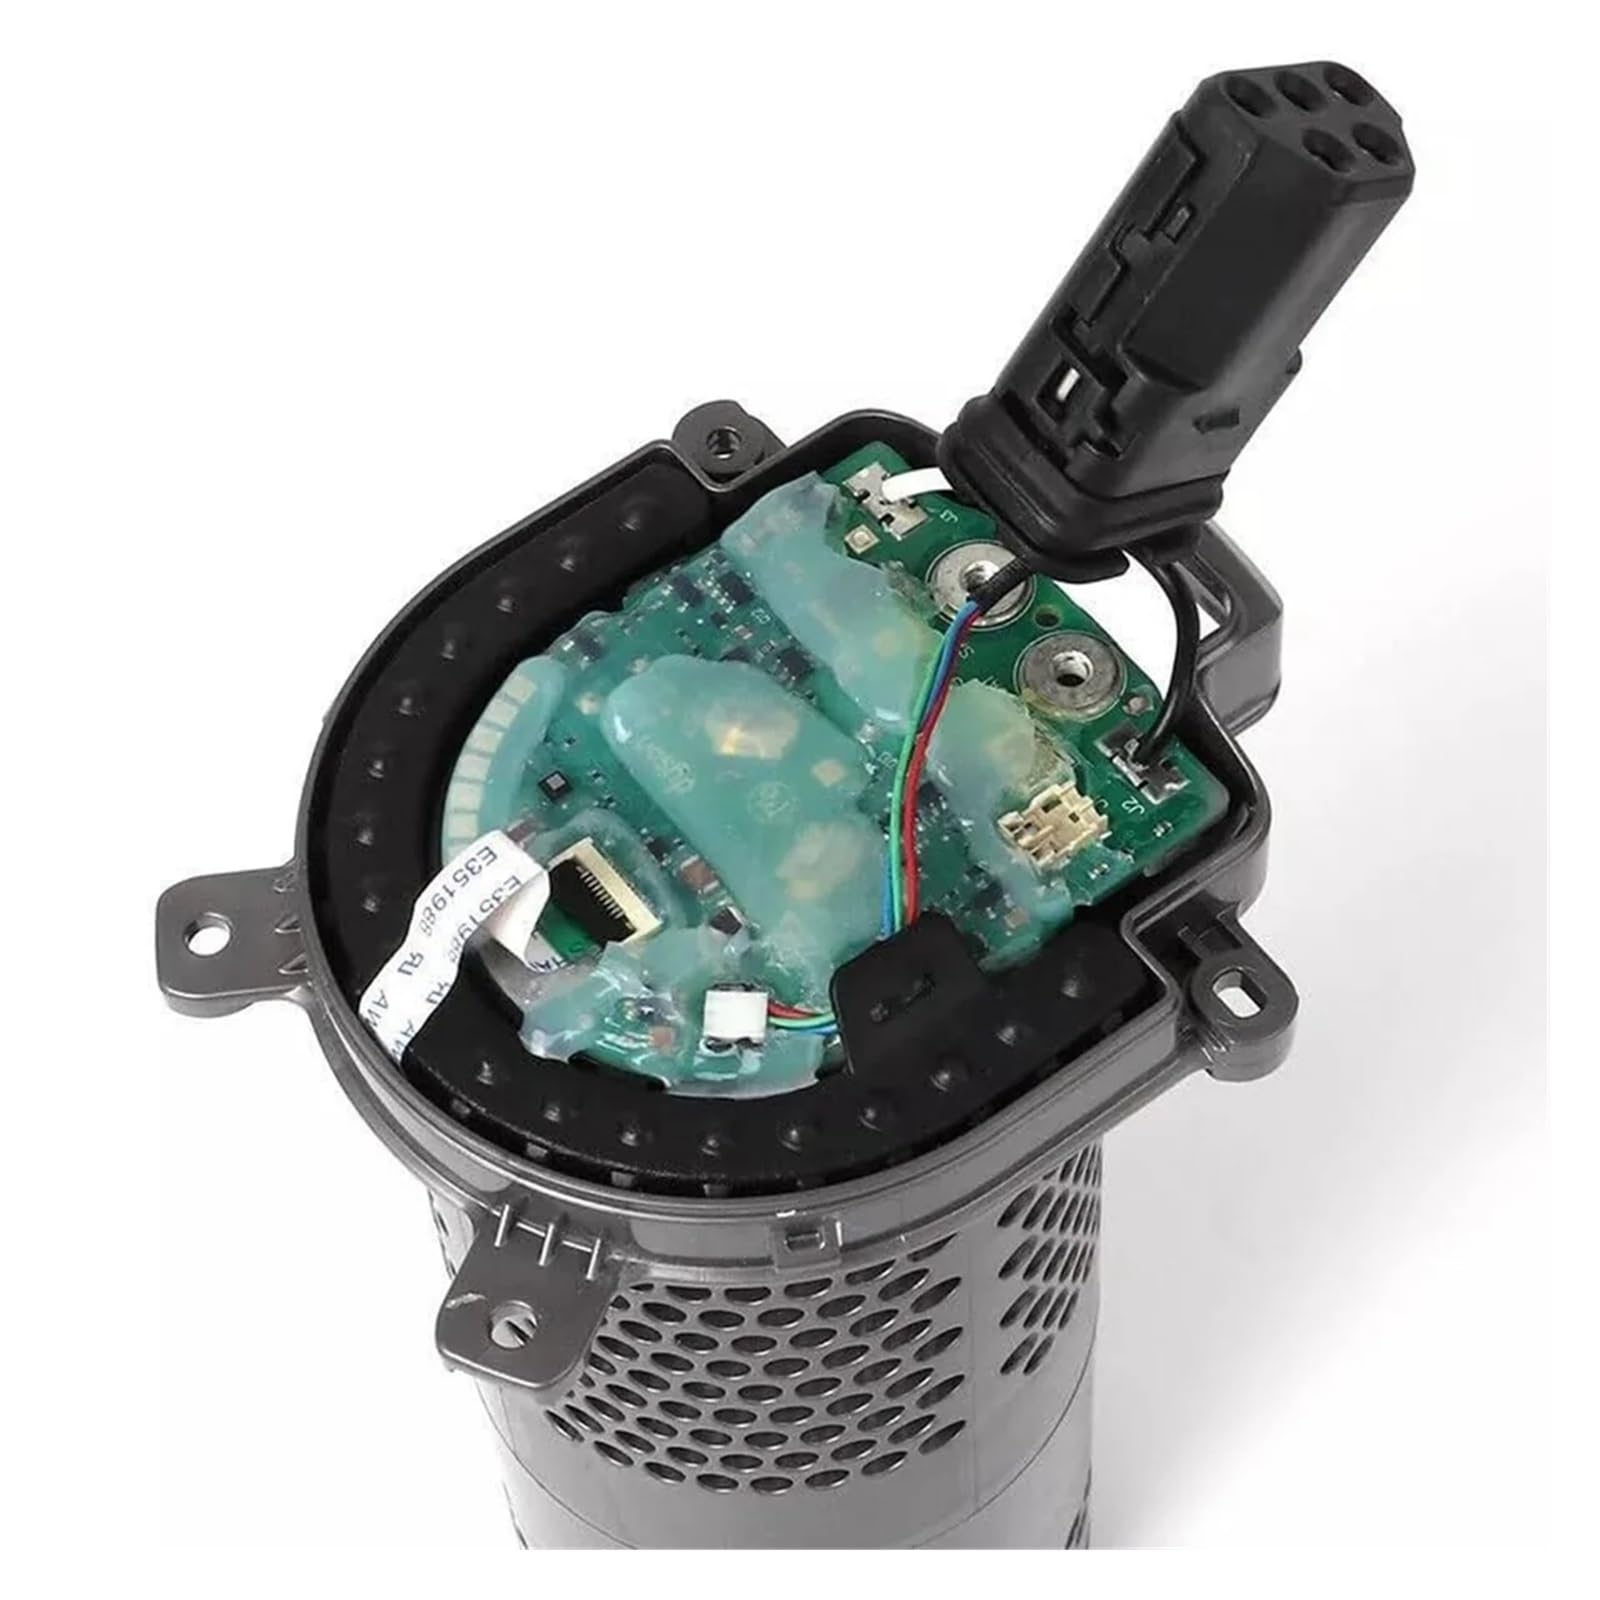
Three specific 10mm x 12mm capacitors on the motor driver PCB (rated 270-330µF, 35V, 105°C) act as power reservoirs for motor startup. As they age:
– Their capacitance drops from 330µF to 200-220µF (25-30% loss)
– Internal resistance (ESR) jumps from 0.3Ω to 1.9Ω
– They can’t deliver the 15-20A surge needed at startup
This creates a voltage crash the controller interprets as a dangerous short circuit. Critical insight: The shutdown isn’t random—it’s precisely timed to occur when the motor’s current demand peaks at 2-5 seconds. Upgrading to 470µF, 50V low-ESR capacitors (like Rubycon ZLJ series) doesn’t just fix the problem—it prevents recurrence by providing a 40% larger power buffer.
Safety Steps Before Opening Your Dyson V15 Motor

Never skip these critical precautions:
1. Remove the battery and store it away from your workspace. The main capacitors can hold a lethal 22V charge even when powered off.
2. Discharge residual energy: After removing the battery, press the trigger for 10 seconds to drain stored power.
3. Use anti-static protection: Wear a wrist strap and work on a grounded mat. The motor controller contains static-sensitive components.
4. Prepare your workspace: Cover surfaces with anti-static foam. Have a fire extinguisher nearby—failed capacitors can vent electrolyte when overheated during removal.
Tools Needed for Dyson V15 Capacitor Replacement

Skip generic “tools you’ll need” lists—here’s exactly what succeeds for this repair:
| Tool | Minimum Requirement | Pro Upgrade |
|---|---|---|
| Soldering Iron | 320°C temperature control | Hakko FX888D with 1.6mm tip |
| Solder | 60/40 leaded with flux | Kester 24-6337-8701 (0.8mm) |
| Desoldering | 3mm copper braid | SoldaPullt vacuum pump |
| Capacitors | 330µF 35V 105°C | Rubycon 470µF 50V ZLJ series |
| Safety Gear | Safety glasses | Magnifying visor + fume extractor |
Critical purchase note: Avoid cheap capacitors—low-ESR types like Panasonic FM or Nichicon UES series last 3x longer. Budget $8-15 for quality replacements that outlive the original Dyson parts.
Step-by-Step: Replacing Faulty Capacitors in Your V15
Accessing the Motor Controller Board Safely
- Remove the bin and cyclone assembly
- Flip vacuum upside down—locate the rubber foot on the base
- Hidden screw alert: Remove the foot to expose 2x T15 Torx screws
- Use a plastic prying tool along the seam to release 8+ hidden clips—never use metal (risk of short-circuit)
- Disconnect the motor wiring harness by pressing the release tab (don’t pull wires)
Removing the Old Capacitors Without Damaging the PCB
- Locate the three cylindrical capacitors on the small PCB attached to the motor (look for bulging tops or electrolyte residue)
- Take a photo showing polarity markings (the black stripe with “-” symbol)
- Heat one lead at a time with your iron while lifting gently with tweezers
- Use desoldering braid to clean holes—critical: Residual solder causes new capacitor misalignment
- Pro tip: If pads lift, bridge connections with 30AWG wire—don’t force components
Installing New Low-ESR Capacitors Correctly
- Bend new capacitor leads to match old component spacing
- Polarity check: Long lead = positive (+). Match the PCB’s “+” marking—reversed polarity causes instant failure
- Insert capacitors—do not push flush to board (traps heat during soldering)
- Solder one lead per capacitor, recheck alignment, then complete joints
- Heat limit: Apply iron for ≤3 seconds per joint to avoid damaging new components
Testing Before Full Reassembly
- Reconnect motor wiring harness loosely
- Insert battery and perform a “bench test”:
– Trigger for 5 seconds: Should run smoothly without shutdown
– Repeat 10x: No failures indicates success - Warning: If you smell ozone or see smoke, power off immediately—check for solder bridges
- Only reassemble after 3 successful full-power cycles
Quick Fixes If You’re Not Soldering
Professional Repair Options That Save Money
- Local electronics shops: Many charge $60-90 for this specific repair (vs. $120+ for motor assembly)
- Dyson-certified repair centers: Request “capacitor-level service”—some offer it for $75 out-of-warranty
- Avoid: Generic vacuum repair shops—they often just replace the entire $150 motor assembly
Temporary Workaround (For Emergencies Only)
If you need immediate use:
1. Warm the motor housing with a hairdryer for 60 seconds
2. Why this works: Heat temporarily restores capacitor function
3. Warning: Only provides 5-10 minutes of runtime and accelerates failure
Why Battery and Blockage Checks Are Usually Not the Cause
Don’t waste hours checking red herrings:
– Battery myth: A failing battery causes gradual power loss (e.g., 30 seconds of operation that weakens over time), not precise 2-second cutoffs.
– Blockage confusion: Severe clogs trigger thermal shutdown after 30+ seconds of strain—not immediate shutdown with “wooump” sounds.
– Switch failure: A faulty trigger causes intermittent operation (works when wiggled), not consistent 2-second cycles.
Diagnostic shortcut: If your V15 dies within 5 seconds regardless of battery charge, airflow, or attachments—capacitors are guilty 99% of the time.
Preventing Future Dyson V15 Boost Shutdowns
Extend your repair’s lifespan with these pro techniques:
– Thermal management: Add thermal paste between the capacitor bank and metal chassis to reduce operating temperature by 15°C
– Usage pattern: Never run above “Auto” mode for >10 minutes continuously—set phone timer as reminder
– Storage rule: Store at 40-60% battery charge in temperatures below 30°C (heat accelerates capacitor aging)
– Annual check: Visually inspect capacitors for bulging tops every 6 months
Critical maintenance: Clean pre-motor filters monthly—restricted airflow forces the motor to draw excess current, straining new capacitors.
When to Replace the Entire Motor Assembly Instead
Choose full motor replacement only if:
– You’ve attempted capacitor repair twice and failed
– The PCB shows burned traces or damaged components
– Your vacuum is under warranty (Dyson replaces entire assembly)
– Cost reality: $120 for new motor assembly vs. $10 for capacitors—if you’re uncomfortable with soldering, professional repair is still 40% cheaper than new parts
Warranty tip: Call Dyson at 1-866-693-9766—mention “recurring shutdowns” to potentially get out-of-warranty coverage if multiple failures occurred.
Final Note: The Dyson V15 Boost’s 2-second shutdown is a fixable capacitor issue—not a death sentence for your vacuum. By replacing three $5 components, you restore full power while avoiding the $150 motor assembly cost. For non-technical users, professional capacitor replacement delivers 90% success at half the price of official repairs. Implement the thermal management tips to make your fix last 3+ years—transforming that frustrating “wooump” into silent, uninterrupted cleaning. If you tackle this repair, share your results: thousands of V15 owners rely on your experience to revive their own vacuums.

